-
Notifications
You must be signed in to change notification settings - Fork 840
Installation_en_docker
Because installing a specific version of python in Linux can be tricky, and
conda can pollute your environment, this method uses Docker Podman to build a container for ALAS.
Podman is used in place of Docker due to mount permission/UID-GID, also with the perks of being daemon-less replacement, which means you can run containers without running as root/sudo. This will reduce attack surface in case of users wanting use remote control the ALAS deployment via SSH method or reverse proxy (e.g. Nginx).
Because Podman also runs on Mac OS and Windows, this method may also work in those platforms, although your mileage may vary (see Detailed usage).
This method doesn't provide a one-click solution as the EasyInstaller with 1:1 feature parity, as this would require a larger codebase for a close-to-zero userbase. If you encounter any problems, file a GitHub issue and ping @viperML or @n0k0m3
-
Some basic knowledge of the terminal and
podman -
Android emulator, such as:
-
Genymotion (recommended)
Installation guide
- Download and install Genymotion from here, or from AUR if you are using Arch Linux.
- Create a new virtual device (red plus button on top right or Ctrl-N), and select "Custom Tablet", click Next. Config your device as follow
- Display: Custom (1280x720 - 160 MDPI)
- Android Version: 7.1 (must be 9 or lower, 5.1 doesn't work for me)
- Pros: Android 5-9 supports
ascreencapmethod to capture the screen, which is the fastest method at the moment
- Pros: Android 5-9 supports
- Processors: 4, Memory: 4096 (modify this as you need less or more)
- Leave the rest as default
- Hit Install
- To install Azur Lane, you MUST install the ARM translation layer (
libhoudini) from this repo: https://github.com/m9rco/Genymotion_ARM_Translation - (Optional) If you have to install Google Play to install Azur Lane (or you can just sideload the apk and obb from APKPure), click on the down arrow on bottom right of the emulator control panel, select "Install Open GApps" and follow the instructions. The emulator will restart and you can install the game.
- Enable debugging mode
- To know the emulator name for alas, type in terminal
adb devices, and the name will show up in the list. - Genymotion doesn't have
netcatorncinstalled by default, so you need to installbusyboxfor it.
-
Android's studio AVD (not recommended due to less smooth and memory leak)
Installation guide
- Install Android Studio (through your distribution's package manager)
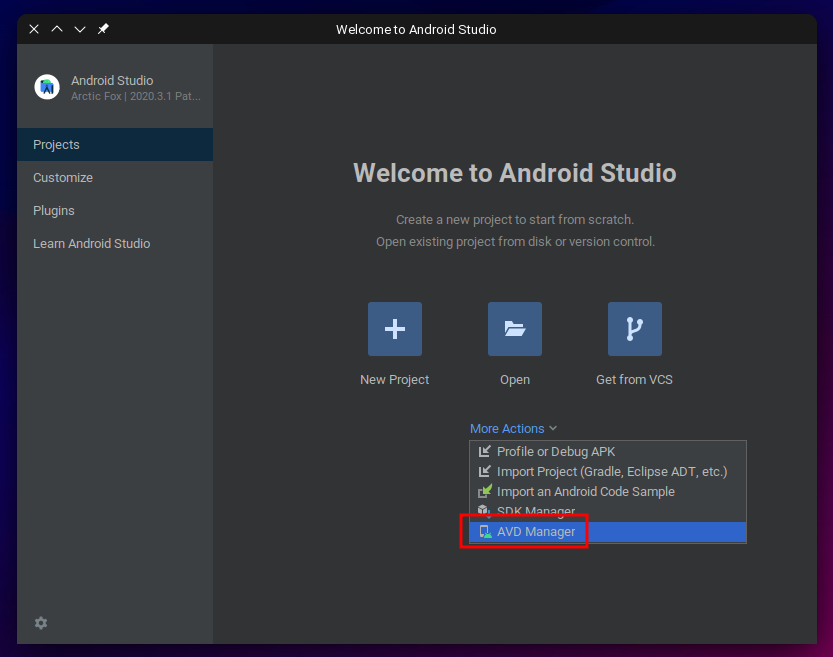
- After the first launch and setup, select the "SDK Manager"

- Now, to download an emulator for Android 11, you have to select "Show Package Details", and then select the "System Image Atom_64", "Google APIs Atom_64" and "Google Play Atom_64" packages, as shown in the image. Only Android >= 11 supports ARM translation layer (source), and Android 12 was recently released (may have bugs). Coming from the future, feel free to experiment with newer Android versions.

- After that installation is done, go back to the AVD manager

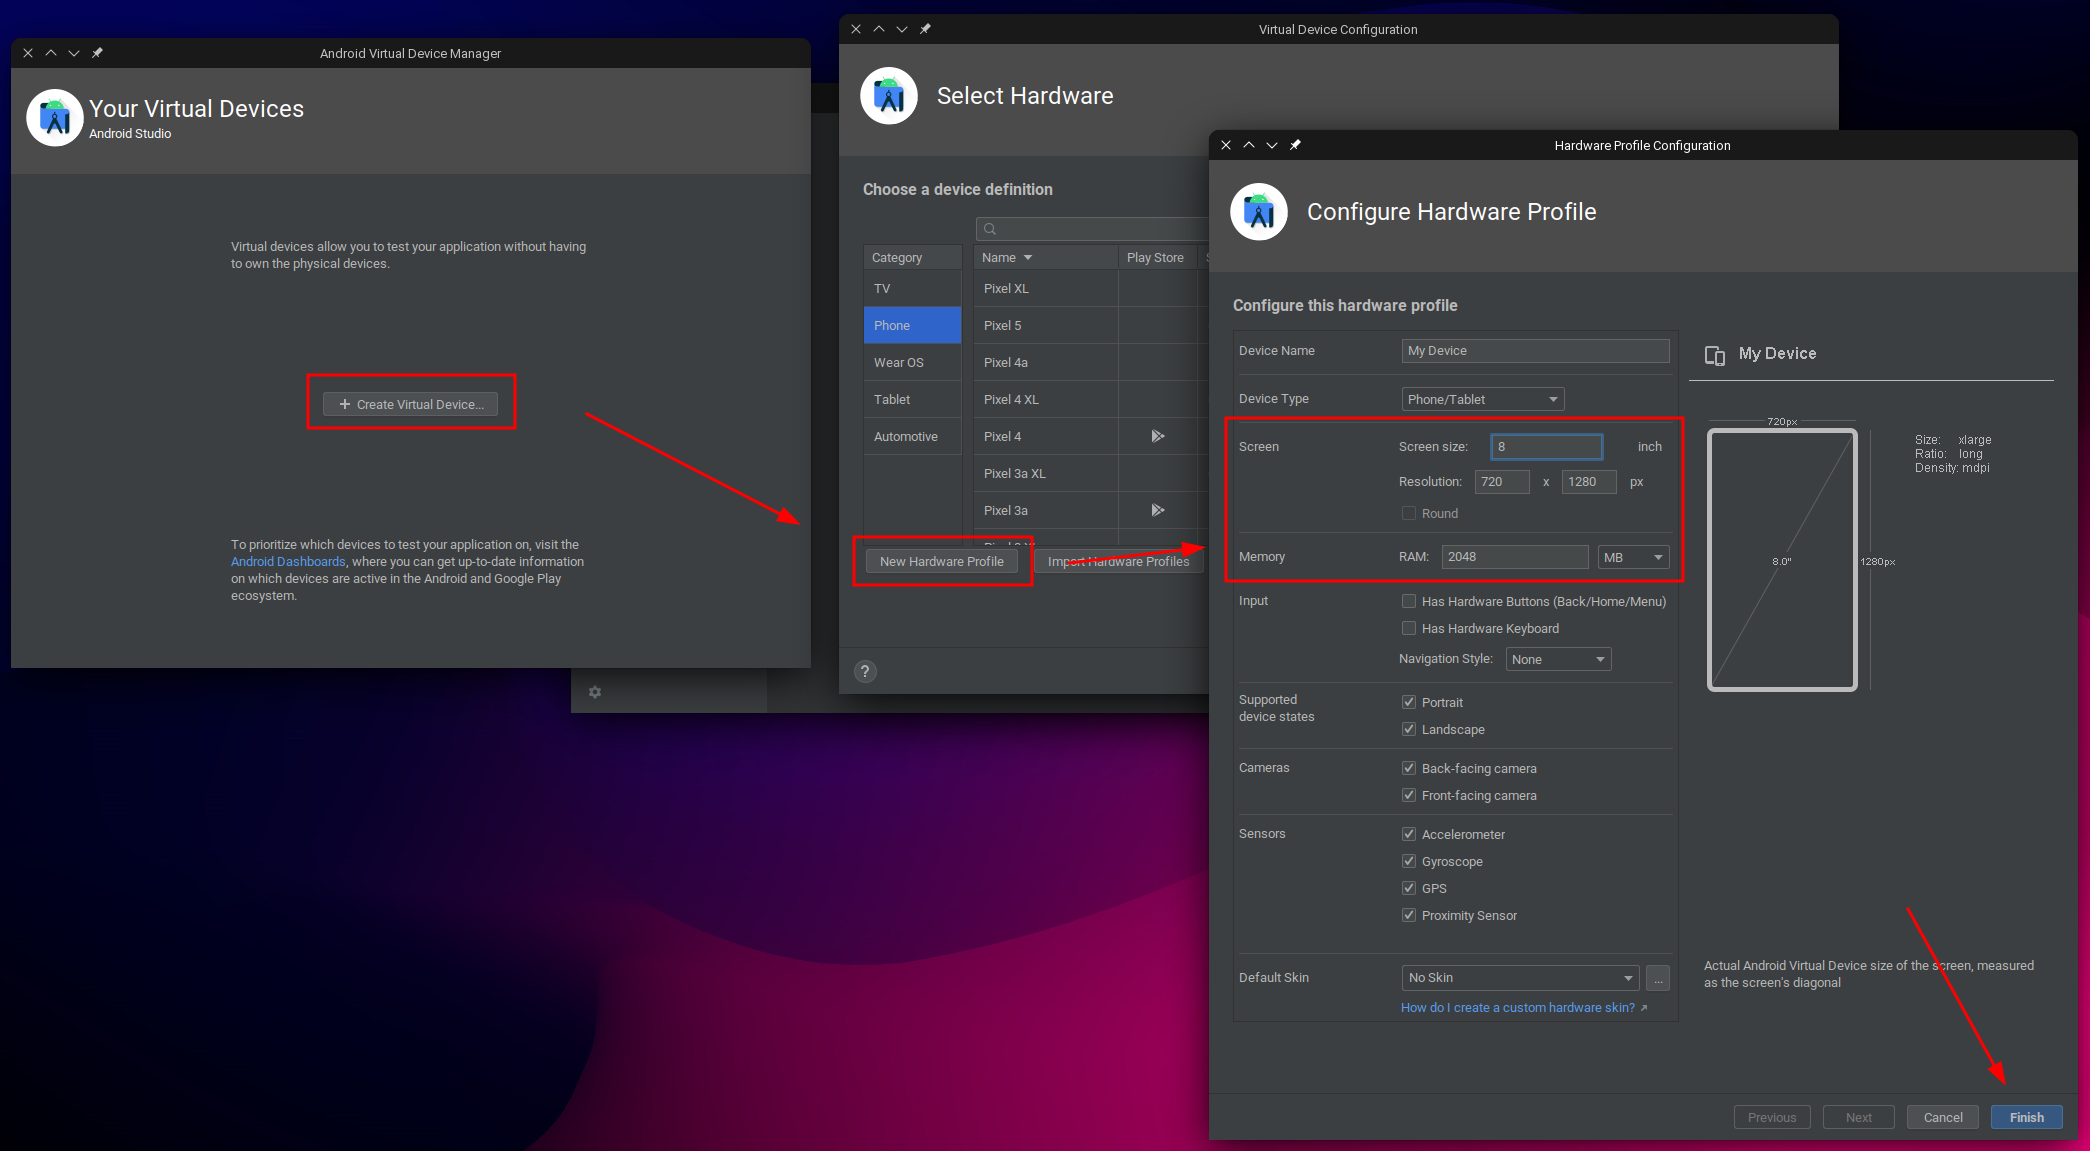
- Start creating a new Virtual Device, first by creating a Hardware Profile with
1280x720screen resolution and enough RAM.
- In the next section, select the system image that we downloaded earlier, under the tab
x86 Images. Make sure to pick the one with "Google APIs'.
- In the last configuration panel, make sure to enable enough storage to install Azur Lane, select the RAM and CPU cores and the device orientation to landscape.

- Finally, before launching the emulator, we have to enable the Play Store to install the game. Edit the file under
/home/<your user>/.android/avd/<AVD name>.avd/config.iniand change the values:-
PlayStore.enable=false>PlayStore.enable=true -
image.sysdir.1=system-images/android-<your version>/google_apis/x86_64/>image.sysdir.1=system-images/android-<your version>/google_apis_playstore/x86/
-
- Close Android Studio, start it again and launch your emulator.
- (VERY IMPORTANT) AVD will lock adb auth to the first adb instance connected. To avoid this, go to emulator's Extended Control (3 dots) -> Settings -> (Turn off) Use detected ADB location and leave the field empty
- To enable emulator's developer option when
Build Numberis disabled, enteradb shelland usesettings put global development_settings_enabled 1 - To know the emulator name for alas, type in a terminal
adb devices, and the name show pup up in the list.
-
-
Podman Compose. Don't install using
pip. -
Git
-
Bash
First, clone this repository into any folder (e.g. at your home directory):
git clone https://github.com/LmeSzinc/AzurLaneAutoScript
cd AzurLaneAutoScript
Refer to config/deploy.template-docker.yaml to update config/deploy.yaml. Note for CN players deployment: edit docker-compose.yml to use Dockerfile.cn to build image, and use config/deploy.template-docker-cn.yaml instead.
Run the following command
podman-compose upShortly after, you should see the IP address to access the GUI in your web browser. Continue to the standard installation guide.
If you get any problem with podman regarding to Error: error creating build container: short-name "<mambaforge container>" did not resolve to an alias and no unqualified-search registries are defined in "/etc/containers/registries.conf", use this solution: https://github.com/containers/podman/issues/9390#issuecomment-970305169
The Dockerfile included in deploy/docker pulls a base image with mamba (conda alternative), and installs the required dependencies into the image. Then, the ALAS folder is mounted into the container and the python entrypoint is run inside.
The
network_mode: hostflag indocker-compose.ymlis important, it allows the bundled ADB in the container can access the emulator directly. Otherwise you would have to manually set up the port forwarding. It is also important to kill any adb servers running on the host machine (adb kill-server)
Equivalent podman run command:
podman build -t alas -f deploy/docker/Dockerfile deploy/docker
podman run --net=host -it -v '.:/app/AzurLaneAutoScript:rw' -v '/etc/localtime:/etc/localtime:ro' --name alas alas$ podman rm alas
$ podman rmi alasAnd remove the AzurLaneAutoScript folder.
Getting Started
- Installation [EN]
- Installation [CN]
- Installation With Docker [EN]
- Emulator Support [CN]
- FAQ [EN/CN]
- FAQ [JP]
- Troubleshooting [EN]
- Another Installation guide
- Research Filter String [EN]
- Research Filter String [CN]
- Reward Shop Filter String [EN/CN]
- Onepush Configuration [EN]
- Onepush Configuration [CN]
Development
- Perspective [CN]
- Perspective [EN]
- Debug perspective [CN]
- Debug perspective [EN]
- Item Statistics [EN]
- 1. Start
- 2.1. Debugging
- 2.2. Multi-server support
- 3.1. Utils
- 3.2. Decorators
- 3.3. Log
- 3.4. Exception
- 4.1. Detection objects
- 4.2. UI control
- 4.3. OCR
- 4.4. State loop
- 5.1. Local Map
- 5.2. Create globe Map
- 5.3. Globe Map
- 6.1. GUI Option
MISC