Removal from car
The instructions for this aren't actually a standard walkthrough, because depending on the exact options your car has, you will require more or less steps. In fact we may not be aware of all of the necessary steps, so keep that in mind and proceed with caution. We're not liable for any damage you incur on your car!
- T20 (Torx) screwdriver, magnetized (preferably strongly magnetized!)
- Needlenose pliers or tweezers or a magnet on a stick to fish the screws out of the hole again (won't be needed if you use a strongly magnetized screwdriver in the first place!)
- A flat wrench or bracket hook as it can be found in car stereo removal kits; a radio removal key tool may also work
Since we had neither available we used this tool (top) from the iFixit electronics tool kit (perhaps best described as some sort of spatula?!):

Also shown (bottom) is one such radio removal key tool. You may have to bend it into shape. Relevant search term other than "car stereo removal" could be "head unit removal".
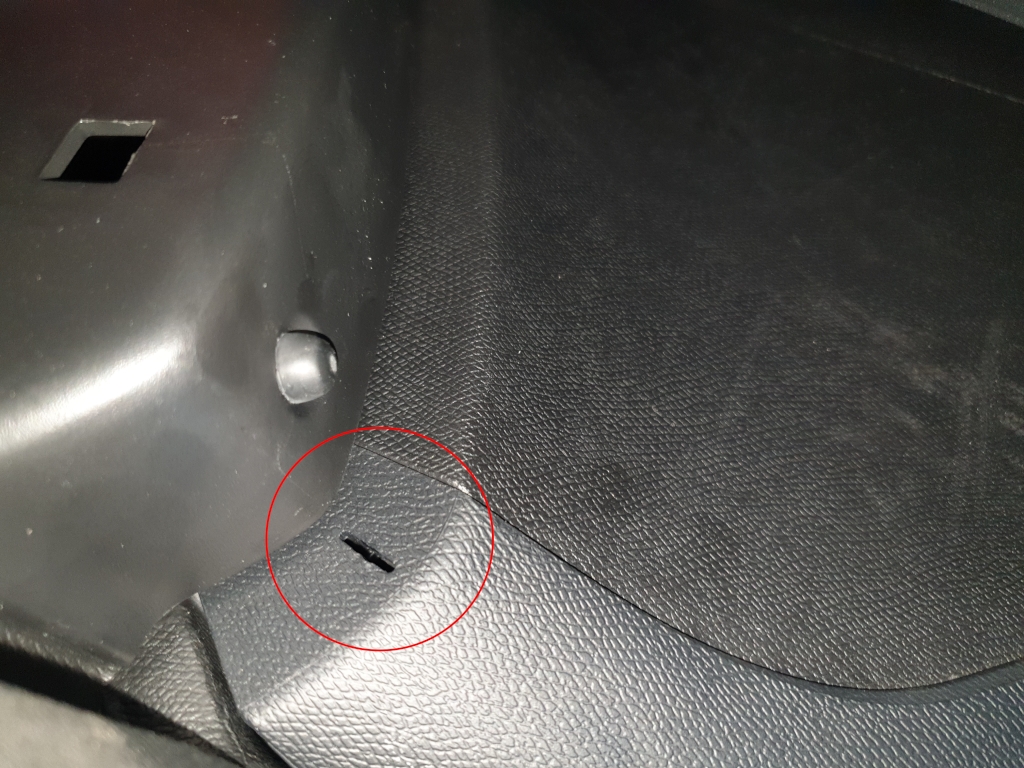
- Remove the casing around the gear stick.
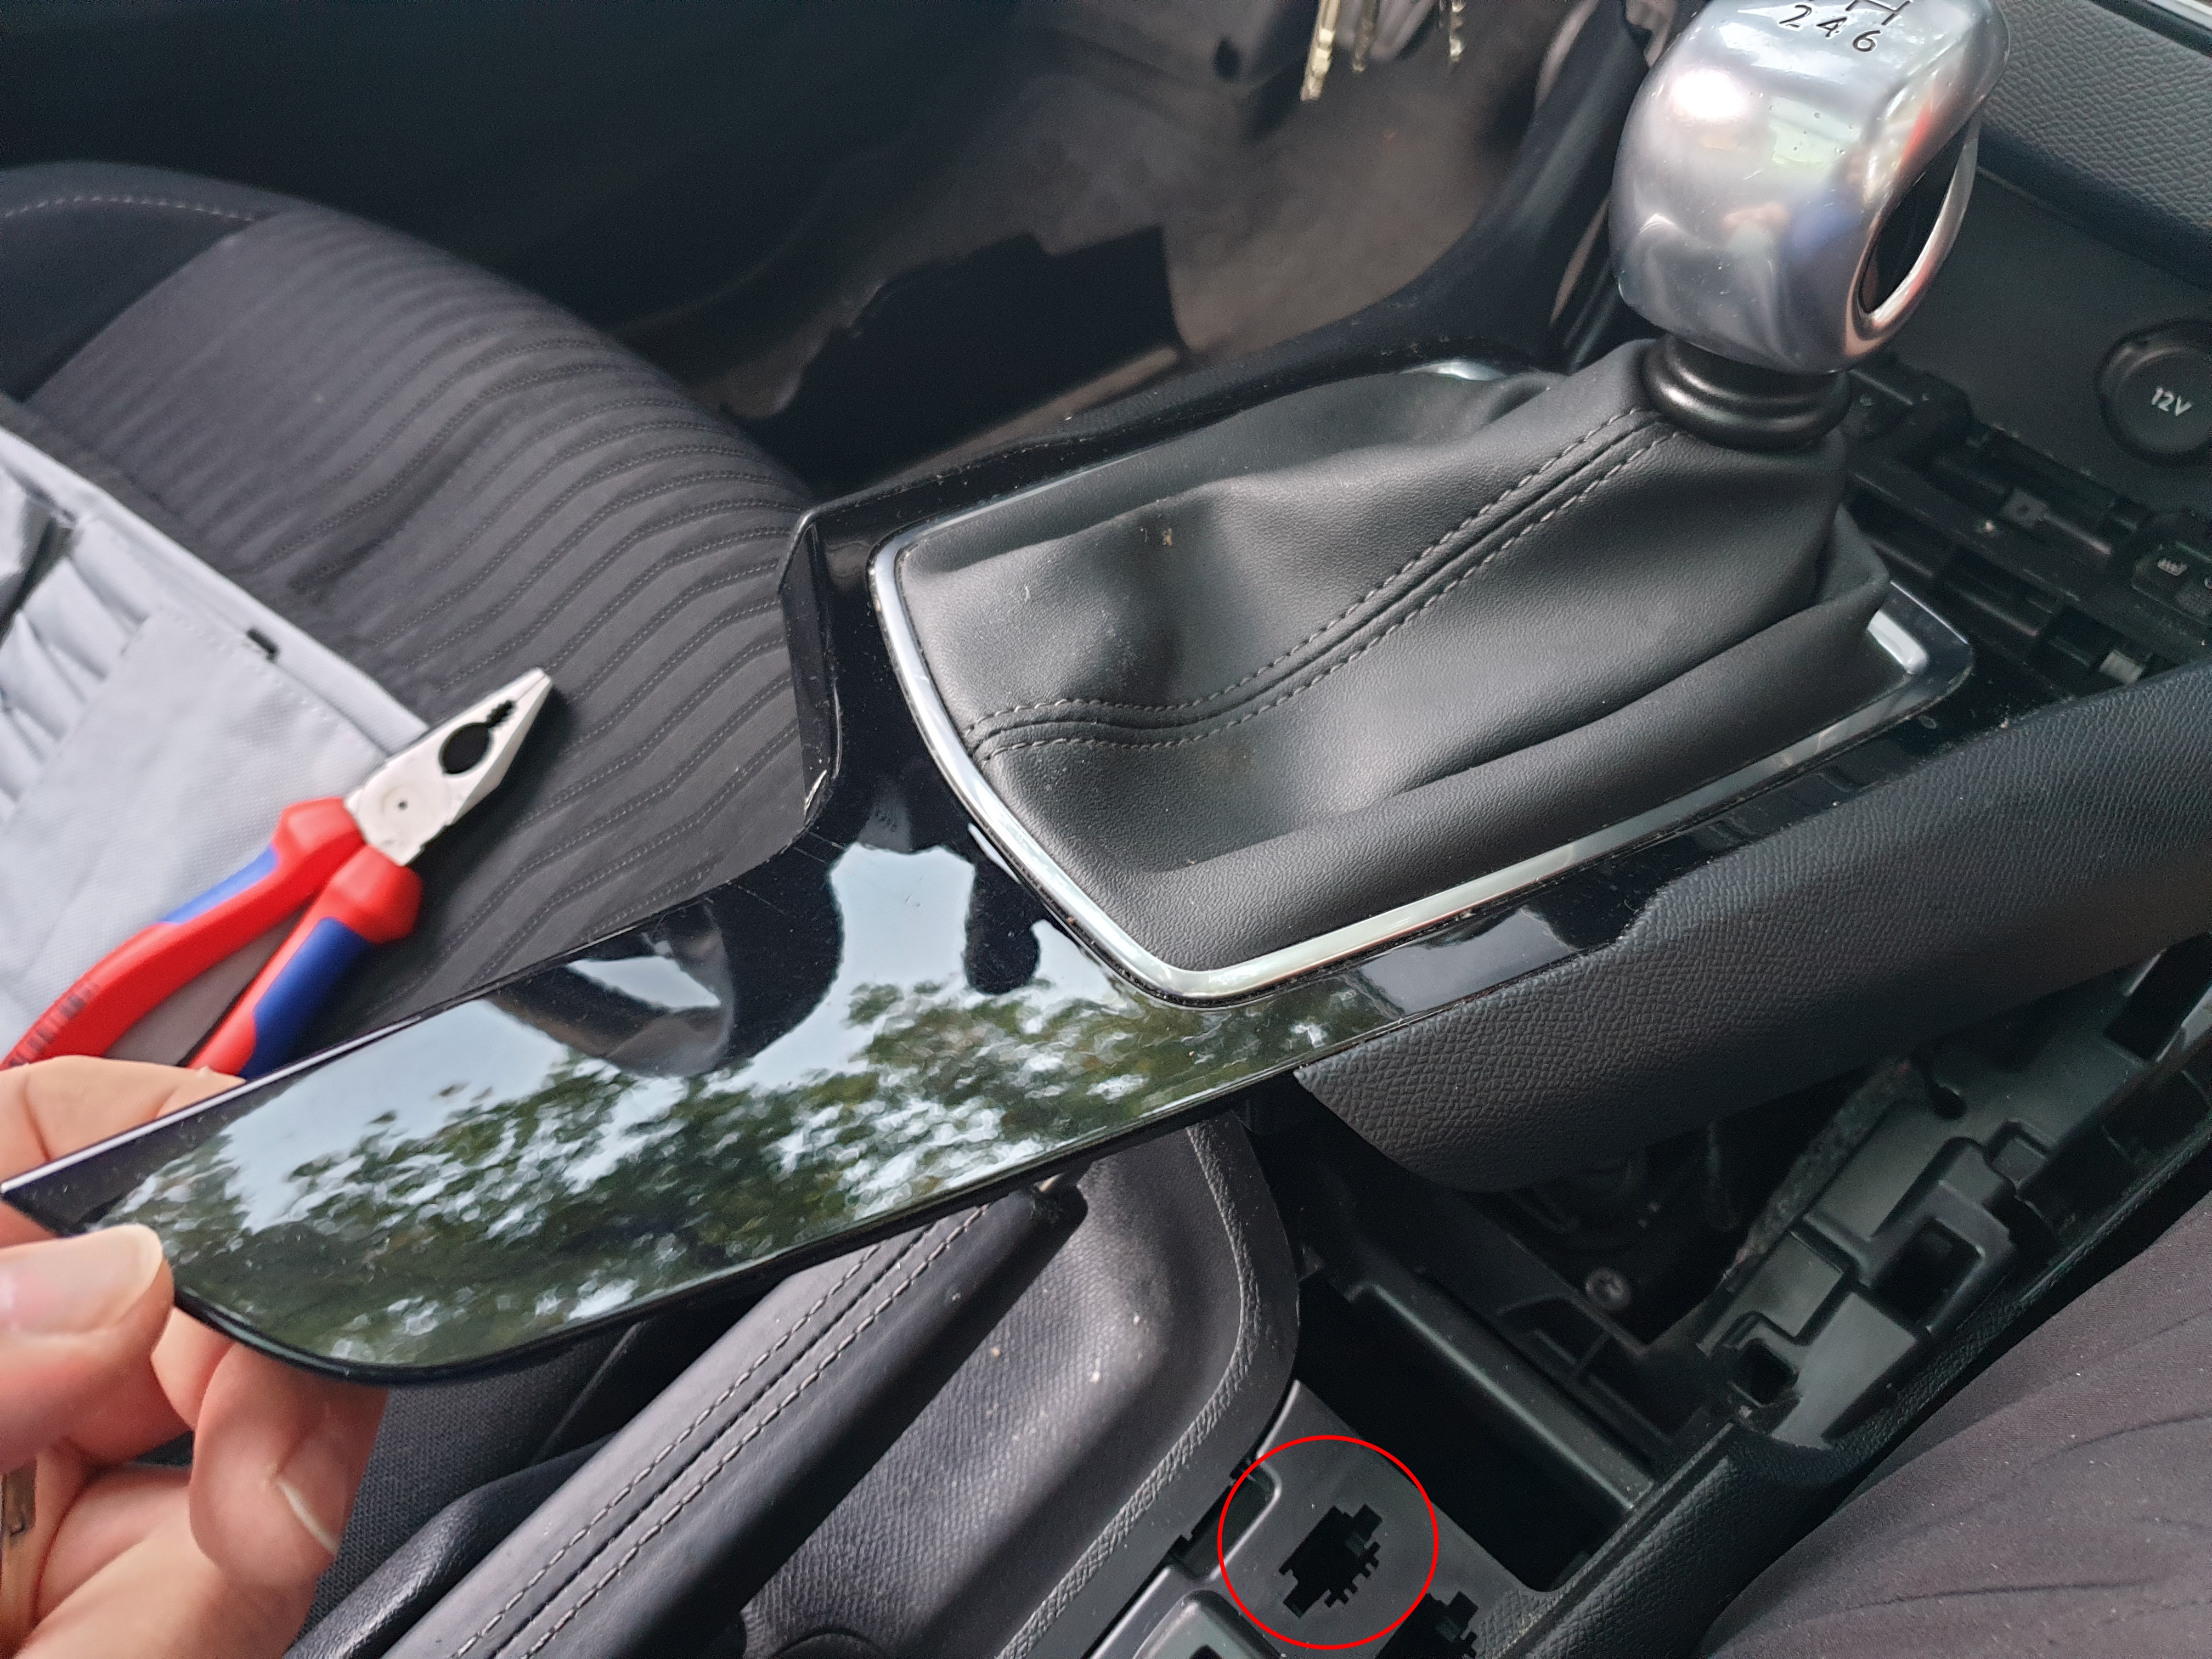
In our case this simply involved gently pulling it up. This was relatively easy, since one can reach underneath by going into the hole covered by the textile/leather material into which the lower part of the gear stick disappears.- The red circle shows one of the holes for a clamp. Gentle force is all that is needed.
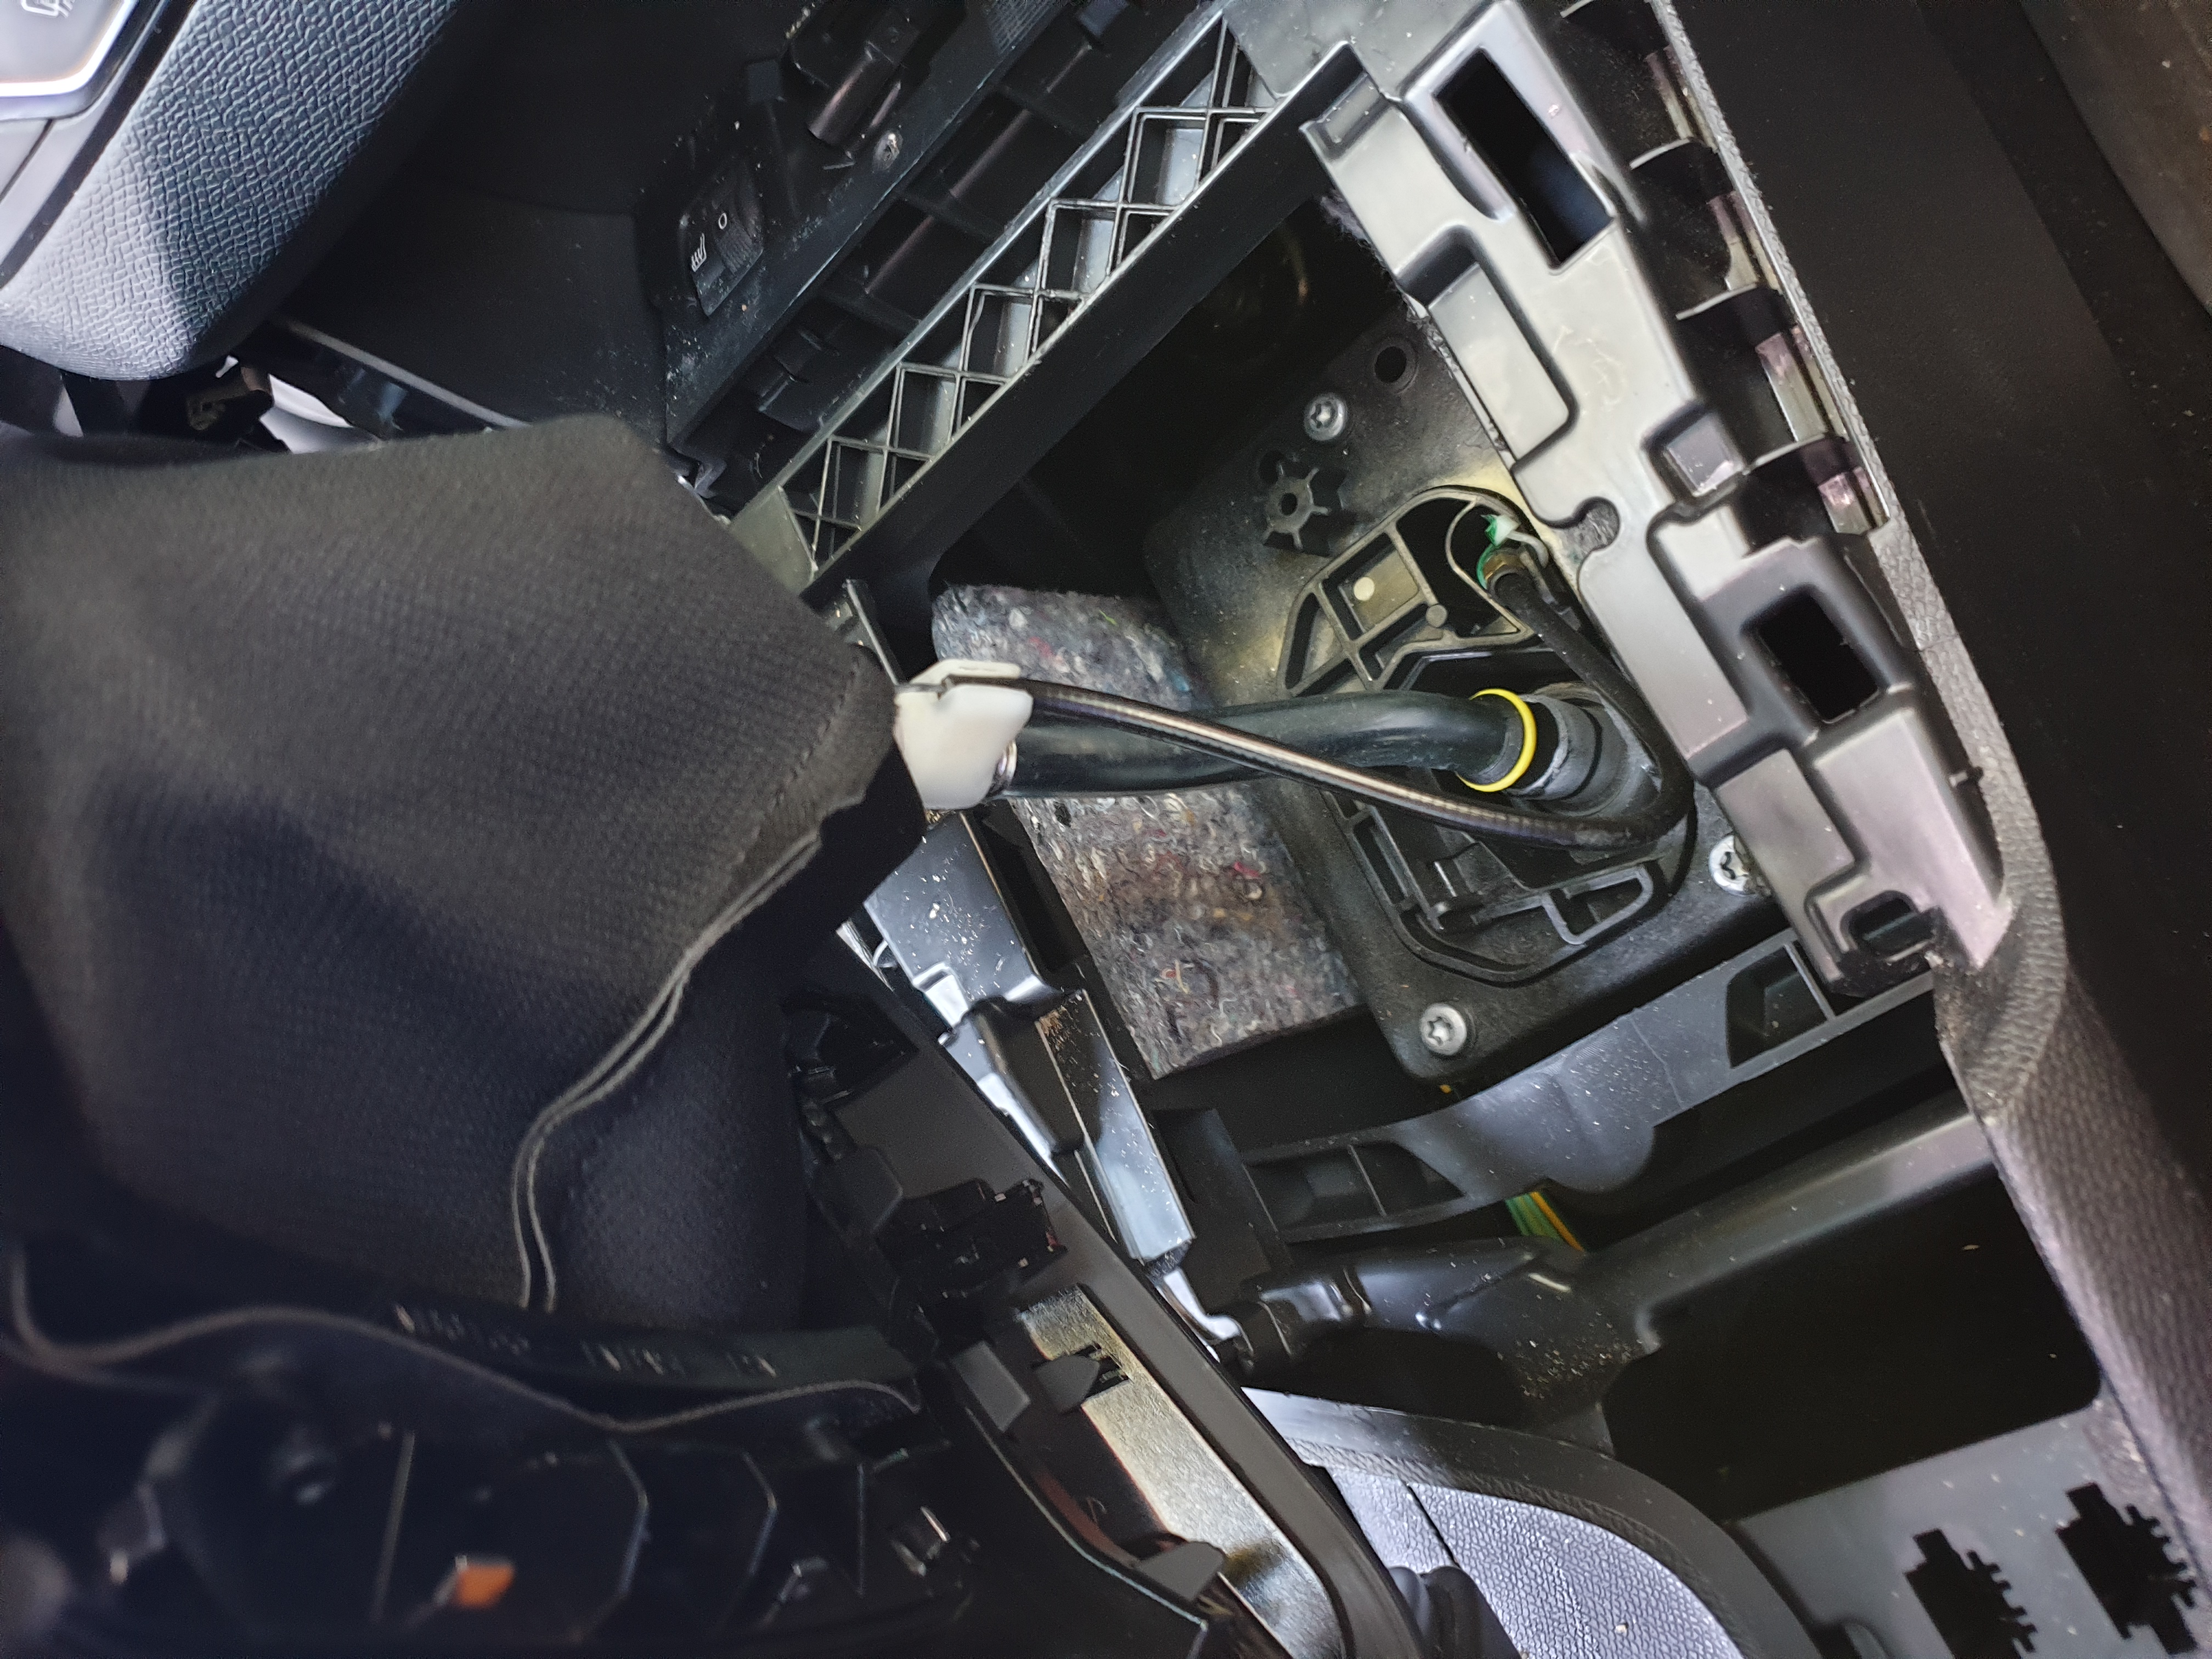
- Be aware that if you have automatic transmission or this sports option there are probably some electric cables, so be careful when lifting the casing up.
In our case there was no electric cable:
- We didn't have to completely remove the casing, instead it was sufficient to loosen it and reveal the screws (see next step).
- The previous step will have revealed two T20 screws on either side of the small compartment which houses the USB port, the 12 V socket and controls for the seat heating. Loosen those screws and take care that your magnetized screwdriver doesn't lose grip of it (otherwise it will be difficult to get those screws back out).
- Remove the cover underneath and above the steering wheel by loosening two T20 screws holding the bottom cover in place. We need this to access a slit underneath of which sits a clamp holding the radio blind (the one underneath the screen) in place.
NB: IMPORTANT make sure to use the lever under the steering wheel which lets you adjust height and distance to the seat. Make sure to pull the steering wheel out as much as possible (towards you) and down as much as possible. Lock it in that position. If you miss this rather important step you will be unable to remove the top cover which will make it near impossible to remove the bottom cover.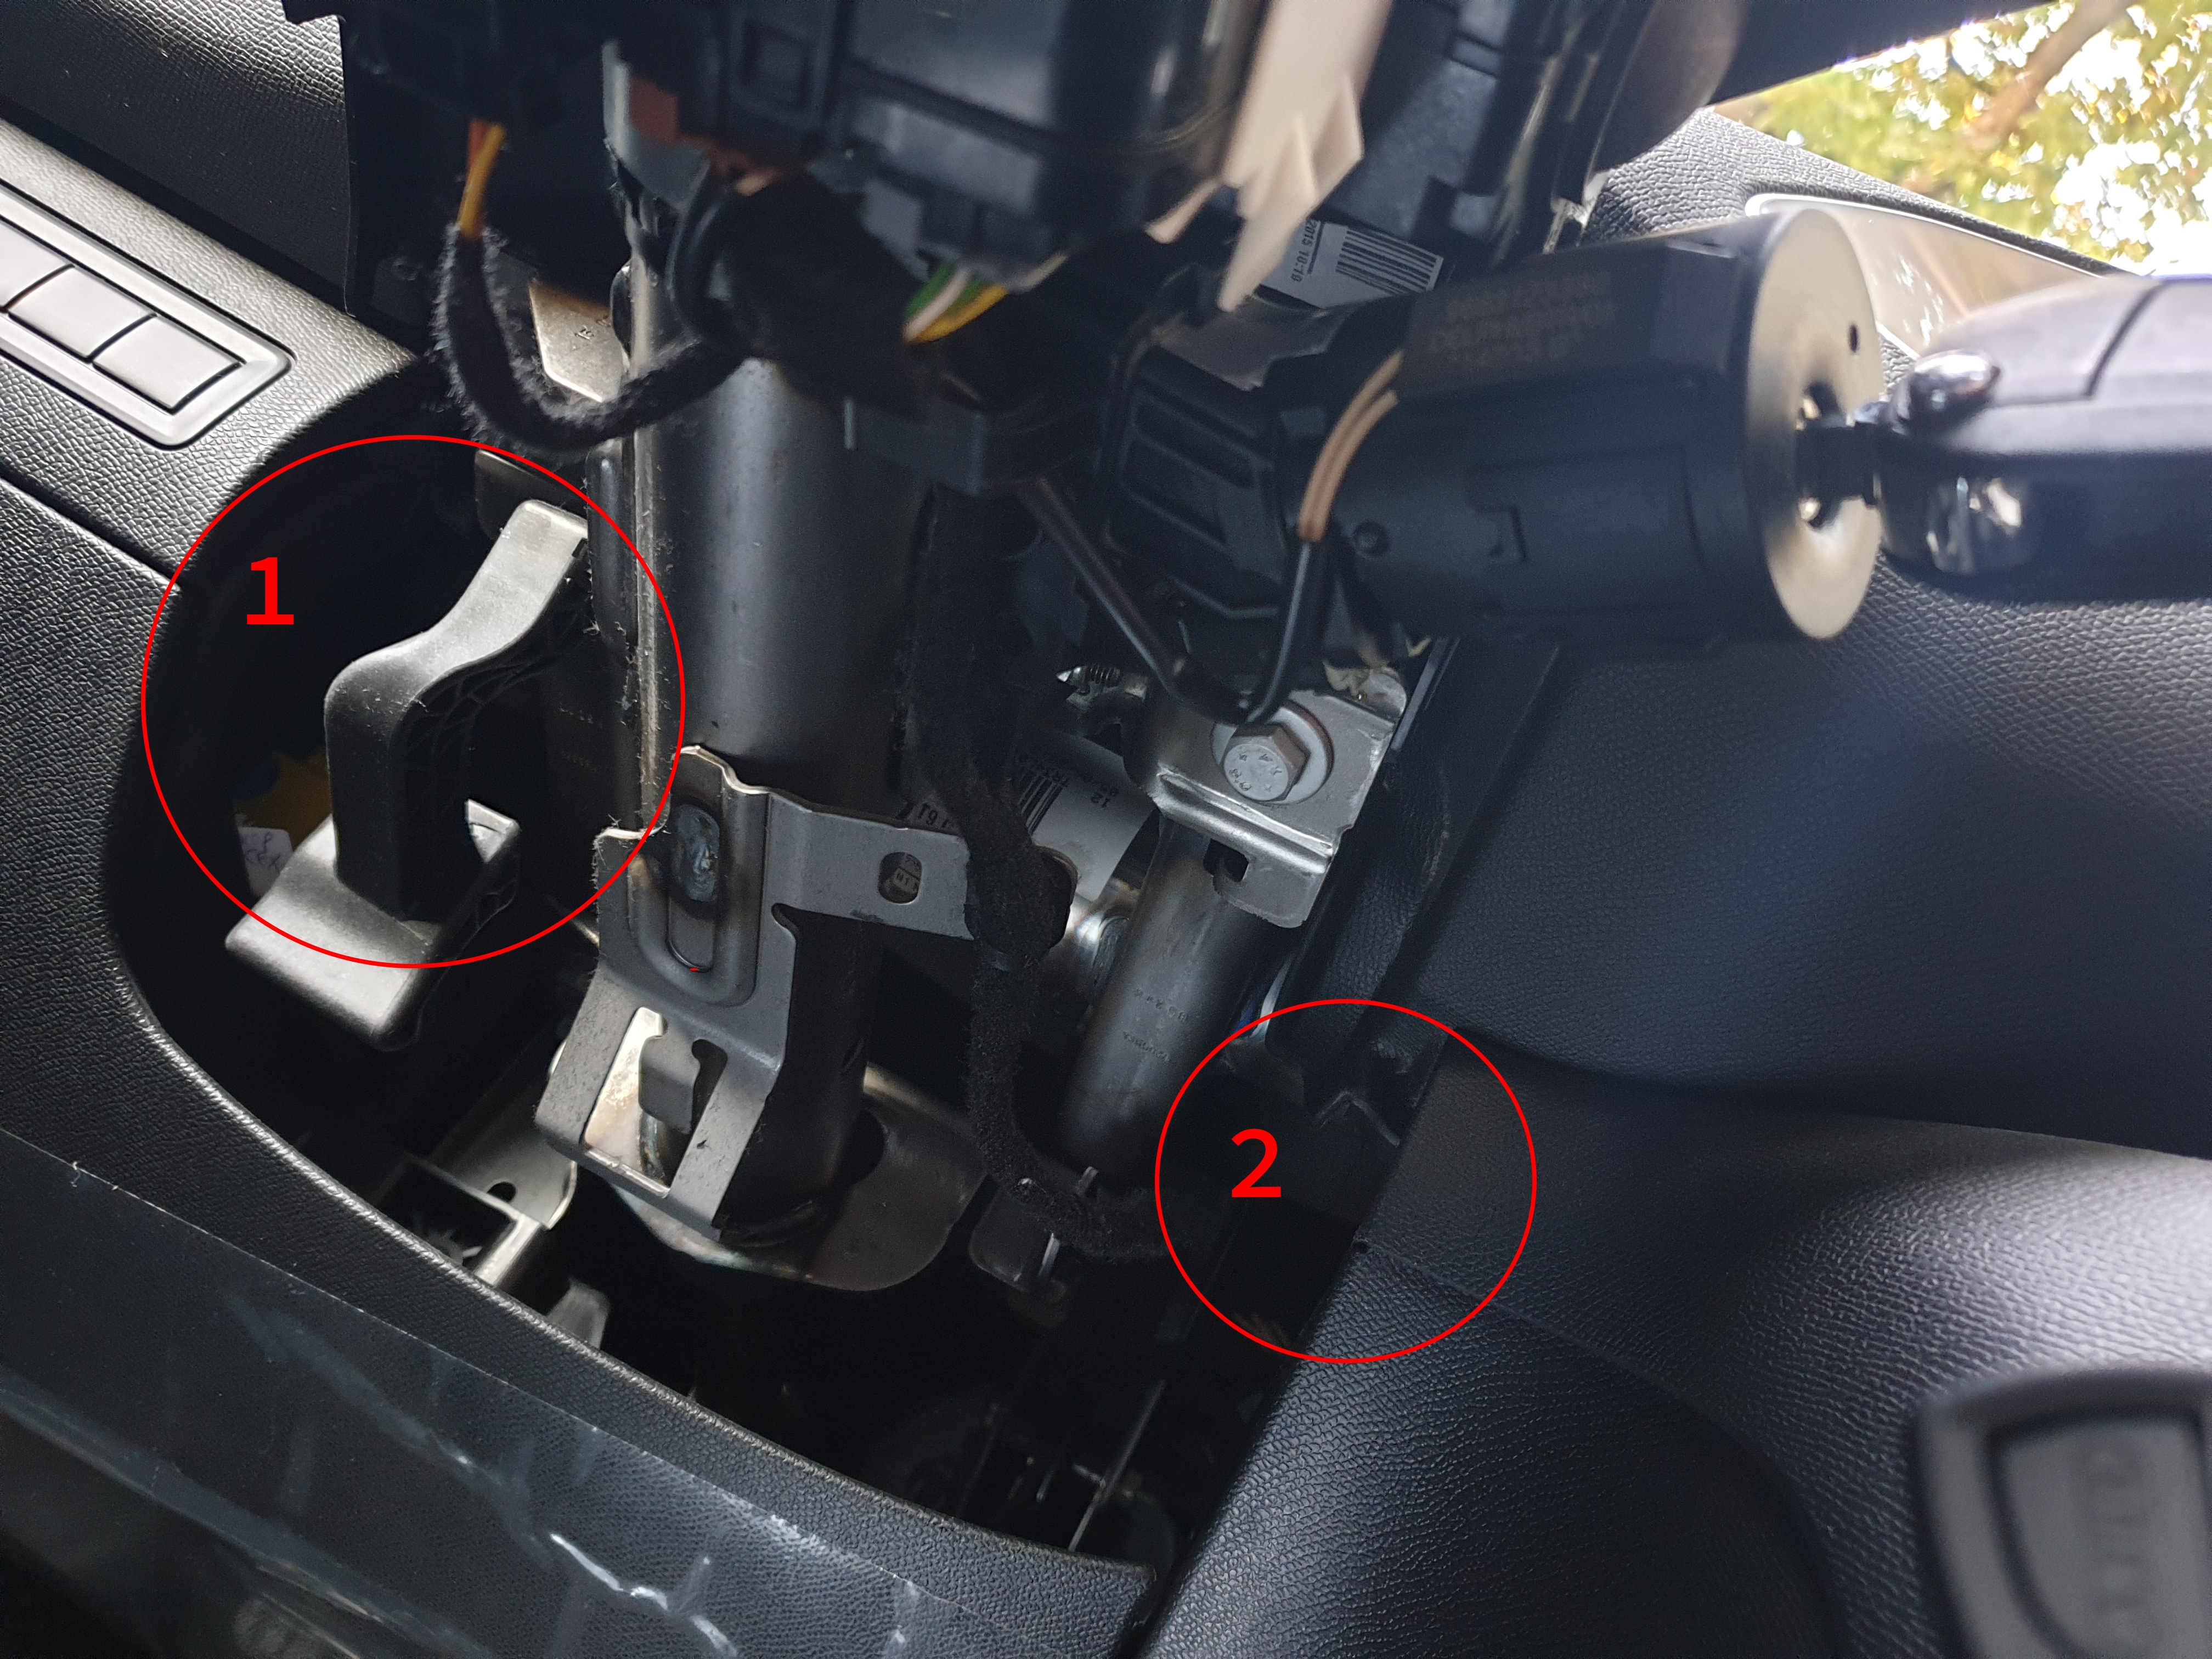
1 shows the lever you use to unlock and lock the steering wheel position.
2 shows the approximate location of said slit. - Use the flat wrench (or whichever tool you picked from the prerequisites) and release the clamp which you can "feel" by reaching into the slit on either side with that tool. Push down on the clamp to release it.
- The one on the side of the steering wheel (driver seat on the left!) looks like this:
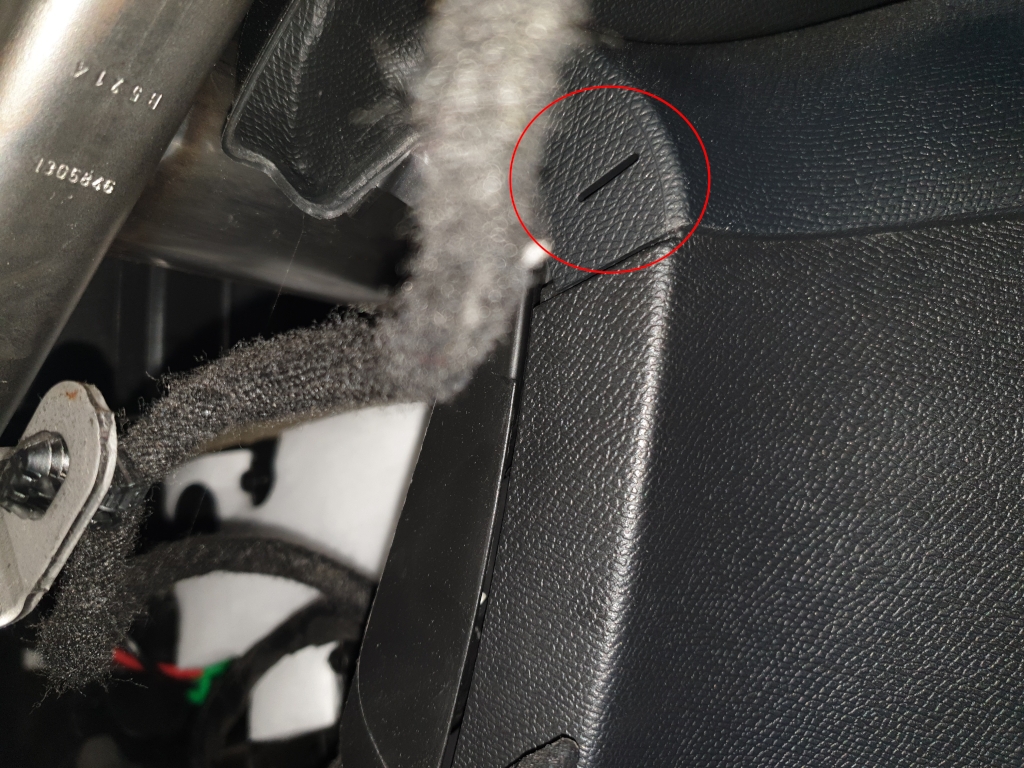
- The one on the side of the glove compartment looks like this:
- The one on the side of the steering wheel (driver seat on the left!) looks like this:
- Release the radio blind by grabbing either side (at around the height where those clamps from the previous step were located) and pulling it gently towards you. BE EXTREMELY CAREFUL not to pull too hard as we need to remove a plug first! There is some leeway, though.
It will reveal the CD reader at the top and the SMEG+ at the bottom:
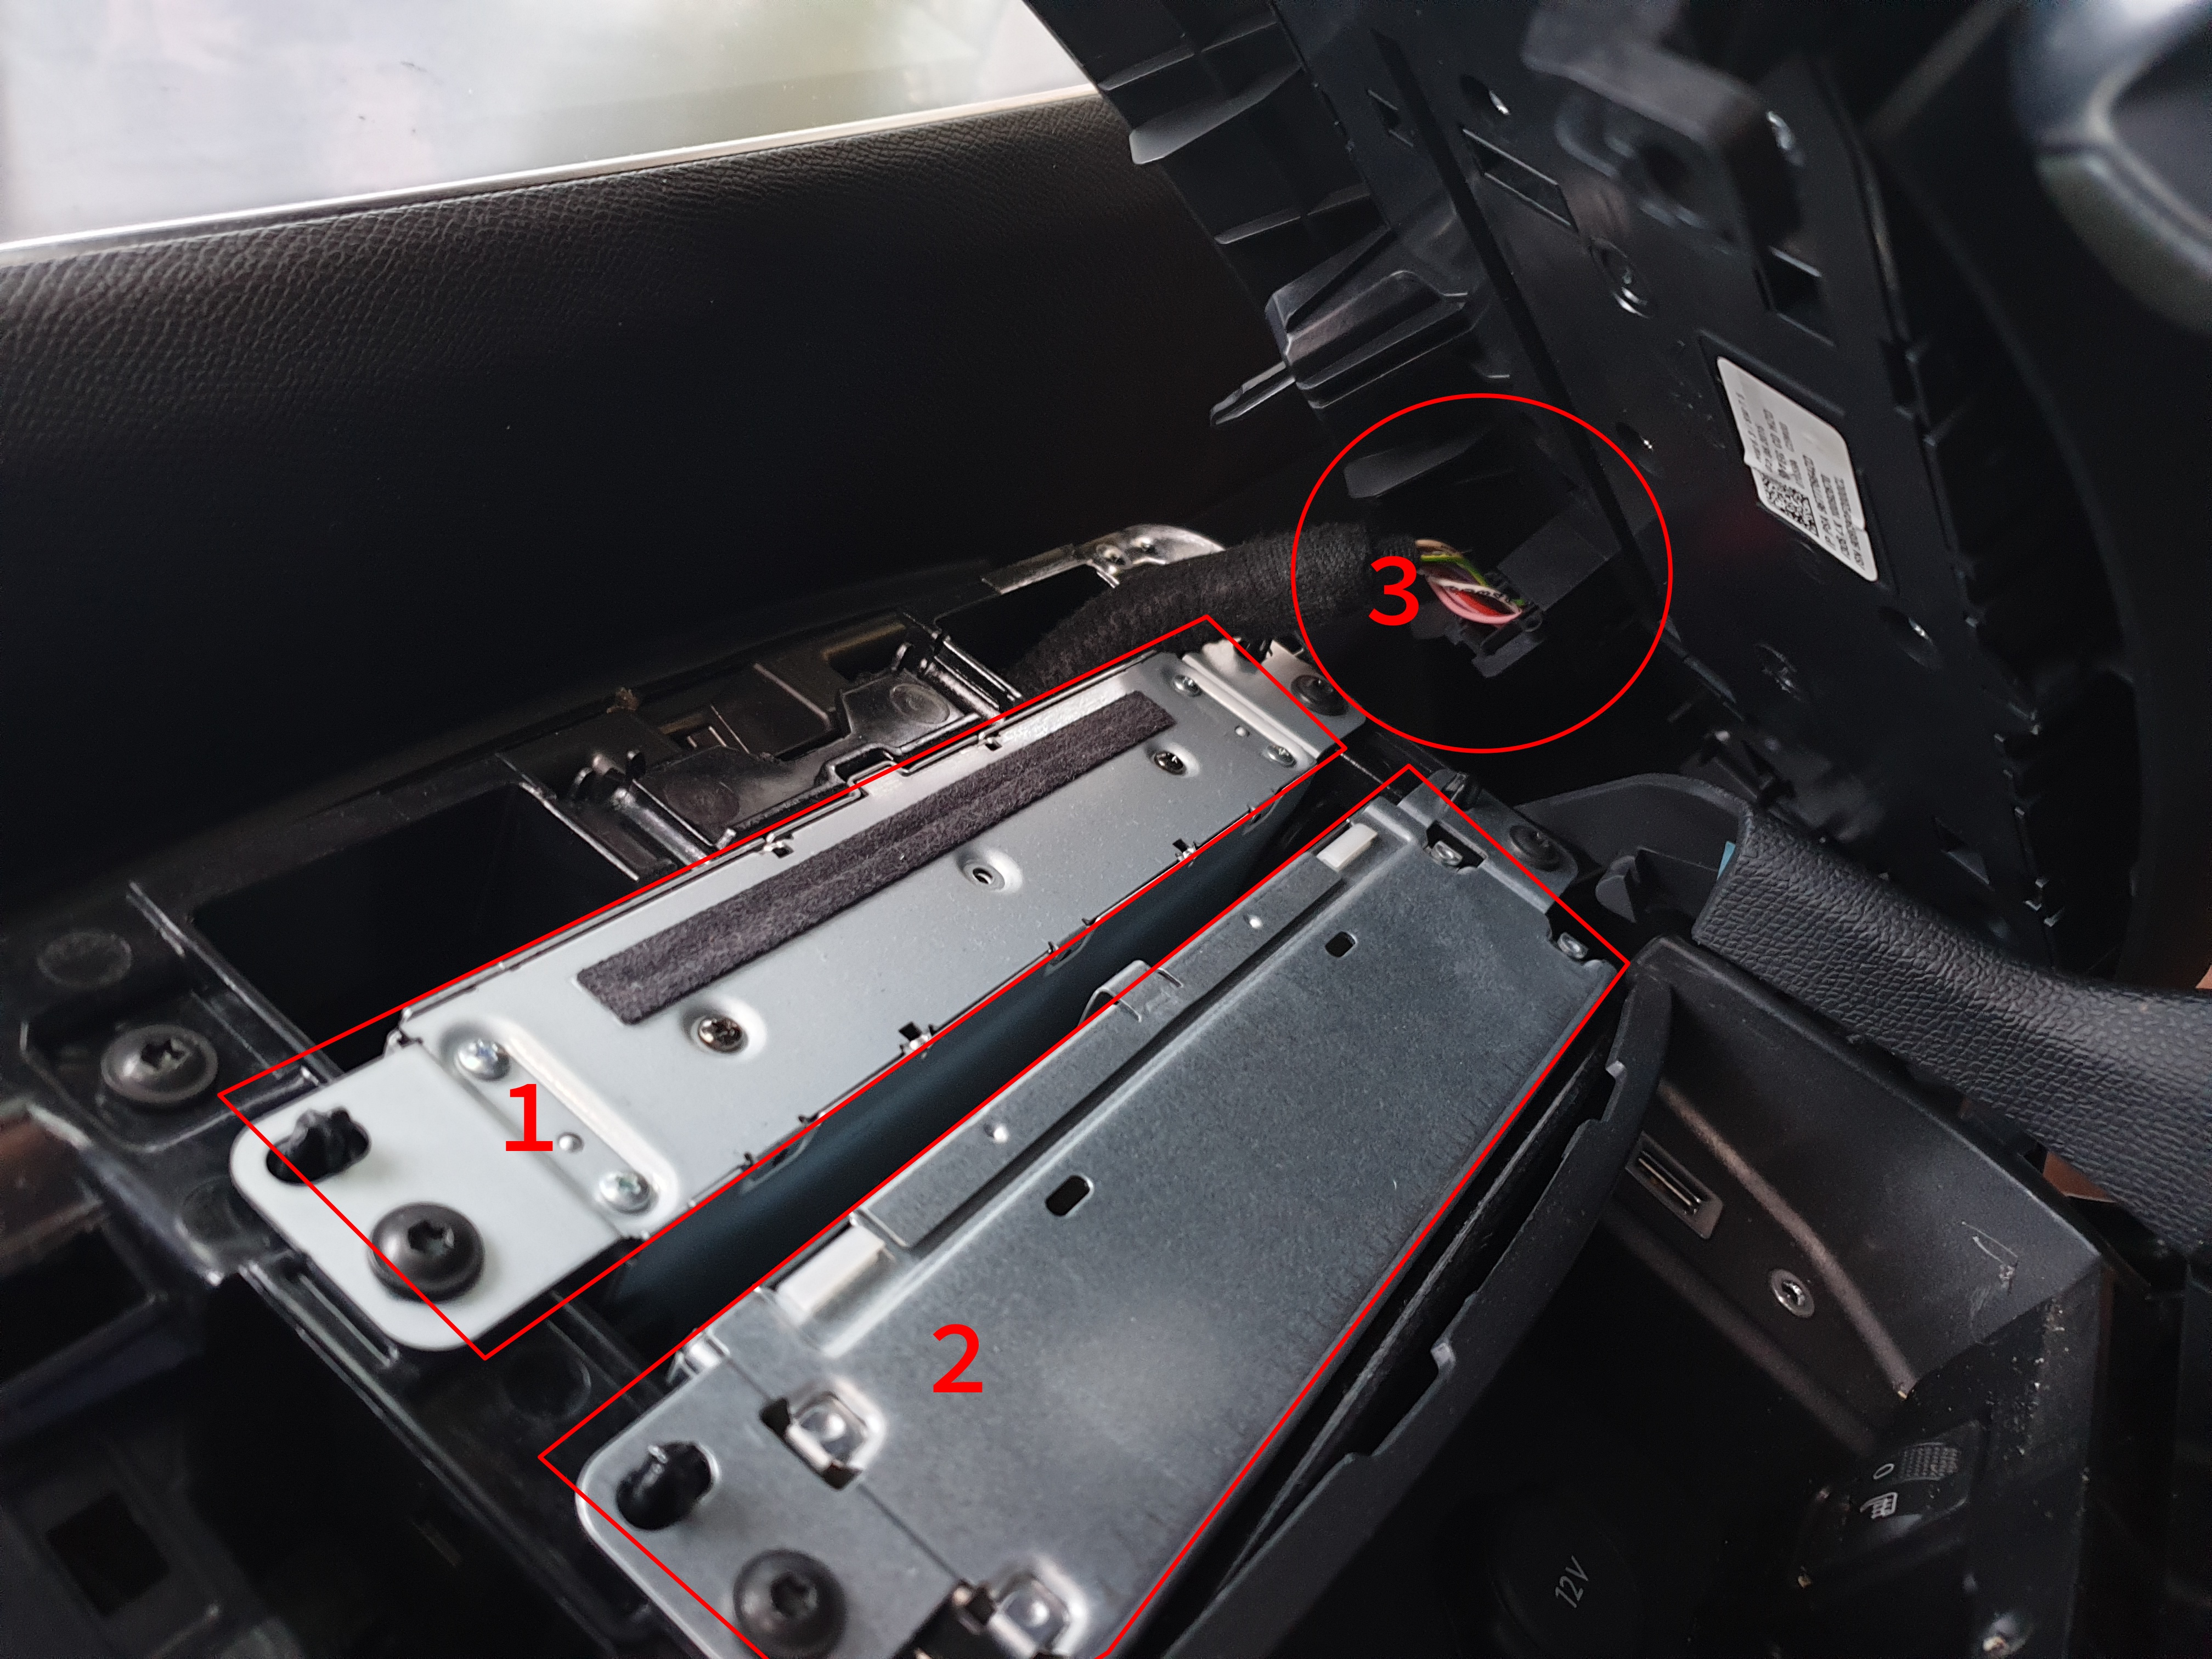
1 CD reader
2 SMEG+ unit
3 The plug we need to remove, yet! - You need to loosen the bracket holding the plug in place before you can unplug it. Since you won't see it, it's useful to have a smartphone camera on hand or look at the following photo:
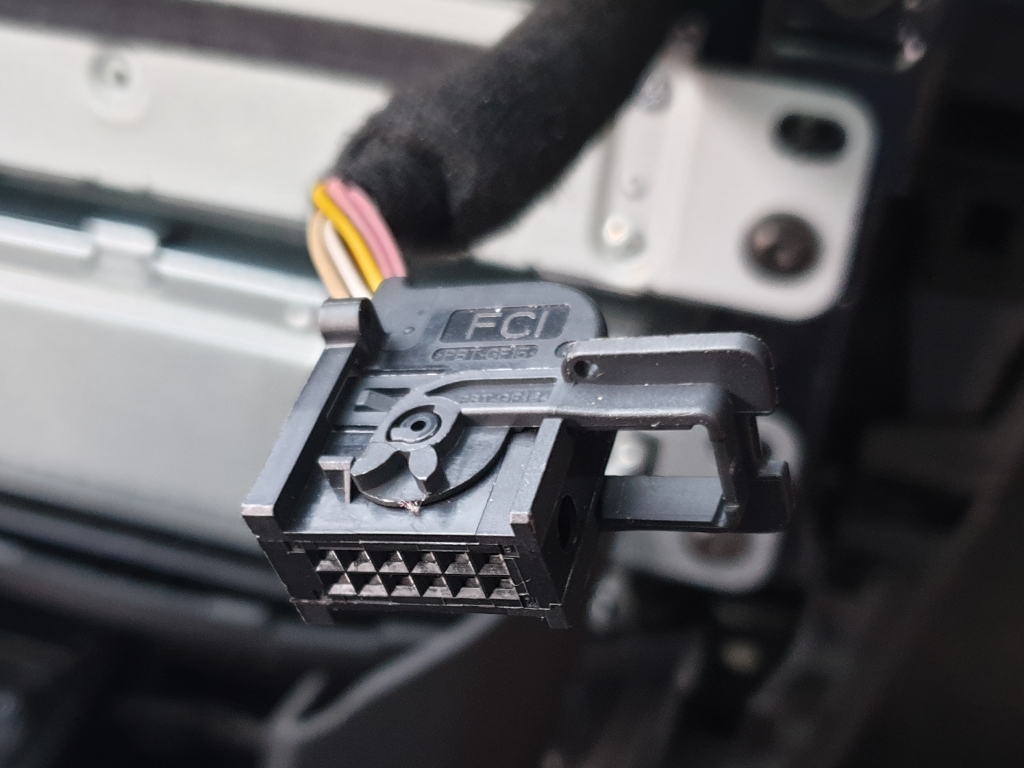
The fastened position will be if the bracket points up, the loosened position is the one shown in the photo. - After unplugging and removing the radio blind completely, you can now loosen the CD reader and the SMEG+ unit with the Torx screwdriver.

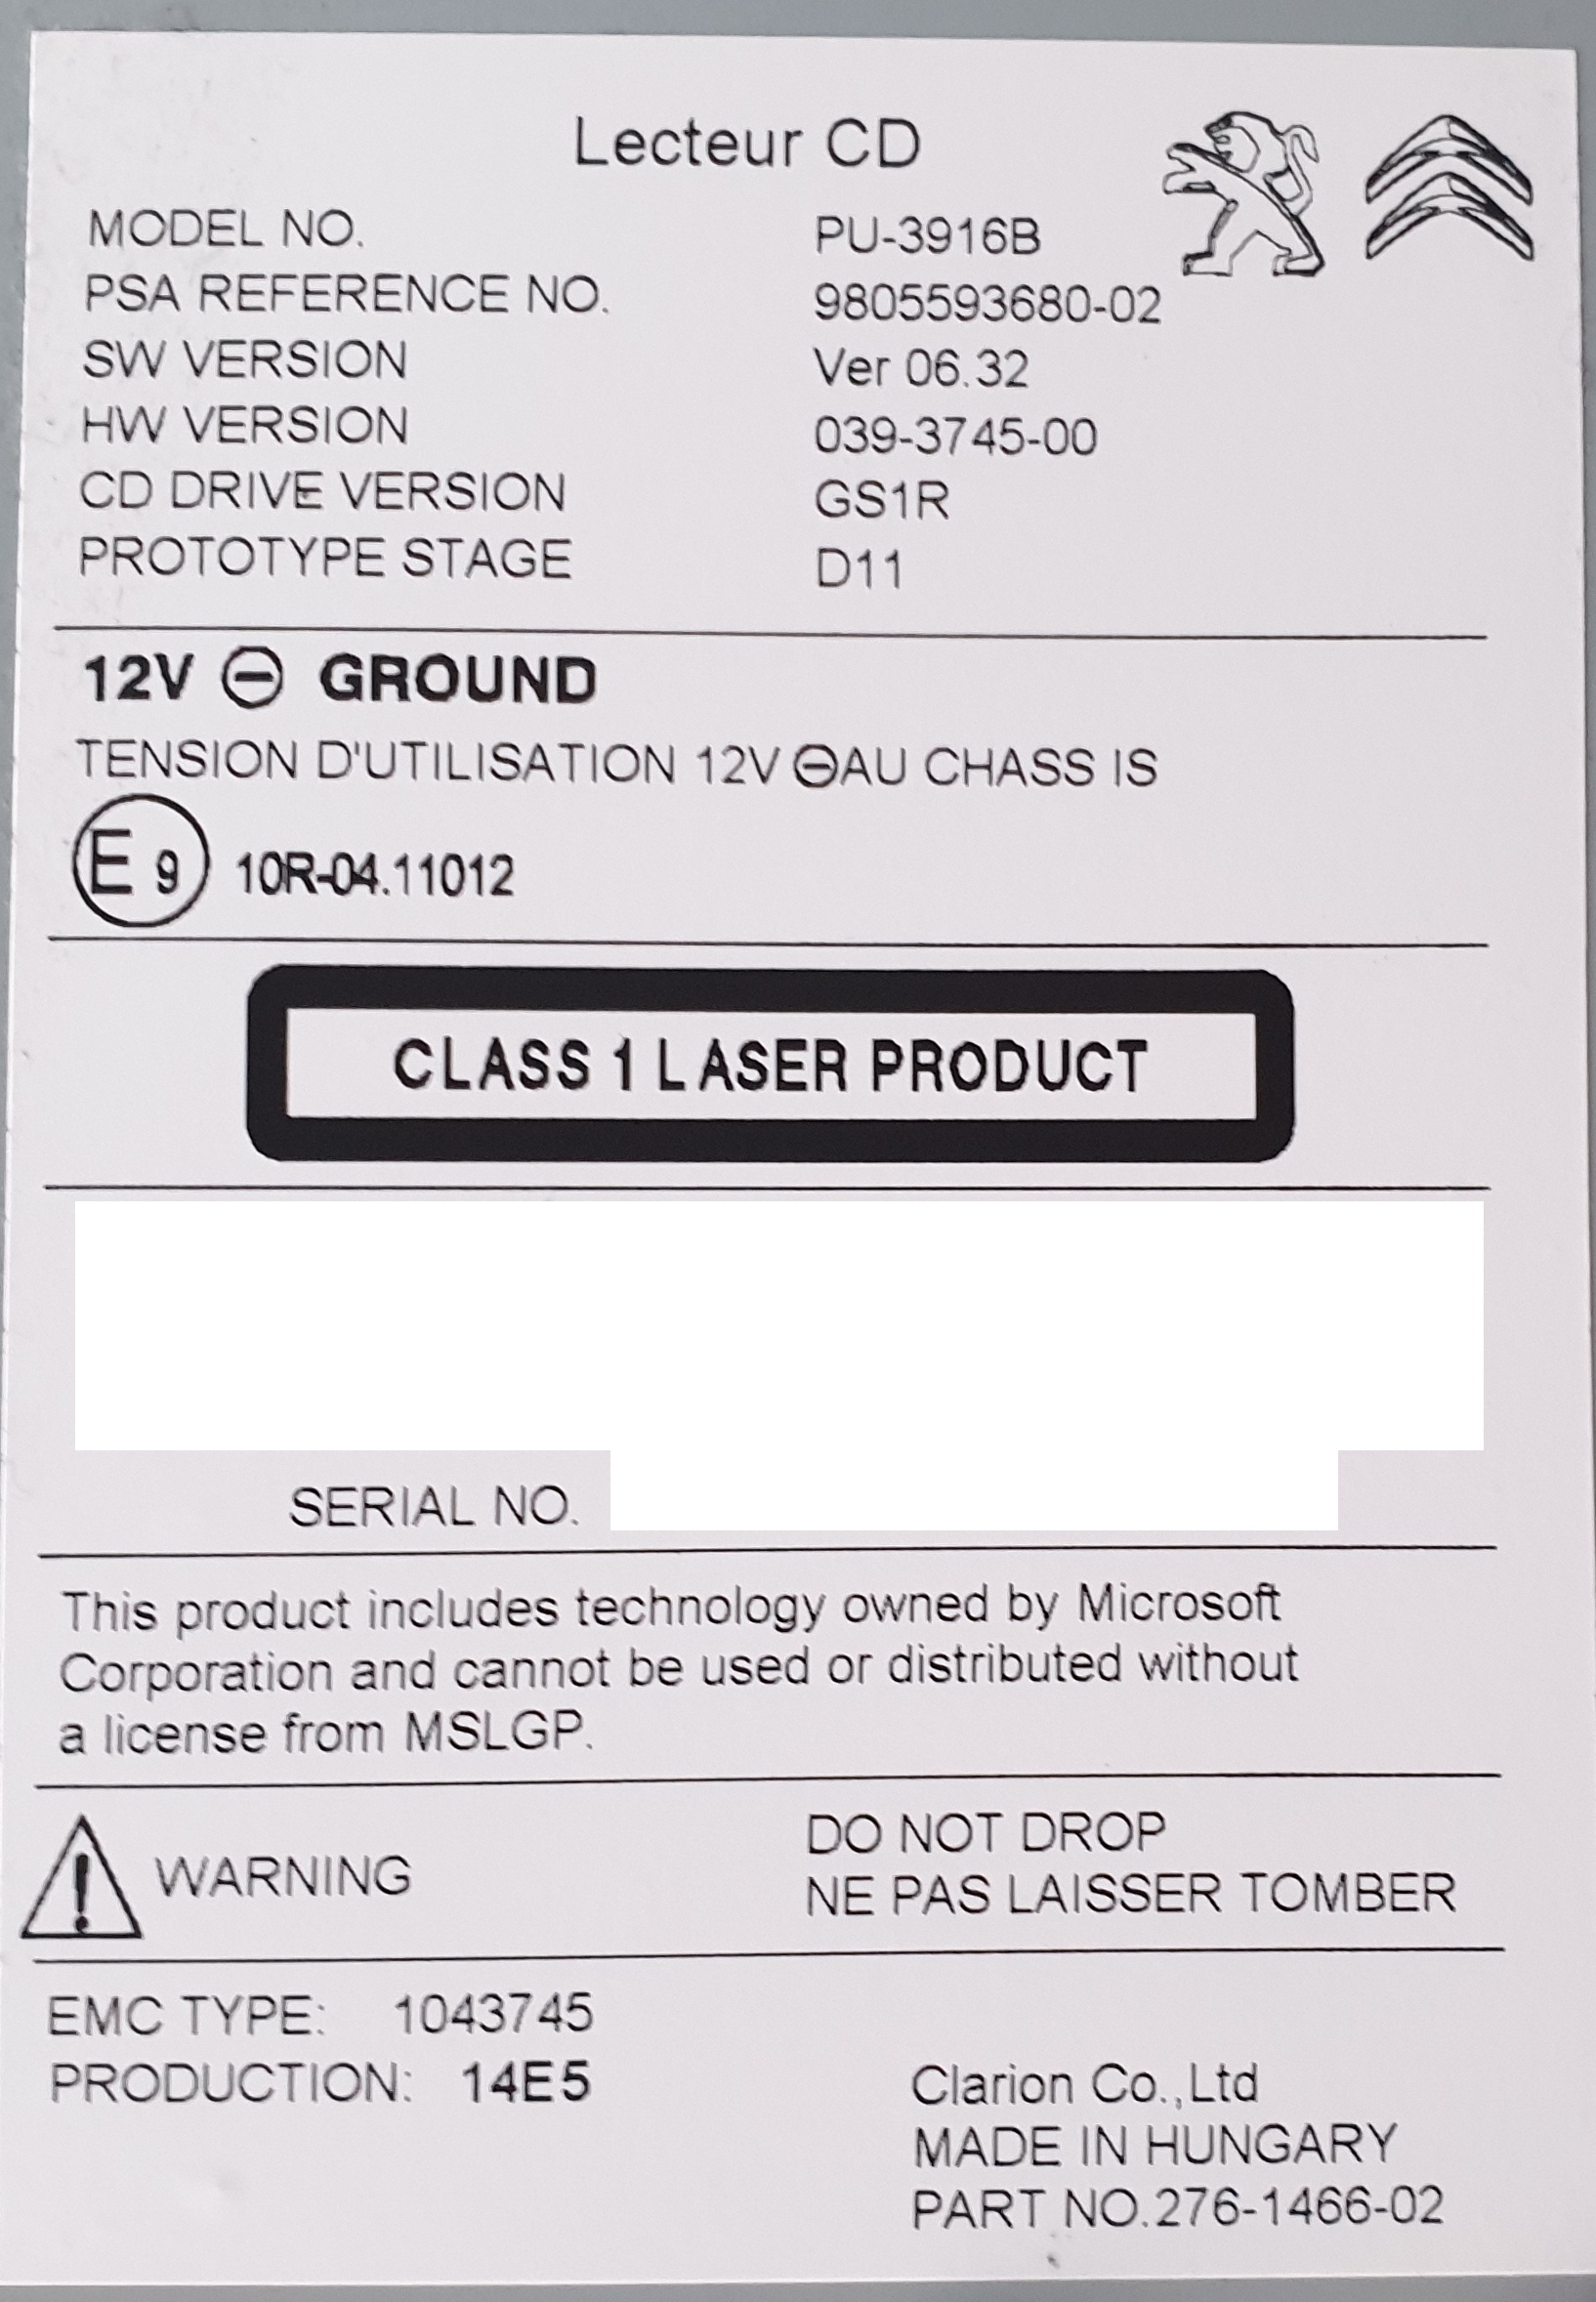
NB: while not strictly necessary to remove the CD reader, it is easier doing it. You will gain a lot of freedom of movement to remove the other plugs that are fastened to the back of the SMEG+ unit. - Pull out the CD reader first. Here is an example of the label:
- Unplug the single plug on the backside of the CD reader (photo shows the bracket in released position):

NB: the plugs and the sockets are actually color-coded, so it should be dead simple even if you forget to note down where you removed which plug. But we recommend taking a photo or so to be on the safe side. - After loosening the screws holding the SMEG+ unit in place also pull it out gently.
- Likely optional, but better safe than sorry: disconnect one of the battery leads from the car battery. Be mindful of the effect this has on doors and windows and bring those into the desired position before you proceed.
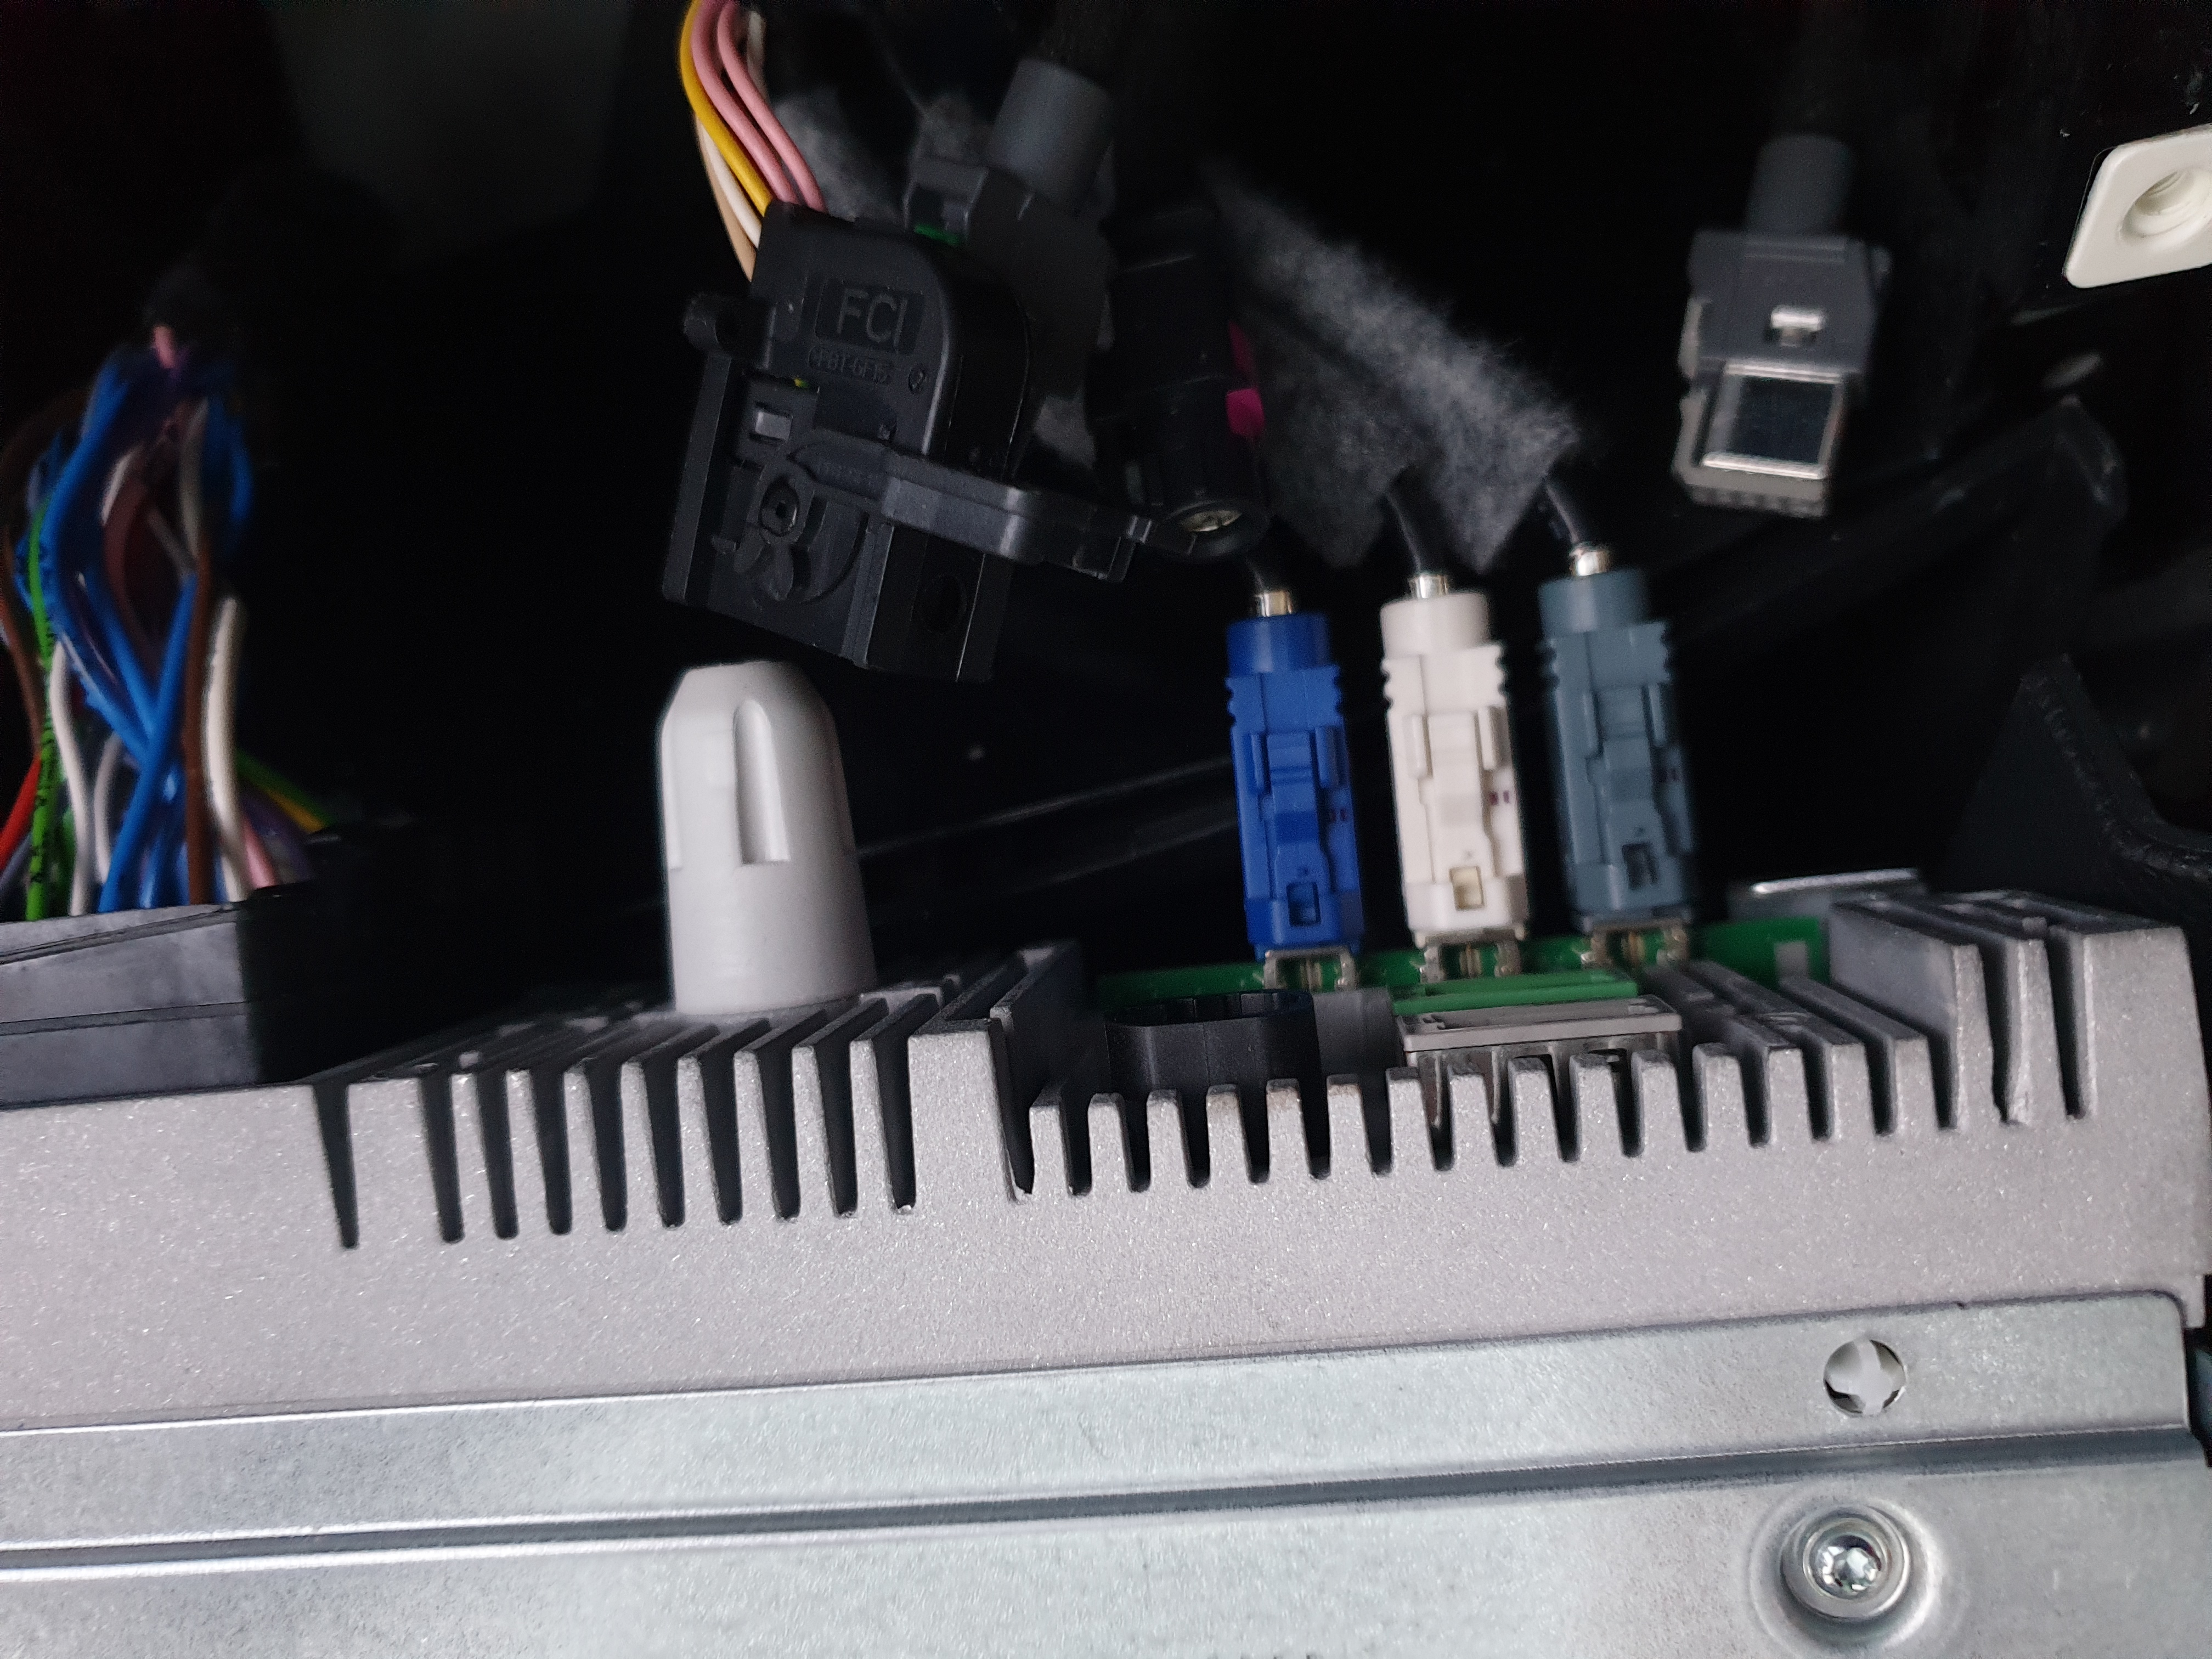
- Take a note of all the plugs (this varies with the options of the car) and where they go. From what we remember the rectangular plugs also have a bracket like the plug that we unplugged from the backside of the radio blind. The big plug which - from the front - sits on the left side of SMEG+ rear side is a MOST connector. Sometimes it is also called quadlock. It also has a bracket, but obviously this looks slightly different from the smaller plugs. But with the knowledge that there also is a bracket you should be able to release it and unplug this one also. Here is how it looks after releasing a few plugs, e.g. the ones for USB and LVDS (display):
Now that you have freed the SMEG+ from the car you could open it up with a T9 (Torx) screwdriver. THIS WILL VOID YOUR WARRANTY!
Options on how to proceed from here would be an upgrade of the μSD card or tinkering with the SMEG+ unit itself.
![]() The contents of this Wiki are dedicated to the public domain. For jurisdictions which do not allow public domain dedications or don't know public domain, content can be assumed to be licensed under CC0.
The contents of this Wiki are dedicated to the public domain. For jurisdictions which do not allow public domain dedications or don't know public domain, content can be assumed to be licensed under CC0.
Note: for this (Wiki) repository I will also use forced pushes. Use git reset, if you encounter inconsistencies.