-
Notifications
You must be signed in to change notification settings - Fork 0
uCC configuration and personalization
- Why use this tool?
- Benefit compared to absence of tool
- Easy installation, customization (configuration, personalization) and maintenance of AAL services and its parts. Also, all functionalities are available remotely.
- Easy extensible to own needs be plugins
- Supports developers in pre-integration process
- Stakeholders addressed
- Describe whether the use of the tool is mandatory, and if there is an alternative describe benefit compared to the alternative way
This page mainly documents the technical background of the implementation for developers and usage for the tool suite for deployers. Before going deeper into these topics let’s briefly introduce the core components for the AAL service integration are:
- Installation
- Customization
- Configuration
- Personalisation
- Un-installation
- A remote deployment access
- Direct uStore integration
- System overview information
- Access control
Detailed information about these components can be found in part 1 of deliverable 3.5D. Also, you can get a first impression about the abilities and the usage of the uCC from the following gallery:
This section gives an overview about the basic installation of the uCC on top of the middleware and afterwards shows how to use it.
Copy the uccDB directory with its xml files into the karaf folder.
Now it is time to start the uCC. To do this, you can open your karaf folder and go to the bin directory. There you have to click the karaf.bat to start the karaf console. The console should look like this (See screen below):

You are now just two steps away from running uCC. Type into console:
-
features:install profilingserverand press -
features:install uCCand press
The features will be installed now. Until this happens you have to wait a while. First starts the middleware, than the profilingserver and last but not least the uCC. The installation of the features is -depending on your system- a more or less lasting task. Your console should at least look like this:

Finally you can open your browser, which supports html5 and type into the url field: http://localhost:8080/ucc. If everything was successfully done, you should see the next screen on your browser:

Congratulation, you have done it! :) Now you can create a account and login to uCC.
http://youtu.be/iuGOHVtk2hI http://youtu.be/jO7ztmHbjI0 http://youtu.be/SfhxvQ9KS7U
The videos above are showing:
- the login into uCC (Video 1),
- setting of preferences (Video 2)
- the local installation process, after you have downloaded a AAL service from the uStore (Video 3).
As an deployer you login the uCC.
To create a account you only need to click the "Create Account"-button next to the "SignIn"-button. The view below opens:

You have now the possibility to login in into uCC.
Now the deployer can open the main menu in the top left corner and choose to purchase a service from the ustore or install a local downloaded AAL service from uStore.

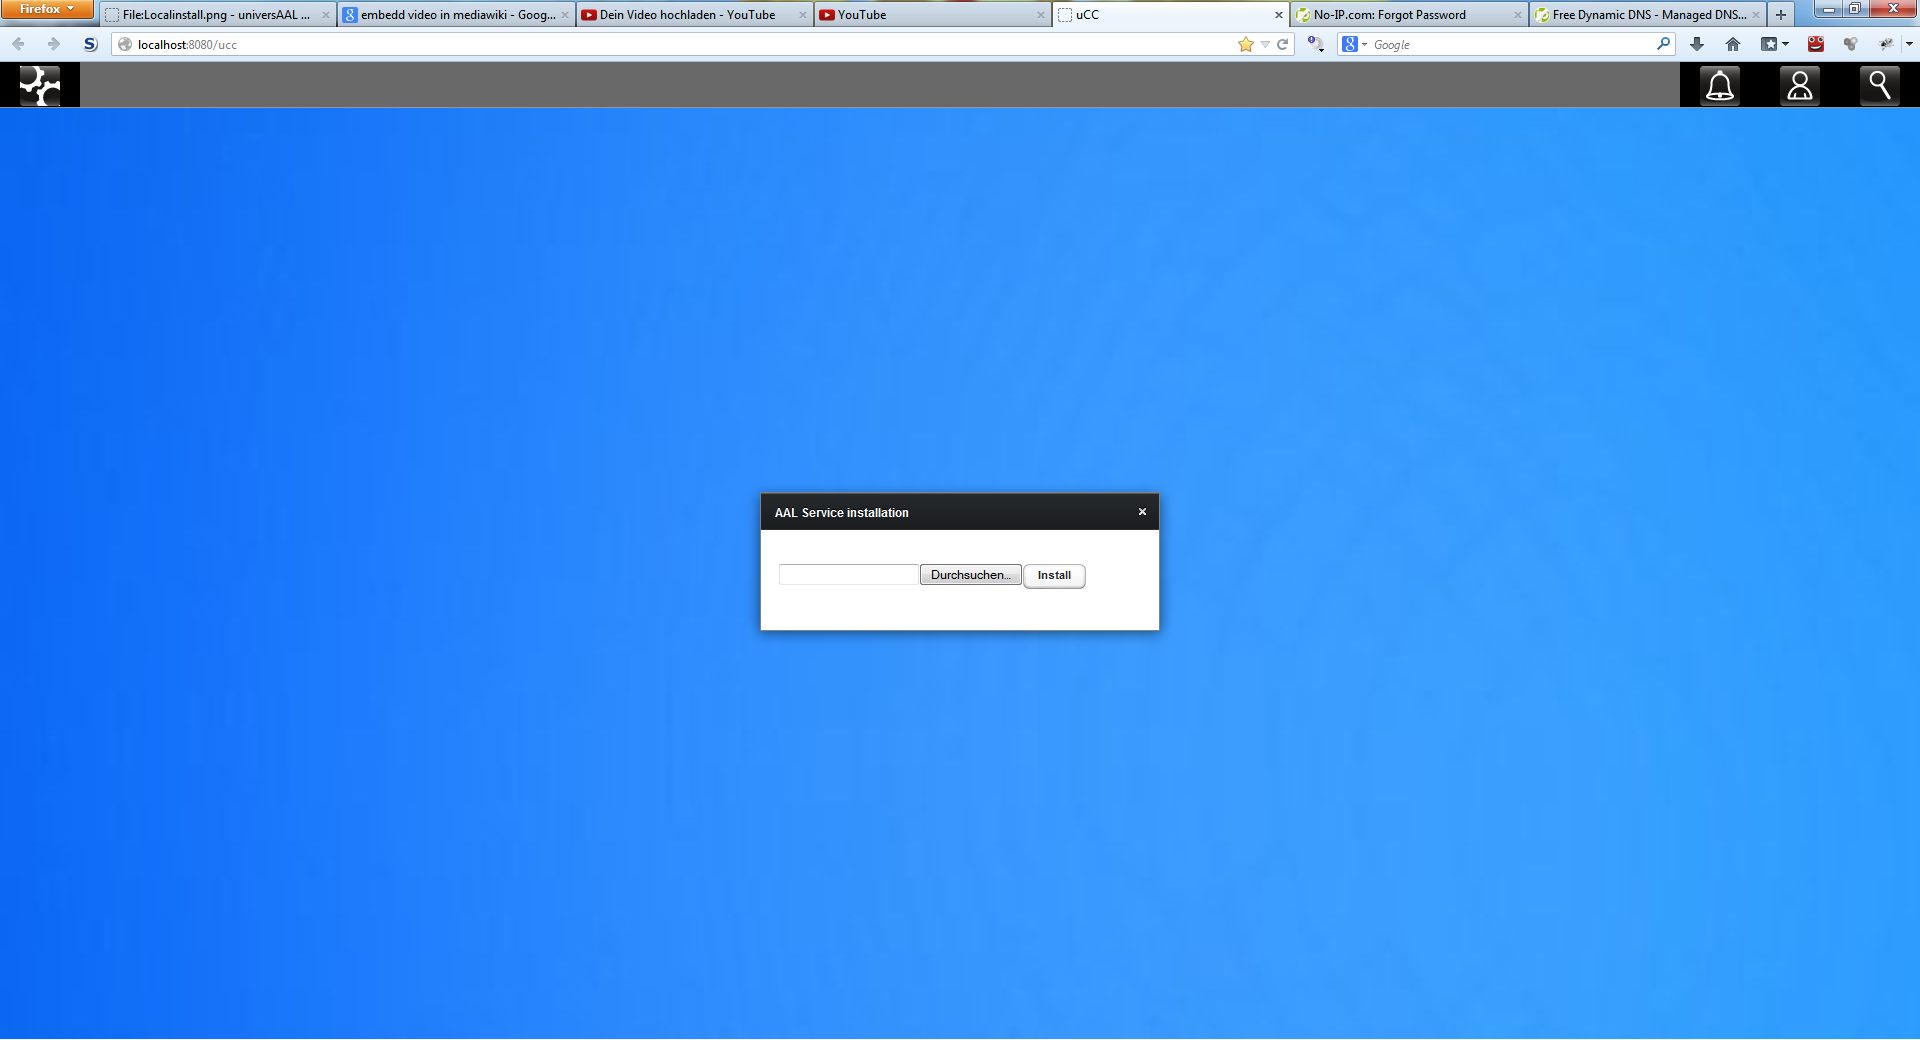
The deployer can choose for the local installation the AAL service with the help of a file explorer (see screen below):

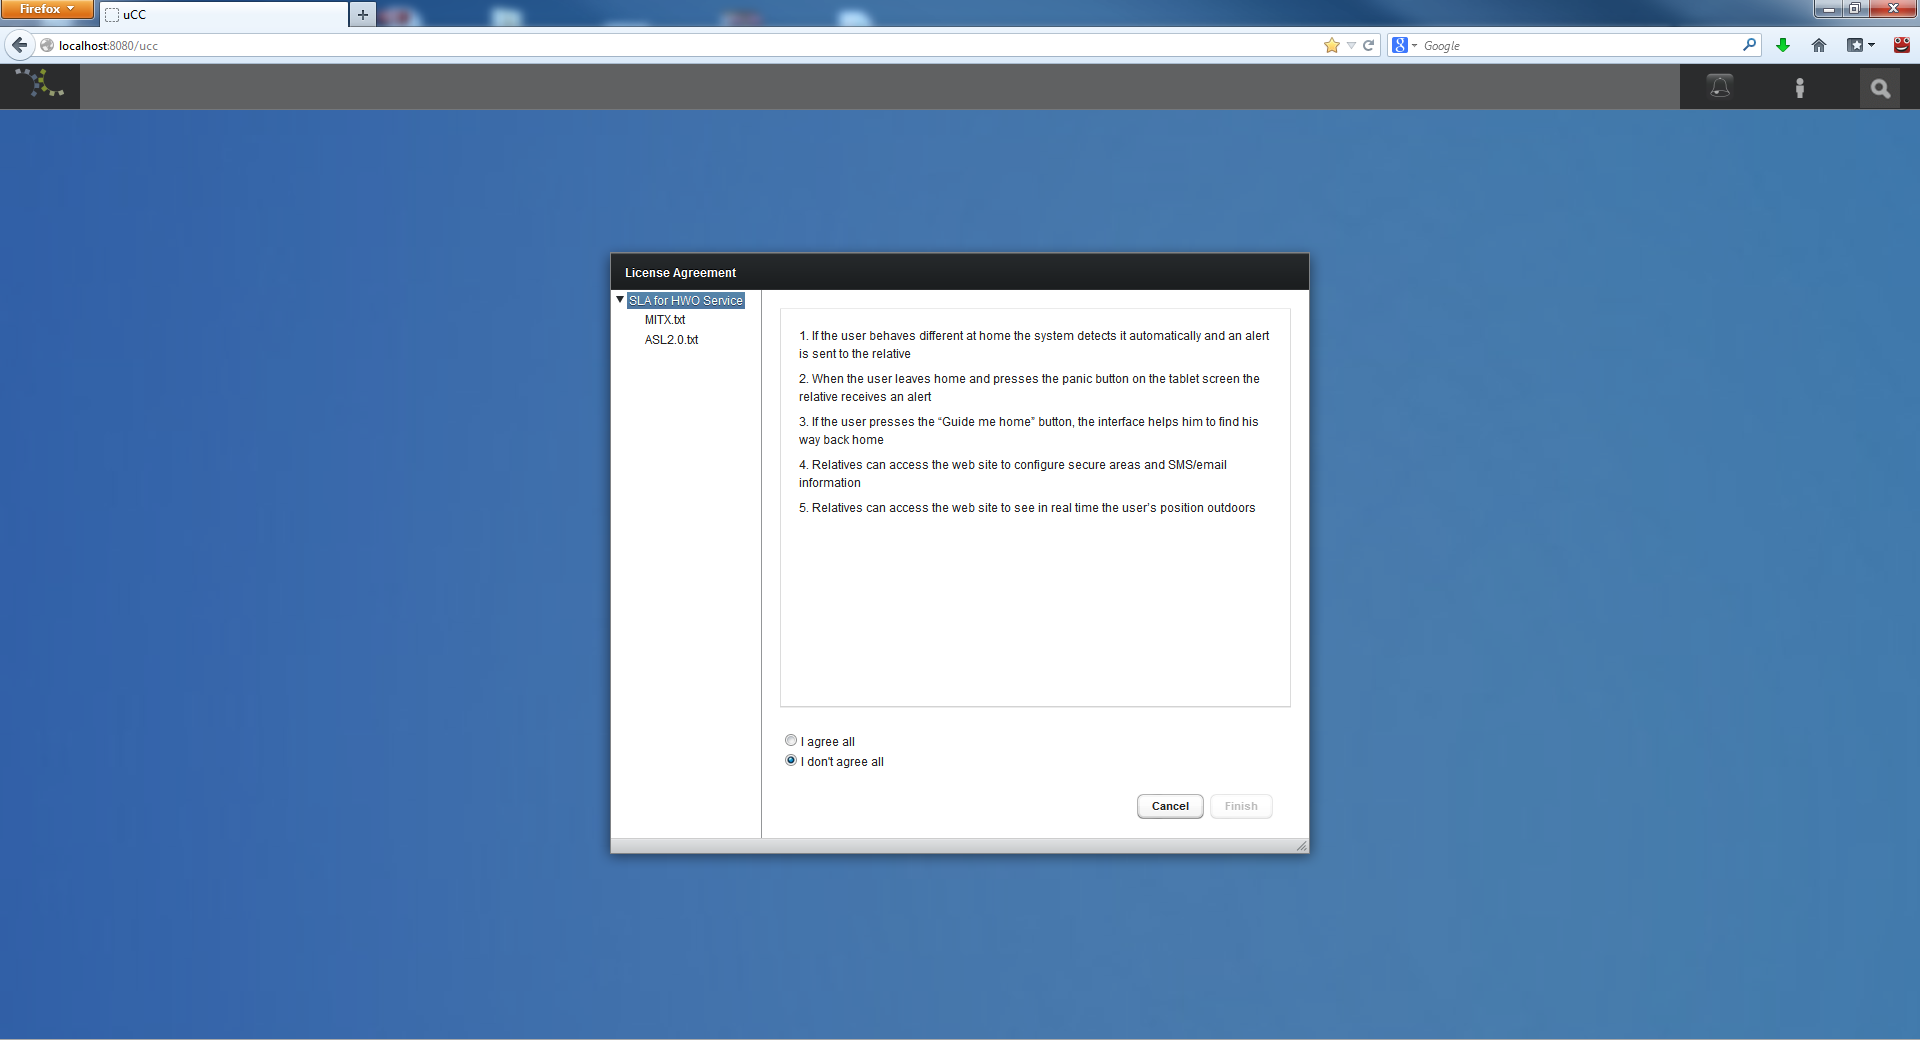
Now the installation process begins. In the next screen you can see the license agreement, which has to be accepted for the installation of a AAL service.


The installation steps follow after the chosen service is downloaded.

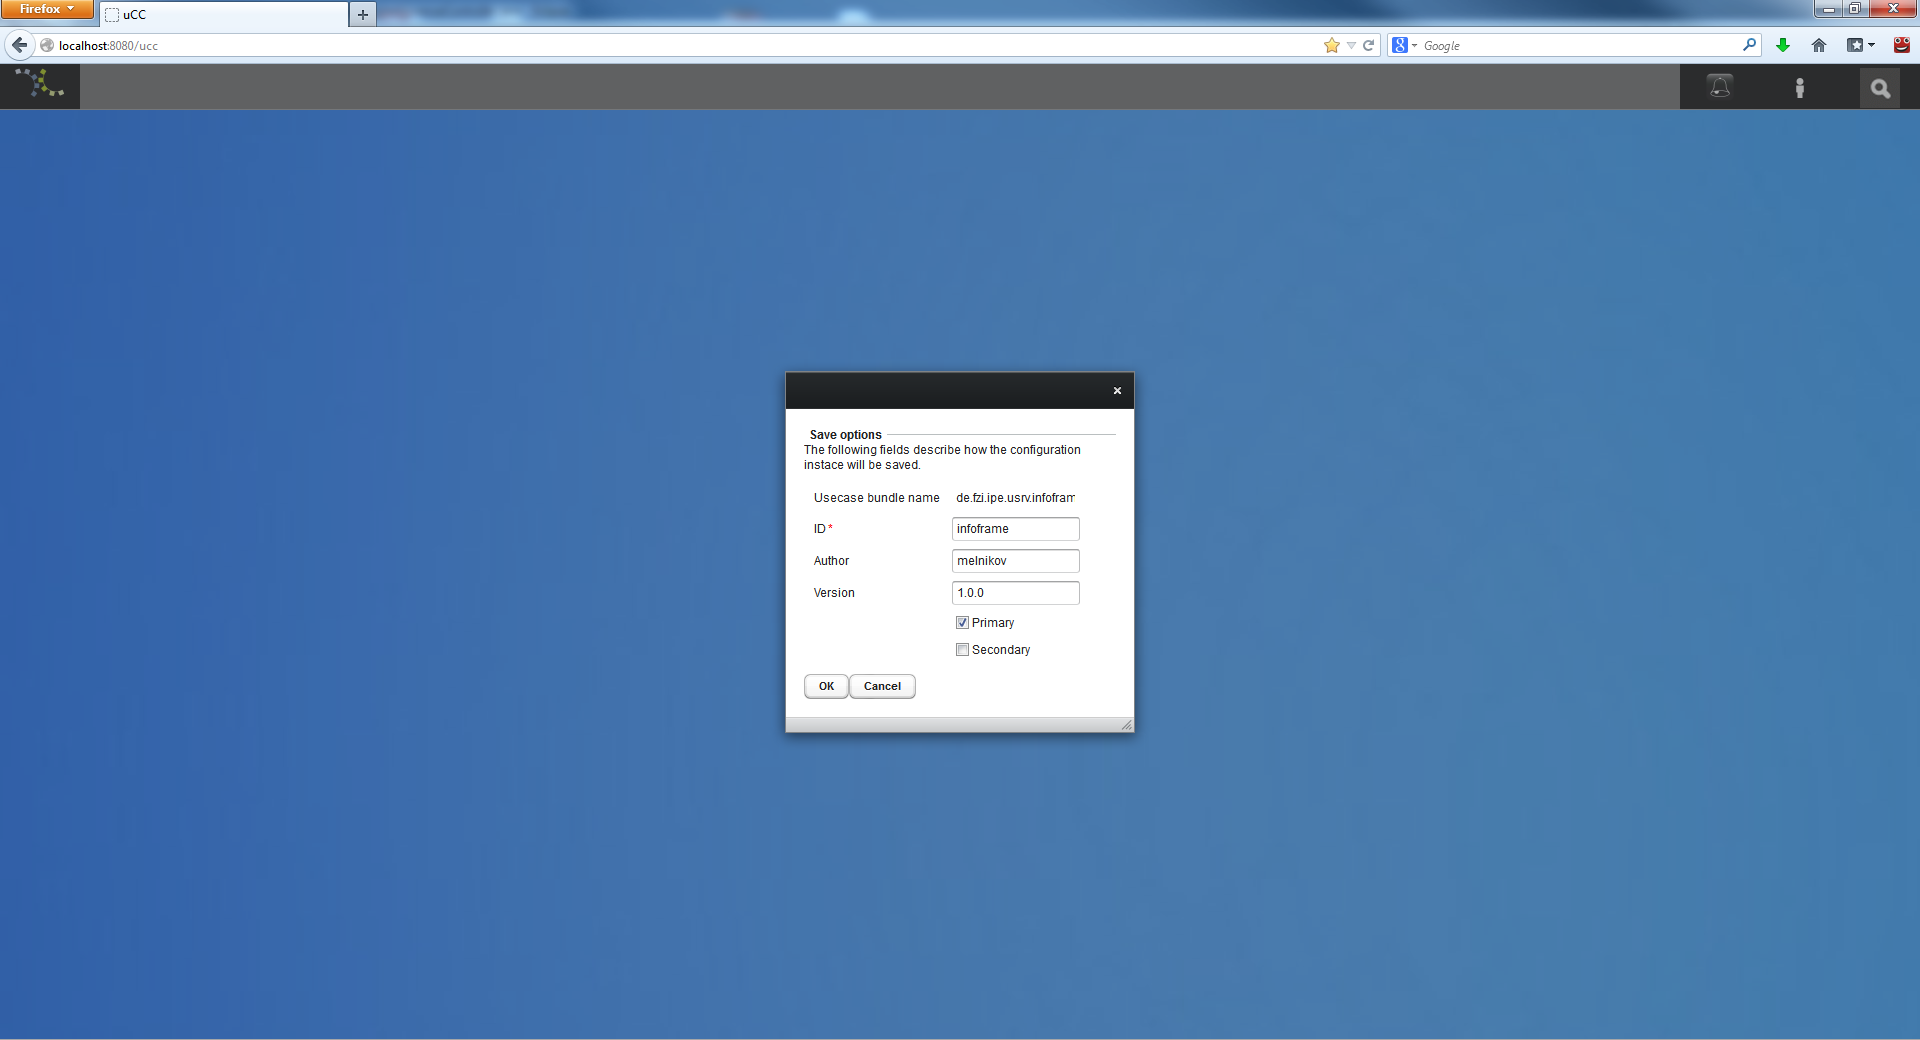
As an deployer you open the configurator. Then you need to choose the universAAL use case which you want to configure. After this you will see a screen with information about the configuration of the use case and all configuration instances. Now you are able to create a new configuration instance, to edit one or to delete. If you create a new or edit one a new window will open and show you the configuration options. At least you need to fill in the ones with a red star, the other ones are optional. If you finished the process of editing the configuration options, click the save button or press ctrl-s. Now a new window appears which ask you for more information about how to save the configuration instance.

Enter an unique id or an id of a configuration instance which should be replaced and check whether this is a primary or fallback configuration. Then save the configuration instance and close the window. Now you have finished the configuration process, the use case will use the first primary configuration which it could find, but this configuration instance selection could be changed in the future.

The developer guide gives a short overview about the usage of the uCC in eclipse and how to extend it.

This is a general installation guide with MW 2.0 and Karaf 2.2.9
First of all, you have to install the Middleware 2.0 and Karaf like it is described in MW2.0_Building_Block. You have also to install the Karaf OSGI Container, which you can find here. Actually the uCC runs with Karaf version 2.2.9. But in later iterations it will be run with a newer version of Karaf (e.g. Karaf 3.0.0 RC1). It is supposed that you have installed Maven, Eclipse IDE and Java JDK 1.5 or newer on your system.
Download the zip or tar.gz (dependant on your OS) package and unzip it to your local device. After you have unzipped your karaf folder, you can go into the karaf directory to bin folder and click the karaf.bat. Now the karaf OSGI Container is installed on your system. In the karaf folder you can see some directories:

For the moment you do not need to know, what the directories are for, but further below some directories will shortly mentioned.
After the successfully installation of Middleware and Karaf on your system, you have to create a new workspace in Eclipse IDE. Import the downloaded ucc bundles from SVN into your workspace. After that, you have to make a “Maven install” with all bundles within your Eclipse workspace, to install them into your local Maven repository.
Note: You have also the possibility to install the uCC bundles without Eclipse in your local Mavenrepository. To do this, you have to execute the mvn install command for the poms of the uCC bundles. For further information refer to http://maven.apache.org/guides/getting-started/index.html

If all bundles are successfully installed into Maven repository, you can switch to the karaf root directory.
In etc directory you can make some configurations for the middleware, like it is described in MW2.0_Building_Block MW2.0_Building_Block. In data/cache directory the karaf framework caches the bundles, which you start when running karaf. You can find there the cached bundles, which you should delete before restarting the karaf framework.
Finally we are prepared to start the uCC.
Go to karaf/bin directory and click the karaf.bat to start karaf. You should see now a opening console, which looks like the screenshot above on this site:
Now you have to type in the following command: features:install profilingserver.
Press enter.
After that insert the command: features:install uCC.
Press enter again.
Now be a little patient and wait till the on this side already shown console output appears.
Now you can open a browser of your choice (which supports html5) and type in the url: http://localhost:8080/ucc.
Finally the mentioned blue screen with a login field should appear in your browser.
Congratulations, you have installed uCC successfully :)
To login as a administrator you have to type in:
- username: admin
- password: uAAL
Now you are signed in and should configure the uCC, what will be described below.
Configuration of uCC
Click the button with the manikin (on the upper right side) to set information for ustore access. The preferences window, which we mentioned above opens. You can also select there your preferred language. There are actually two languages supported: German and English. Shown in the next screenshot.

After you have inserted your data into the textfields and have selected your language you can save it by pressing the Save Button on the lower right side. To close this panel you can press the little x on the upper right corner, but it automatically closes after pressing the save button. The values you inserted will be saved in a local database and are available on every use of uCC. Now your uCC is configured and can access uStore with the embedded uStore browser and install AAL services from there.
In order to keep the outline smart and because of historical reasons every plug-in has its own wiki page.