-
Notifications
You must be signed in to change notification settings - Fork 0
uCC
In opposite to the other tools presented in this Guide the uCC is not only for developers. It can help also a developer to test their applications, but in focus is a user oriented way to install universAAL applications at a local system. In general the uCC closes the gap between the run-time platform of universAAL and the user of the whole system. The basic idea of the uCC was a Home-Control-Center, that gives a single point of access to the most common functions. The most basic of these functions are to manage the locally installed applications and get basic feedback about the status of the system. Currently multiple views of uCC exist. In following we will describe the Vaadin-version of uCC which provides a HTML5 frontend you can access through a web-browser.
Besides applications, the other approach to extend the uCC is writing plug-ins for it. This means basically that tools can be included into the view of the uCC and therefore centralized presented to the user. For sure these plug-ins can use the provided functions given by the uCC core-components. In following we will show how to install the uCC and use some of it's features. You can find detailed information about uCC on the [UCC_-_configuration_and_personalization].
Copy the uccDB directory with it's xml files into the karaf folder.
Now you have to start the Karaf OSGi runtime you downloaded before. Go in to the corresponding karaf4uAAL- subfolder according to your operating system. Go in to the bin subfolder of the distribution and start Karaf by executing the karaf file.

You are now just two steps away from running uCC. Type into the Karaf console:
-
features:install profilingserverand press -
features:install uCCand press
The features will be installed now. Until this happens you have to wait a while. First starts the middleware, than the profilingserver and last but not least the uCC. The installation of the features is -depending on your system- a more or less lasting task. Your console should at least look like this:

If you have successfully managed the previous steps, the uCC is now running and can be opened in the browser. To start the uCC again after quitting just start the karaf runtime. No execution of additional commands are required since Karaf remembers the installed bundels from previous run and relaunches them on each start.
You can now open a web browser which supports html5, and type into the url field: http://localhost:8080/ucc. If everything was successfully done, you should see the next screen on your browser:

Congratulation, you have done it! :) Now you can create a account and login to uCC.
Currently there exists no tool to create a *.uaal file. But in a few words this is in the current version only a renamed *.zip file. This need to contain the following:
- All bundles that belongs to the application and not already included in the run of the uCC
- A textfile named EULA.txt that include licence information
- A xml-file named config.xml like described for the configuration tool
The basic idea when installing an application is to download a .uaal file from the uStore and save it locally. Then you can use "Install App" to select this file from the local system and get the new application running inside the OSGi instance of the uCC. To test out this process we are going to create a *.uaal file by our own. In every of our three created projects you will find a folder target (e.g. <worspacepath>/smp.lighting.ont/target). If you already build the bundle like described in the previous chapters you will find here a jar file called like the project name together with the version of the artefact (e.g. smp.lighting.ont-1.0.0-SNAPSHOT.jar). Simply create a ZIP-file <worspacepath></worspacepath></lighting.zip></worspacepath>and add the three jar-files to it. Also add a text-file EULA.txt that includes some text and the config.xml like provided in the chapter of the configuration extractor (like mentioned there unfortunately the CE currently do not provide valid files for the uCC). Now rename the project to lighting.uaal and start the uCC if not already done. In case of any trouble you can get an example file at the developer depot. Click on the start button in the top left of the screen and select Install. In the following dialogue you need to select the lighting.uaal file you created before:

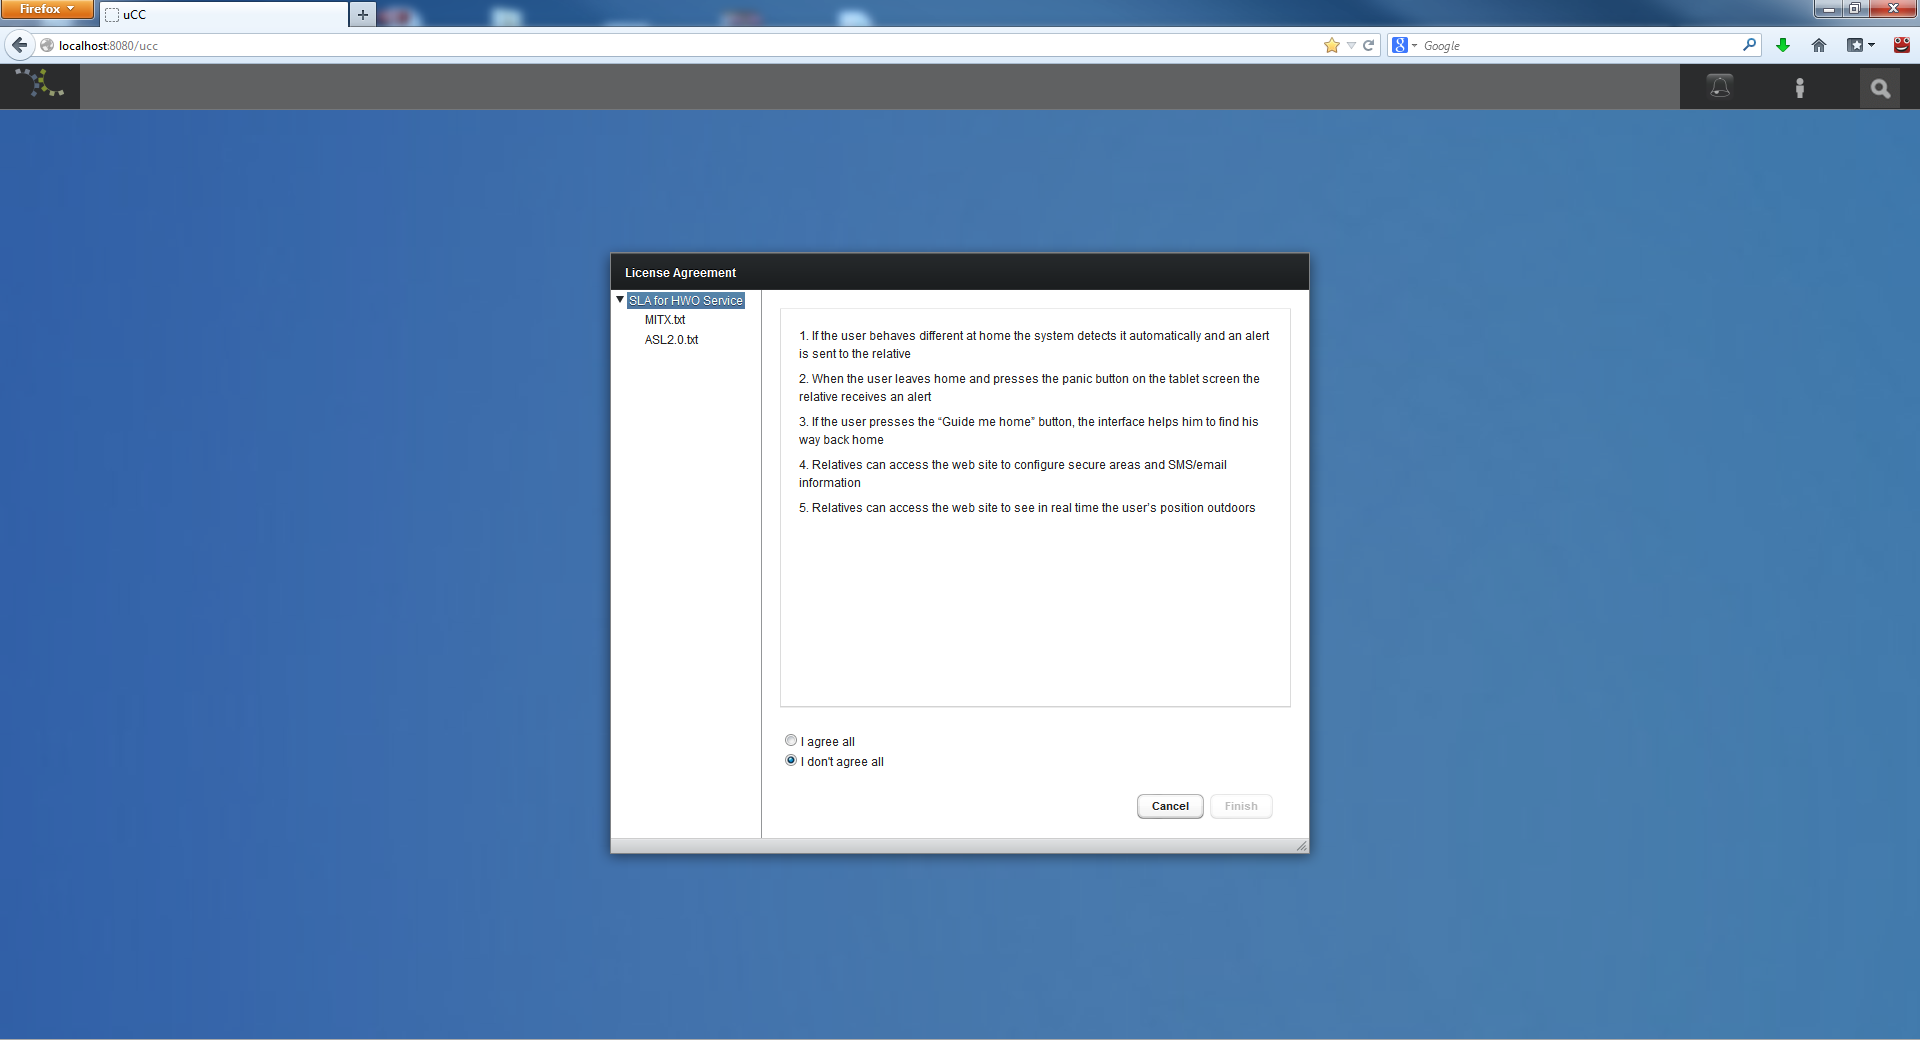
Simply use the OK button to proceed to the next step. A licence will be presented so you similar as shown below:

By have a click at Accept we now come to the configuration of the application. Fill in the configuration values and click OK.
The lighting example should be started now and you should be able to see the lamps list.
To access the configuration parameters from the program code we have to register the configuration first.
 configURL = FrameworkUtil.getBundle(this.getClass()).getResource("/serverConfiguration.xml ");
 configReg.registerConfigurationDefinition(configURL);
Now you are able to access this configuration with an instance of the "ConfigurationPreferences" class. So if we want to use the values given by the user we need to read it out. This can be done for example by the following code somewhere in the constructor of the SCallee class in the smp.lighting.server project:
 config = new ConfigPreferences(FrameworkUtil.getBundle(this.getClass()).getBundleContext().getBundle());
 setAutomaticBehaviour(config.getBoolean("time_config.AutomaticBehaviour"));
 setTimeToDisable(config.getBoolean("time_config.SwitchOffTime"));
The work at the uCC is still in progress and much to be done. The basic functionalities will be improved in the future and additional one will be included. One way we are going is to make it possible to write applications as a plug-in for the uCC. This allows you to directly show your graphical interfaces as a part of the universAAL platform. Also we will improve the interaction between uStore and uCC to make using of universAAL for a user as easy as possible.
An overview about the installation and usage of the uCC is given in the video below: Video