-
Notifications
You must be signed in to change notification settings - Fork 0
4 Create a Cloudfront distribution
HOME > SNOWPLOW SETUP GUIDE > Step 1: setup a Collector > [Setup the Cloudfront collector](setting up the cloudfront collector) > 4. Create a Cloudfront distribution
Having setup everything in S3, we now need to create a Cloudfront distribution. This will be used to serve the tracking pixel i. (So we need to tell Cloudfront to serve the contents of the first bucket in S3 we created, that houses the tracking pixel.) We also need to switch on Cloudfront logging, so that every request made for the tracking pixel by the Snowplow tracker will be logged. Again, we need to tell Cloudfront to store these logs in the bucket we created in step 3 above.
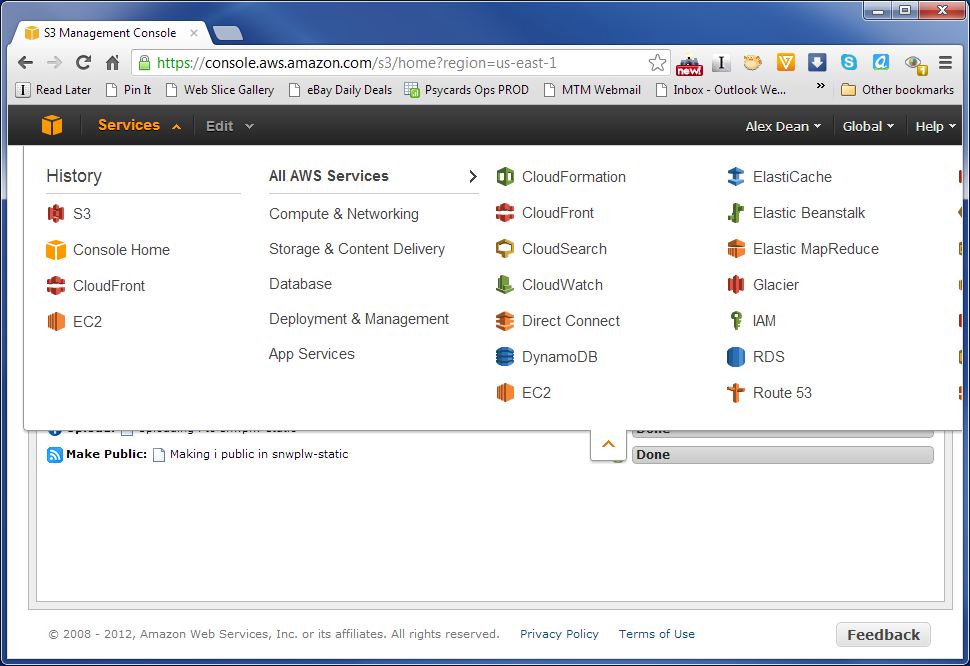
Click on the Services menu on the top left of the browser screen, and select Cloudfront from the drop down:
You should see a screen like the following: (Note - if you have not setup many Cloudfront distributinons previously, it will look a lot more sparse :-) .)
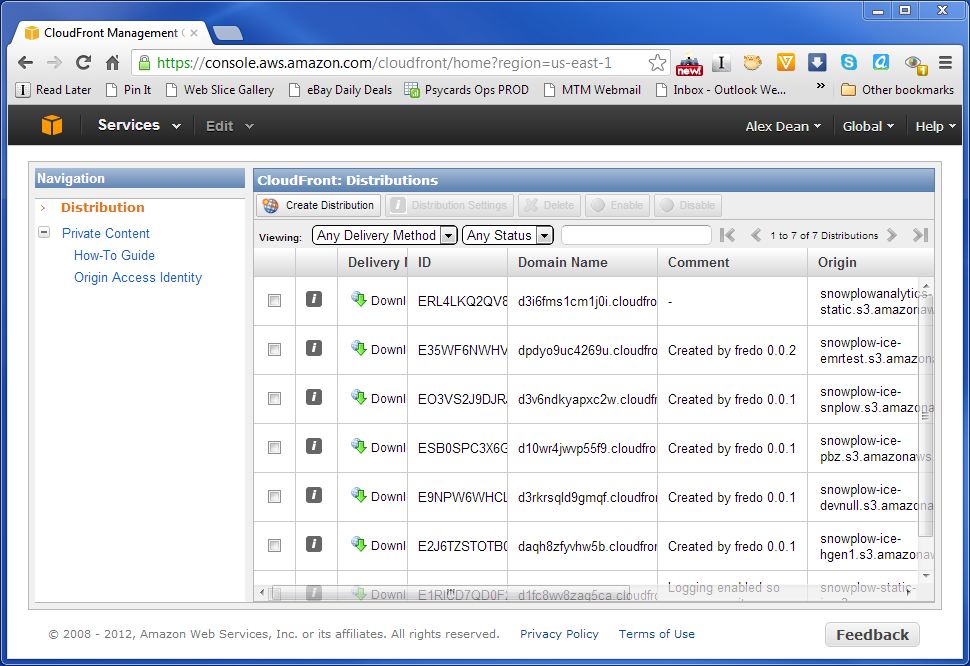
Click on the Create Distribution button on the top right of the window. When presented with the following screen, select Download (rather than Streaming) and click the Continue button.

Now we are presented with a screen with many options:
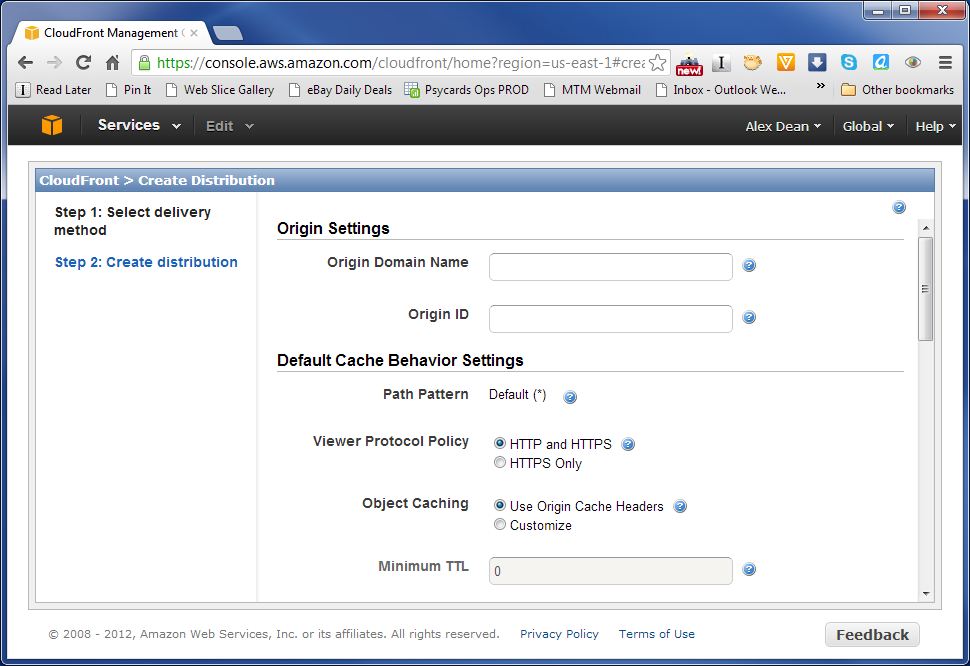
The first field, Origin Domain ID lets us specify where Cloudfront should find the content to distribute on the Cloudfront subdomain we are in the process of creating. If you click on it, you will be presented with a drop down:
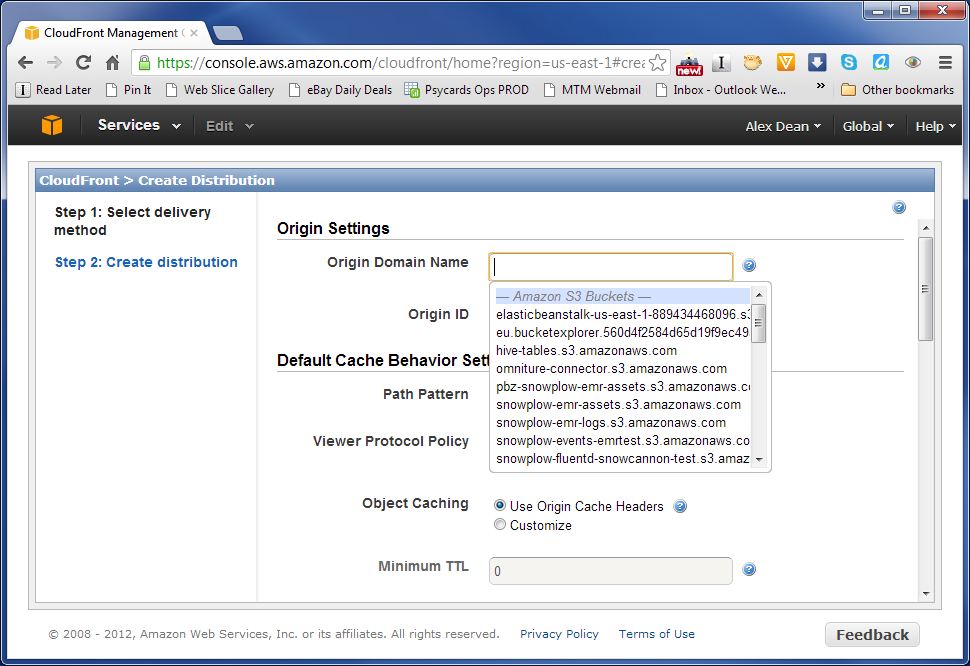
In the drop down you should see the bucket you setup in step 1 that contains the tracking pixel i. Selet this - the Origin ID field should be automatically populated for you:
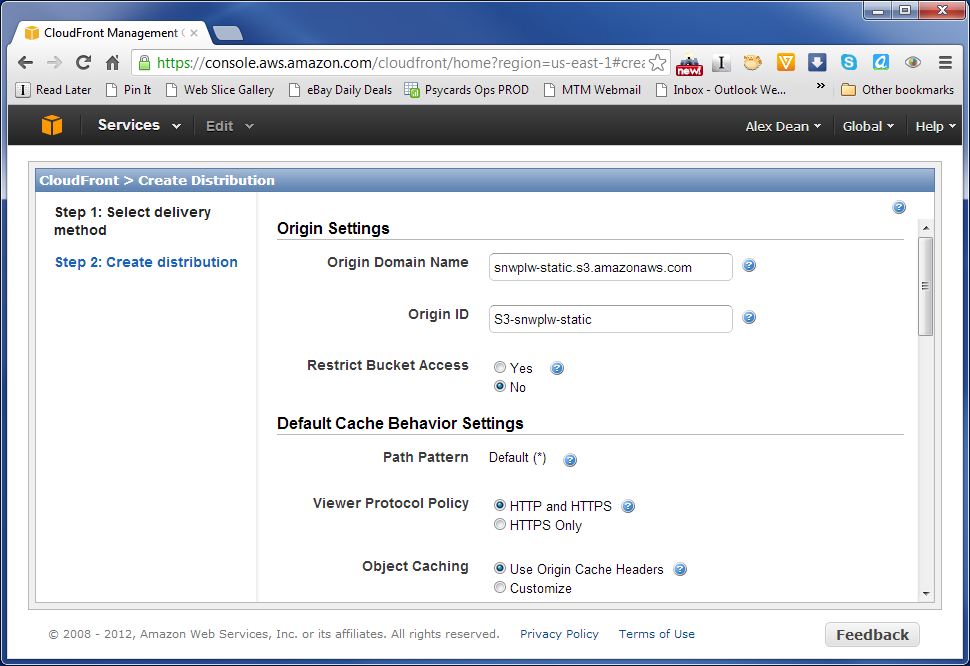
Great! We've linked the Cloudfront subdomain to the bucket on S3 with our tracking pixel. Now we need to switch on Cloudfront logging, and ensure that Cloudfront logs to the bucket we setup in S3. Scroll down the list of options (you will need to scroll quite far):
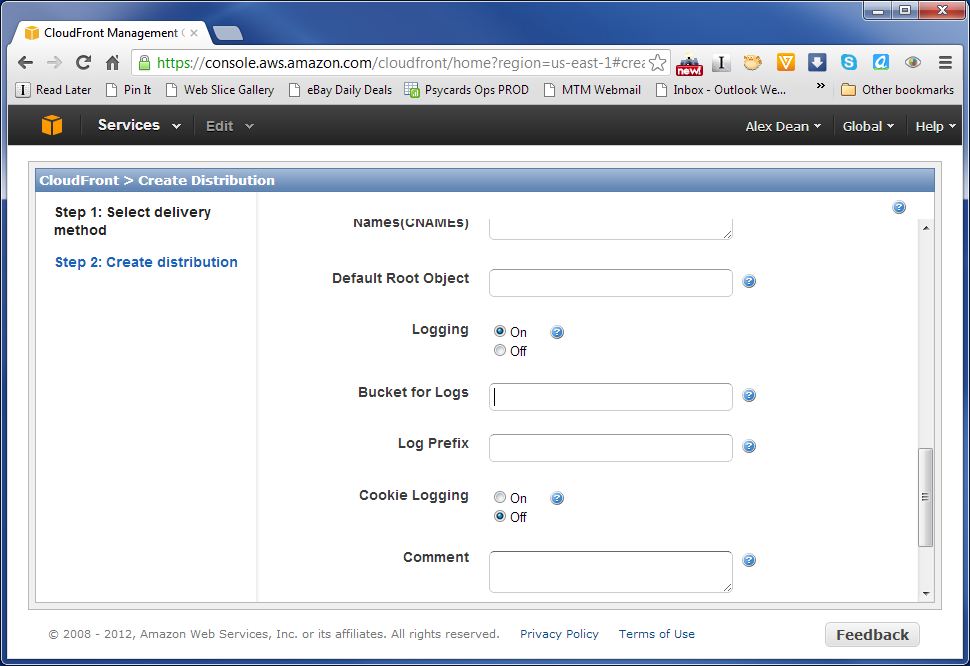
Change the radio button for Logging from Off to On. The two fields beneath it should be activated. Now click on the Buckets for logging field:
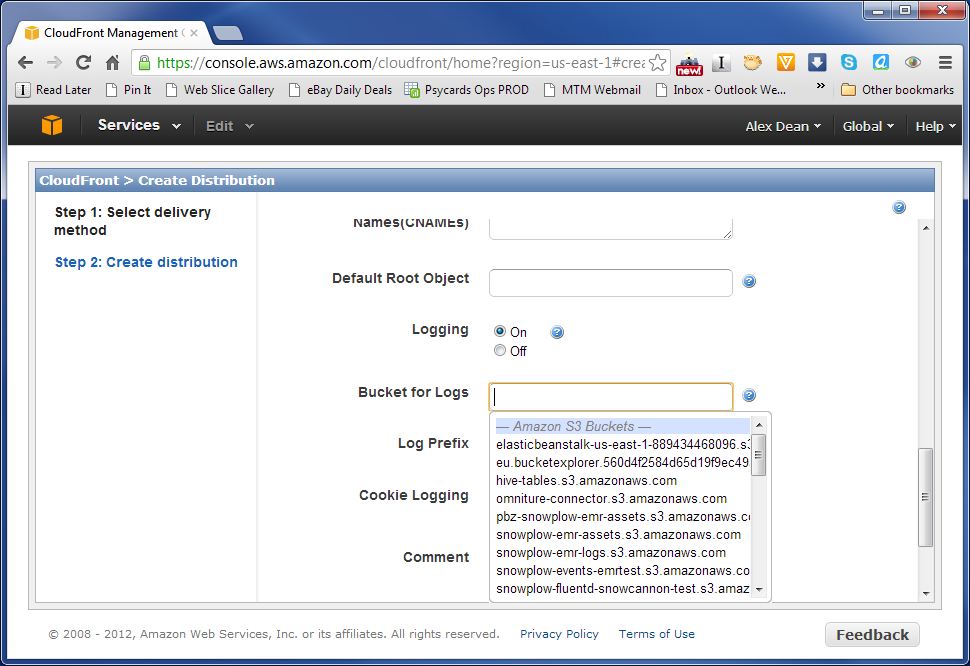
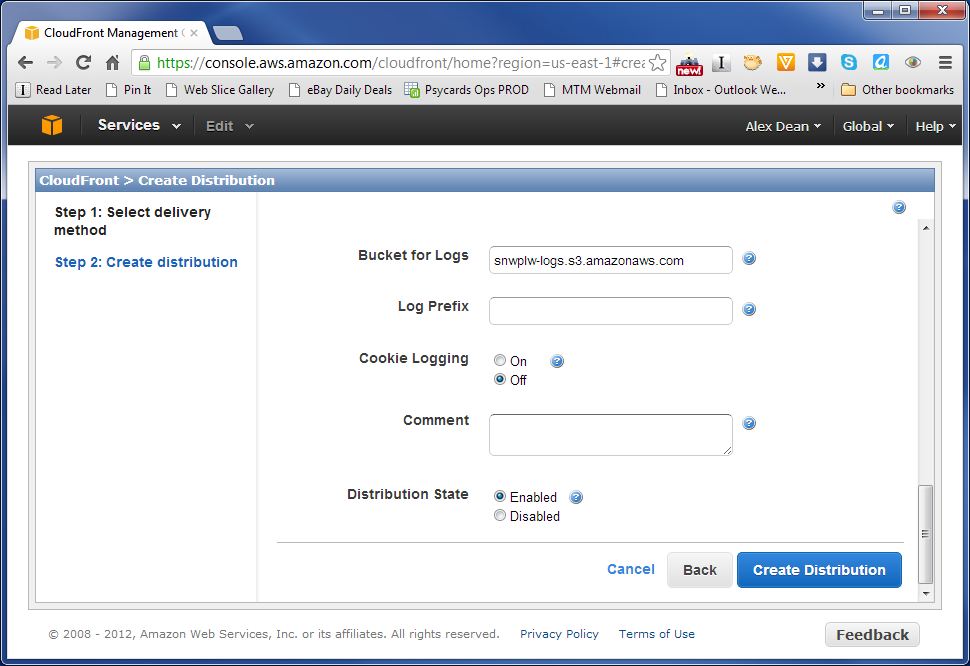
You should now be able to select the 2nd bucket you setup to store the logs.
Now all you need to do is tell Cloudfront to create the distribution. Scroll down to the end of the options and select the Create Distribution button:
You should see your new distribution listed:
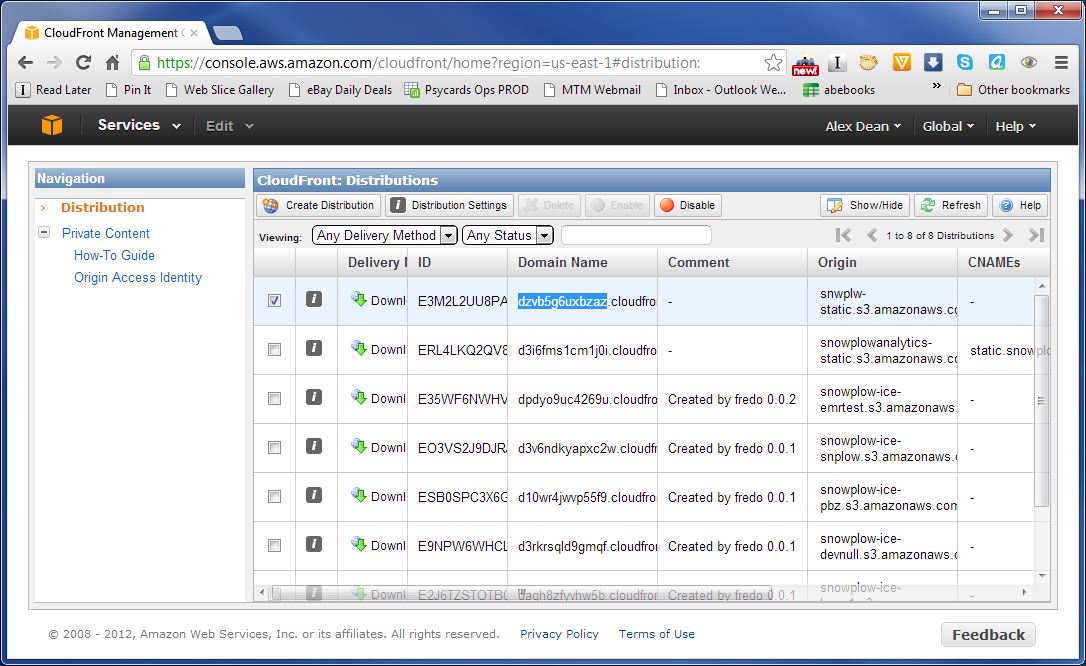
Write down the Domain Name for the distribution you just created. (Highlighted above - in our case it is http://dzvb5g6uxbzaz.cloudfront.net.) You will need this in the next step (to test the collector is working), and when you setup your tracker.
Proceed to step 5: test your pixel.
Return to an overview of the Cloudfront Collector setup.
Return to the setup guide.
Home | About | Project | Setup Guide | Technical Docs | Copyright © 2012-2013 Snowplow Analytics Ltd
HOME > SNOWPLOW SETUP GUIDE > Step 1: Setup a Collector > [Setup the Cloudfront Collector] (Setting-up-the-Cloudfront-collector)
- [Setup a Collector] (setting-up-a-collector)
- [Setup the Cloudfront Collector] (setting-up-the-Cloudfront-collector)
- [Step 2: Setup a Tracker] (setting-up-a-tracker)
- [Step 3: Setup EmrEtlRunner] (setting-up-EmrEtlRunner)
- [Step 4: Setup the StorageLoader] (setting-up-storageloader)
- [Step 5: Analyze your data!] (Getting started analyzing Snowplow data)
Useful resources