-
Notifications
You must be signed in to change notification settings - Fork 0
Contribution Guide
This page describes the contribution process for the EOP Project. This process is intended for developers who already have the skills required to work on the EOP but who do not yet have full committer rights. Two are the most important aspects when one wants to contribute to the EOP development. The former is more related to the procedure one should follow to declare their intentions to contribute to the code, what issue or feature one wants to work on, their plans to do that and existing developers already working with EOP who can offer advice and help to become familiar with the EOP development process. The latter aspect is more precisely technical and is related to how to work with the EOP repository to get the code and add the contributions (that can be anything from a small documentation to a new component).
This section focuses on the contributing side of the process.
-
Find something interesting to work on
The most obvious thing to work on is a bug or enhancement about which you are passionate. In addition a list of available projects may be found in the Get Involved Section. -
Discuss your contribution
Before you invest any significant amount of time it may be worth discussing what you plan to do with other developers working on the same code. They can offer comments and suggestions. Moreover, telling them that you're working on a particular item can also help to avoid wasting time in case someone else is already working on it. Developers can be reached by their mailing list: see Get Involved Section. -
Work with your sponsor
If you are a developer who belongs to one of the institutions involved in the Excitement Project, the EOP reference person of your institute is your sponsor. If you are an external developer (who does not belong to one of the four institutions working in EXCITEMENT), administrators will check if there is a developer who can sponsor you. If such a sponsor exists, such person will take ownership of that work. He/She will be your sponsor, who evaluates your work for correctness, performance, and coding style. If all goes well, after doing a pull request, the platform administrators will push your contribution into the EOP upstream. Here with the term "administrators" we mean those developers who have the right to merge code contributions back to the upstream. You can find the list of the current administrators in the Project Team Section available from the right menu.
In addition, the administrators are responsible for:
* Appropriateness of a contribution.
* Quality of a contribution: correctness, and coding style.
-
Register on GitHub
EOP is stored in a GitHub repository. GitHub offers free accounts for users and organizations working on open source projects. Creating your personal account on GitHub is one of the first things to do when you want to contribute to EOP. -
Submit your code
Your code must be built and tested on all EOP supported platforms before submission. To help the administrators check your code, before committing your contribution, you should at least:
- Check for syntax errors and warnings. Administrators do not accepts code that does not compile or that generates warnings in the upstream. Preparing Junit tests for testing the code and using software environments like Eclipse IDE for development could help you prevent them.
- EOP is Maven project and as a result it is very simple to test it from Eclipse as well as the command line, e.g.:
> mvn test - Check for missing Javadoc comments (that is for public classes and methods).
- We use Jenkins for continuous integration. Take a look at the report prepared for your server-side copy of code before submitting. If the report shows errors or significant warnings, administrators could ask you to fix the code and resubmit.
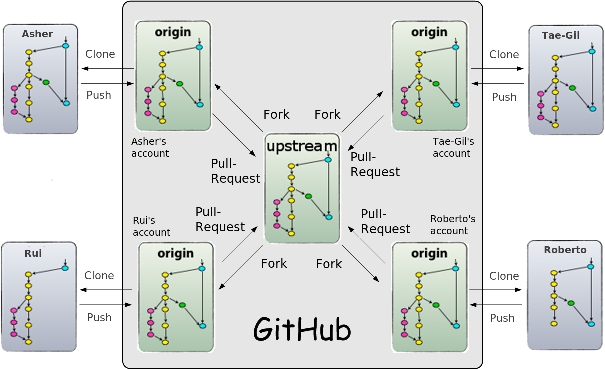
Differently from other git workflows, like the centralized workflow, in the adopted forking workflow when new developers want to start working on the project, they do not clone the official repository but create a personal copy of that repository by forking it. In this way they have a server-side copy, whereas to have a copy of the repository on their local machine they have to clone the repository (i.e. this is simply done by the git clone command).

The fork is called origin (that it because it is the origin of your local development repository), whereas the canonical project repository is called upstream (because it is upstream from origin). The developers work on their local copy of the software and then push their local commits to origin to update their own repository on GitHub with the changes. Finally, they do a pull request to let the maintainer of the platform know that a contribution is ready to be integrated. In turn, the maintainer checks the update to be sure that the changes do not break the project and merge it into the master branch.
Forking the project is required to take a copy of the project’s source code for independent development. To do that, the first step consists in logging in to your personal Github account and then fork the repository project by clicking the Fork button at the top of the EOP github page (i.e. https://github.com/hltfbk/Excitement-Open-Platform). GitHub creates a public clone of the project in your GitHub account.
After forking the project, you need to clone it. By the following instructions you will make a copy of your fork and download the code on your local computer:
1. mkdir excitement_open_platform-git
2. cd excitement_open_platform-git
3. git clone [email protected]:user_account/Excitement-Open-Platform.git
where user_account is developer's user name on GitHub.
When a repository is cloned, it has a default remote called origin that points to your fork on GitHub, not the original repository it was forked from. To keep track of the original repository, you need to add another remote named upstream:
1. cd Excitement-Open-Platform
2. git remote add upstream [email protected]:hltfbk/Excitement-Open-Platform.git
If the original repository you forked your project from gets updated, you can add updates to your fork by the following code:
1. git fetch upstream (Getting changes from the original repo)
2. git merge upstream/master (Merges changes fetched into your working files)
git push origin master
When you want to contribute to the original fork (i.e. EOP repository), you have to send the administrators a pull request (click on the Pull request button available from the GitHub web page).
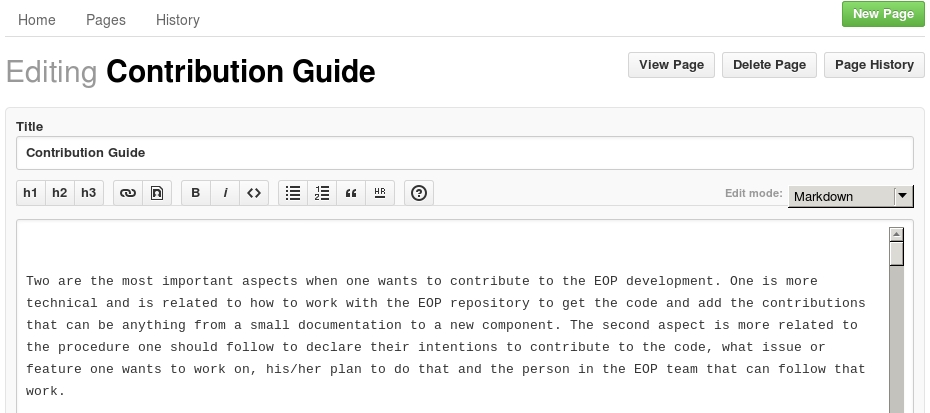
To write the documentation the new GitHub wiki editor is used. It is available from the EOP GitHub repository and its main features include:
- Functional support for most popular markup languages (e.g. Markdown).
- Full-page preview.
- Revert capabilities.

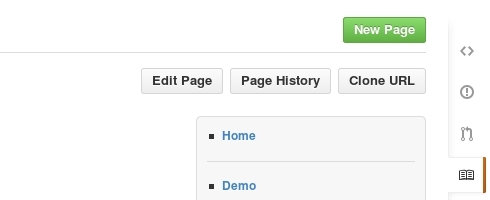
With the wiki editor you can both create new pages (by the New Page button) or edit an existing one (by the Edit Page button).

Before creating a new documentation release, its pages need to be reviewed. To let reviewers easily look for new pages or for pages that have been changed we used to putting a label on top of the page in case a new page is created or changed. [under development] is the label to let reviewers see that you are working on it, whereas [to be reviewed] is the label when you finish working on it.
If you would like to put images in the wiki pages, please commit them to the wiki-images directory that resides in the EOP distribution's Git repository (in the gh-pages branch): https://github.com/hltfbk/Excitement-Open-Platform/tree/gh-pages/wiki-images/.
To commit new images into the gh-pages branch:
> git checkout gh-pages
then copy your files into the wiki_pages directory and after that:
> git add your_files
> git commit
> git push origin HEAD:gh-pages
> git checkout master
Please note that, when you do a fetch that brings down new remote branches (like gh-pages could be), you do not automatically have local, editable copies of them. In other words you do not have a new gh-pages branch; what you have is only an origin/gh-pages pointer that you cannot modify. If you want your own gh-pages branch that you can work with, you need base it off your remote branch. Before running the command listed above check if the gh-pages branch already exists:
> git branch -a
If you can see the remotes/origin/gh-pages branch but not the local gh-pages one you have to base it off:
> git checkout -b gh-pages origin/gh-pages
- Licence
- Requirements
- Installation
- Quick Start
- Step by Step Tutorial
- Entailment Algorithms
- BIUTEE
- EDITS
- TIE
- Lexical Resources
- Configuration Files
- FAQ