教材網址:https://github.com/rkuo2000/EdgeAI-AmebaPro2
LLM服務器程式範例: AmebaPro2_server (.py)
Arduino 程式範例: Arduino/AMB82-mini (.ino)
自強基金會 WiFi
SSID: TCFSTWIFI.ALL
Pass: 035623116
32-bit Arm v8M, up to 500MHz, 768KB ROM, 512KB RAM, 16MB Flash (MCM embedded DDR2/DDR3L up to 128MB)
802.11 a/b/g/n WiFi 2.4GHz/5GHz, BLE 5.1, NN Engine 0.4 TOPS, Crypto Engine, Audio Codec, ...
Arduino IDE 2.3.2 下載 & 安裝
Hub8735 ultra
https://raw.githubusercontent.com/ideashatch/HUB-8735/main/amebapro2_arduino/Arduino_package/ideasHatch.json
AMB82-mini
https://github.com/ambiot/ambpro2_arduino/raw/main/Arduino_package/package_realtek_amebapro2_index.json
Tools > Board Manager > AMB82 package > 4.0.7
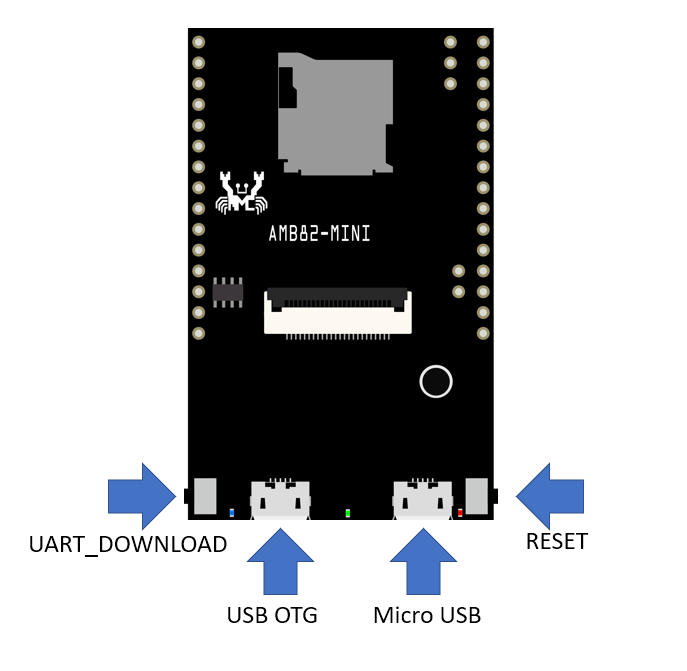
首先將AMB82-mini板子用MicroUSB線 連接至電腦的USB port
- 01.Basics> Blink
- 02.Digitial> GPIO> Button
修改程式碼:
const int buttonPin = 1;  // the number of the pushbutton pin
const int ledPin = LED_BUILTIN;    // the number of the LED pin
- 瀏覽器打開 EdgeAI-AmebaPro2, 點[Code]並選 [Download ZIP]
- 解壓縮.zip, 並將 Arduino/AMB82-mini 複製到 Documents/Arduino底下
Serial-monitor baud rate = 115200
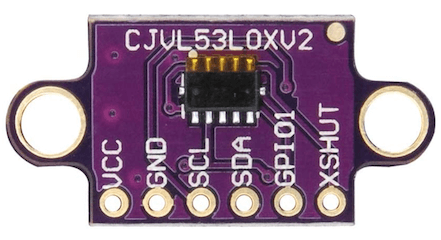
Datasheet: VL53L0X - Time-of-Flight ranging sensor
Sketch: IR_VL53L0X
Sketch: IMU MPU6050-DMP6v12
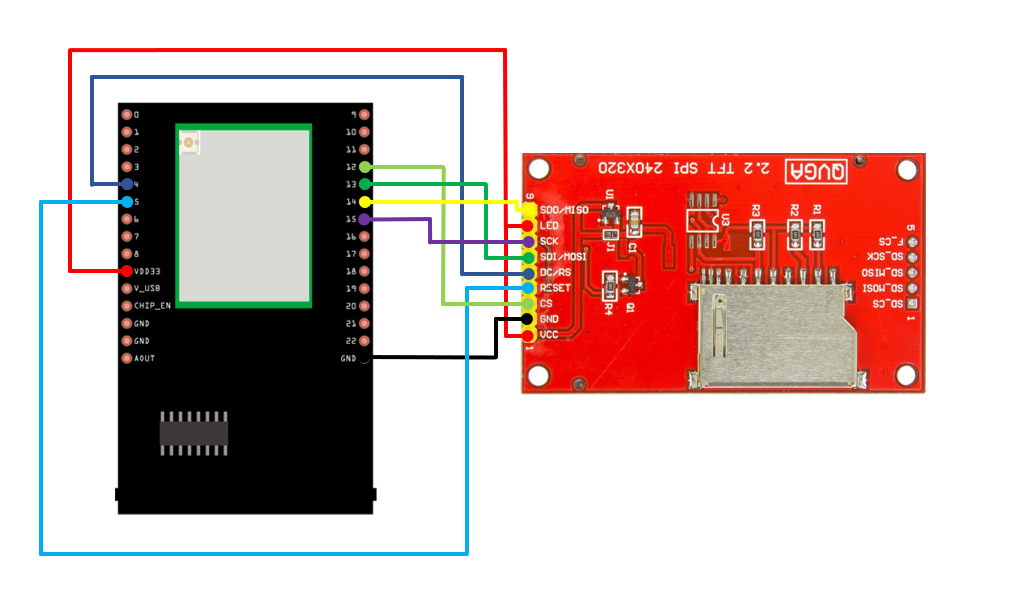
- MOSI: Standard SPI Pin
- MISO: Standard SPI Pin
- SLK: Standard SPI Pin
- CS: Standard SPI Pin
- RESET: Used to reboot LCD.
- D/C: Data/Command. When it is at LOW, the signal transmitted are commands, otherwise the data transmitted are data.
- LED (or BL): Adapt the screen backlight. Can be controlled by PWM or connected to VCC for 100% backlight.
- VCC: Connected to 3V or 5V, depends on its spec.
- GND: Connected to GND.
Sketch: Camera_TFTLCD
Exmples/AmebaSPI:
- LCD_Screen_ILI9341_TFT : LCD Draw Tests
- Camera_2_Lcd : Camera output , then Jpeg Decoder to TFT-LCD
- Camera_2_Lcd_JPEGDEC : Camera output, saved to SDcard, then Jpeg Decoder to read to TFT-LCD
Sketch: RTSP_VideoOnly
Examples: AmebaMultimedia / MotionDetection / LoopPostProcessing.ino
- 修改ssid, passwd, 後燒錄到AMB82-mini,
- 按reset後程式即開始運行, 用serial-monitor 查看顯示串流網址
- 啟動手機或電腦上之VLC player, 設定RTSP串流網址
Examples: AmebaMultimedia / MotionDetection / MotionDetectGoogleLineNotify
Audio & Mic
Examples: AmebaMultimedia / Audio /LoopbackTest
Skatch: MP3_Player
- store a song.mp3 onto SDcard
- cd ~/.arduino15/packages/ideasHatch/hardware/AmebaPro2/4.0.13-Release/
- copy
variants/common_libs/MP3_Player.ato ~/.arduino15/packages/realtek/hardware/AmebaPro2/4.0.7/variants/common_libs - edit
platform.txt(~/.arduino15/packages/realtek/hardware/AmebaPro2/4.0.7/platform.txt) to add "{com_lib.path}/MP3_Player.a" into Ameba archive list (compiler.ameba.ar.list) - copy
libraries/MP3_Playerto ~/.arduino15/packages/realtek/hardware/AmebaPro2/4.0.7/libraries
Upload & Reset to run
Examples: AmebaMultimedia / Audio / RTSPAudioStream
Examples: AmebaMultimedia / RecordMP4 / AudioOnly
Examples: AmebaNN / AudioClassification
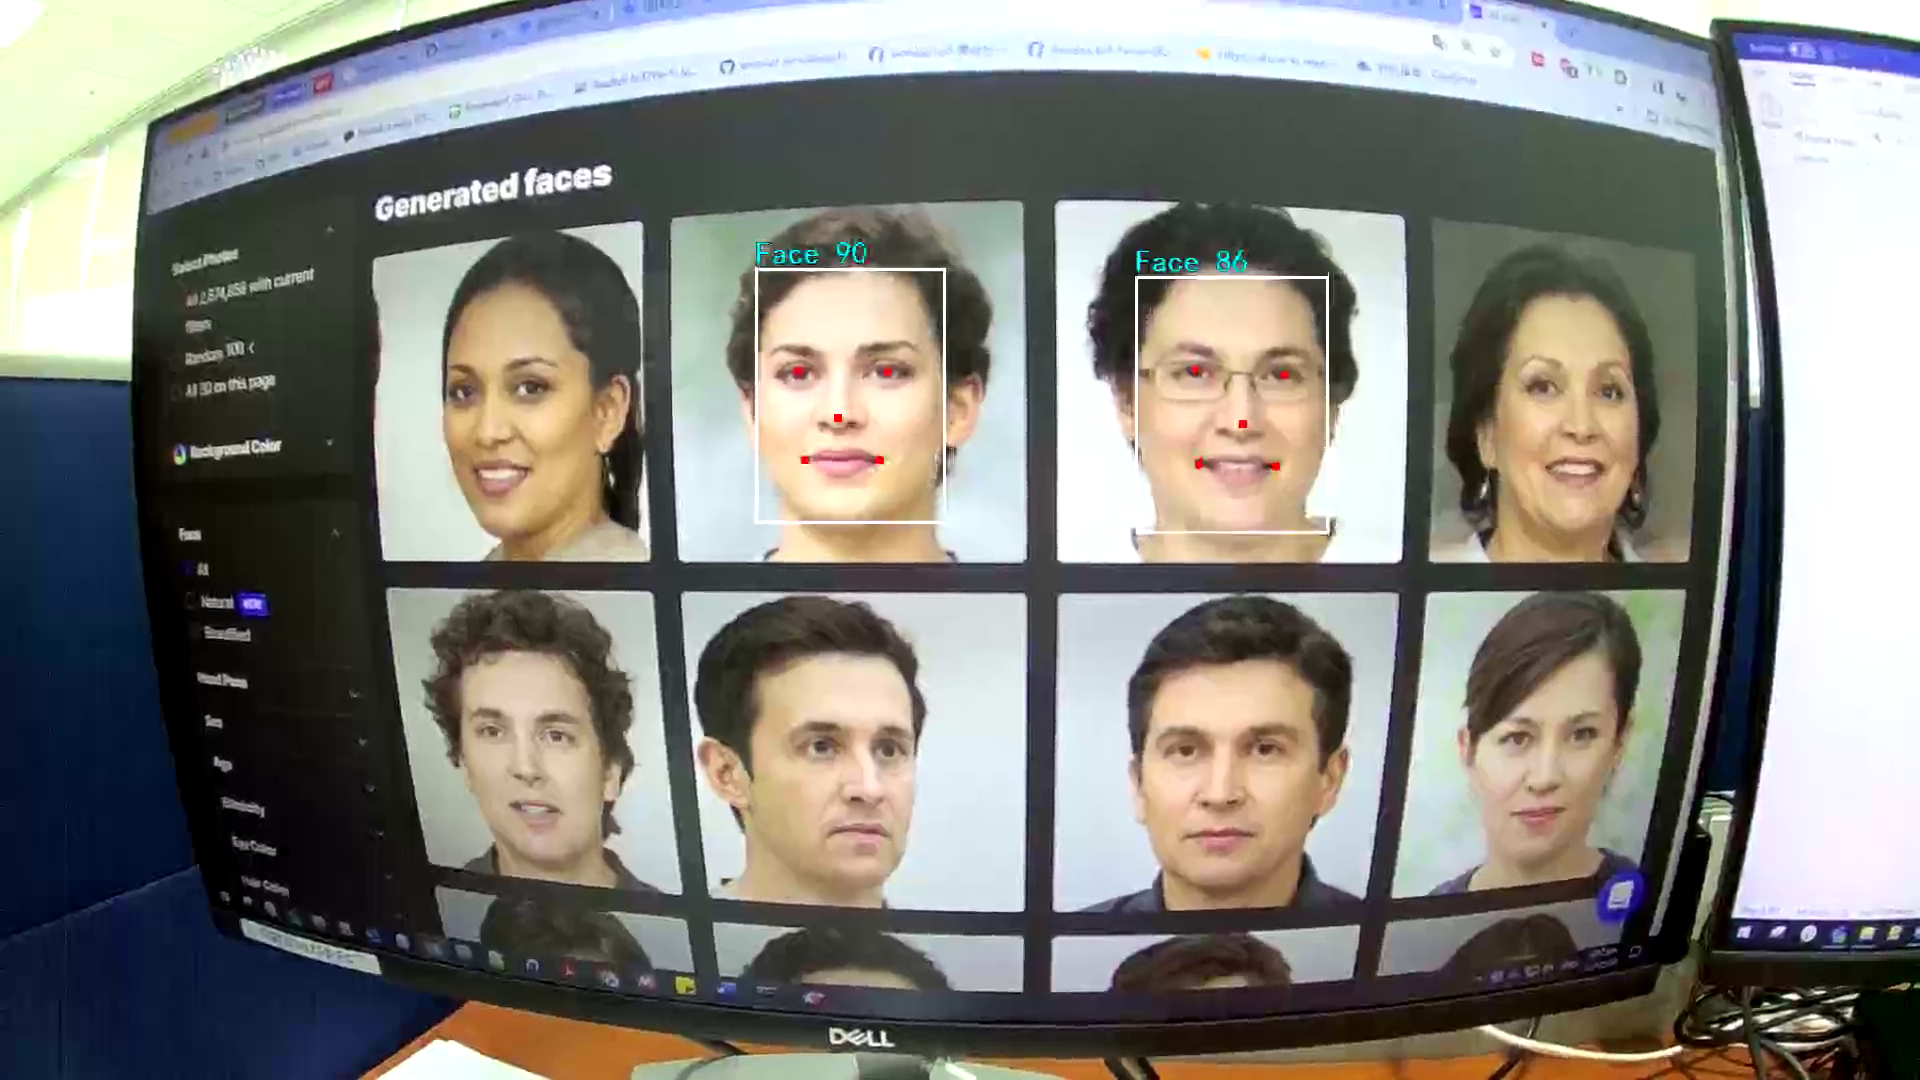
Examples: AmebaNN / RTSPFaceDetection
Examples: AmebaNN / RTSPFaceRecognition
Serial_monitor: REG=RKUO
- Enter the command REG=Name to give the targeted face a name.
- Enter the command DEL=Name to delete a certain registered face. For example,
DEL=SAM - Enter the command BACKUP to save a copy of registered faces to flash.
- If a backup exists, enter the command RESTORE to load registered faces from flash.
- Enter the command RESET to forget all previously registered faces.
required in kaggle for AmebaPro2
- pip install tensorflow==2.14.1
- model.save('garbage_cnn.h5', include_optimizer=False)
- Download garbage_cnn.h5 from kaggle.com/rkuo2000/garbage-cnn
Output - Compress garbage_cnn.h5 to garbage_cnn.zip
- Go to Amebapro2 AI convert model, fill up your E-mail
- Upload garbage_cnn.zip
- Upload one (.jpg) test picture (EX. glass100.jpg from Garbage dataset)
- Email will be sent to you for the link of
network_binary.nb
- click the recieved Email link to download
network_binary.nb - create NN_MDL folder in SDcard, save network_binary.nb under NN_MDL folder, and rename it to
imgclassification.nb - plugin SDcard back to AMB82-MINI
- modify Sketch RTSP_GarbageClassification.ino
- modify SSID and PASSWD
- modify imgclass.modelSelect (change DEFAULT_IMGCLASS to CUSTOMIZED_IMGCLASS)
- burn code into board AMB82-MINI, and run it with VLC player streaming
Kaggle範例:
- YOLOv7 Facemask detection
- YOLOv7 Pothole detection
- YOLOv7 Sushi detection
- YOLOv7 refrigeratoryfood
- YOLOv7 reparm
- repro https://github.com/WongKinYiu/yolov7
- create pothole.yaml
%%writefile data/pothole.yaml
train: ./Datasets/pothole/train/images
val:  ./Datasets/pothole/valid/images
test: ./Datasets/pothole/test/images

# Classes
nc: 1  # number of classes
names: ['pothole']  # class names
- YOLOv7-Tiny Fixed Resolution Training
!sed -i "s/nc: 80/nc: 1/" cfg/training/yolov7-tiny.yaml
!sed -i "s/IDetect/Detect/" cfg/training/yolov7-tiny.yaml
- Download
best.ptfrom kaggle.com/rkuo2000/yolov7-pothole - Compress best.pt to
best.zip - Go to Amebapro2 AI convert model, fill up your E-mail
- Upload best.zip
- Upload one (.jpg) test picture (EX. pothole_test.jpg from Pothole dataset)
- Email will be sent to you for the link of
network_binary.nb
- click the recieved Email link to download
network_binary.nb - create NN_MDL folder in SDcard, save network_binary.nb under NN_MDL folder, and rename it to
yolov7_tiny.nb - plugin SDcard back to AMB82-MINI
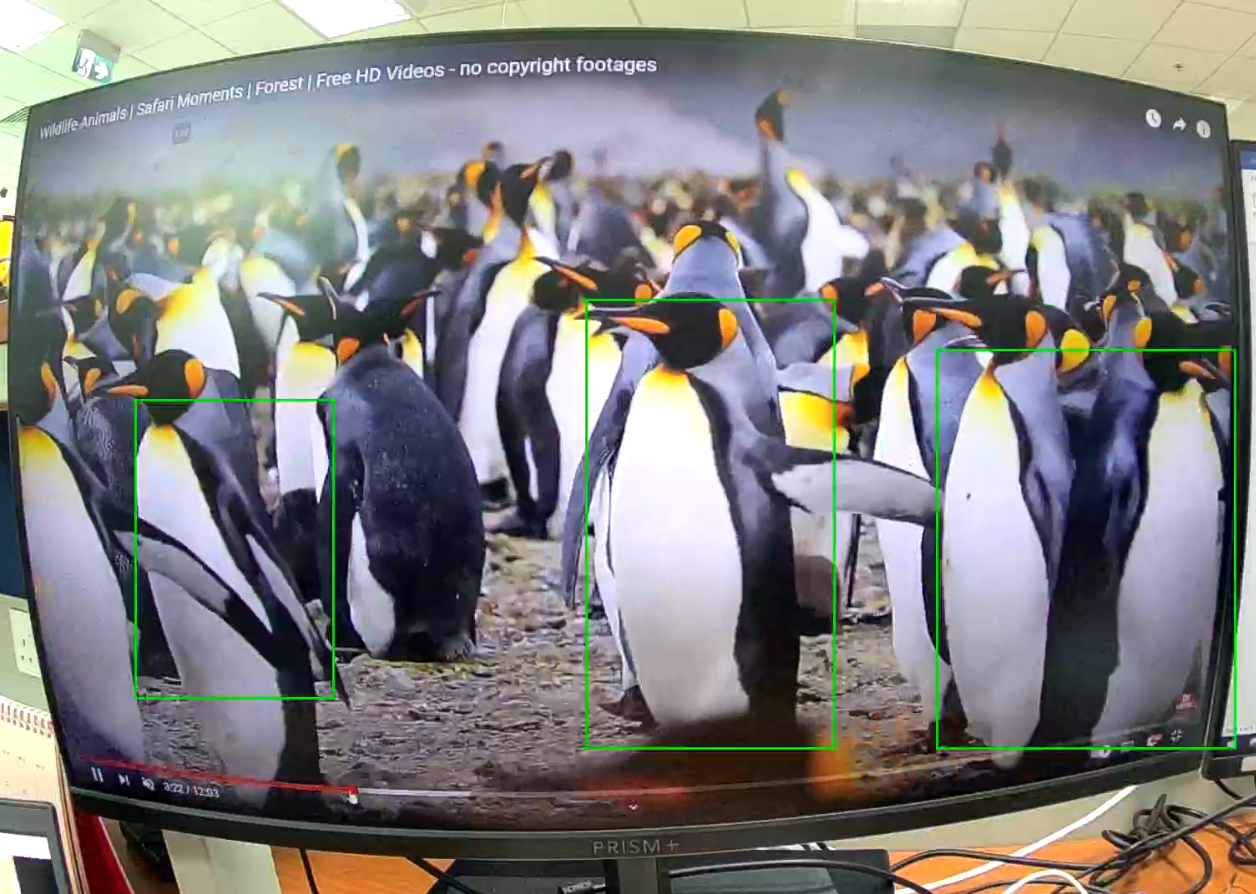
- modify Sketch RTSP_YOLOv7_Pothole_Detection.ino
- modify SSID and PASSWD
- modify ObjDet.modelSelect(OBJECT_DETECTION, CUSTOMIZED_YOLOV7TINY, NA_MODEL, NA_MODEL);
- burn code into board AMB82-MINI, and run it with VLC player streaming
RTPS_ObjectDetection_AudioClassification.ino
Download ffmpeg-master-latest-win64-gpl.zip, extract & put ffmpeg.exe into where you run Whisper server.
- 到 https://aistudio.google.com/app/apikey 取得API_Key 填入GOOGLE_API_KEY, 再執行AmebaPro2_Whisper_Gemini_server.py
- 修改server IP位址 in RecordMP4_HTTP_Post_Audio.ino server IP位址, then 燒錄到 AMB82-MINI
- reset AMB82-MINI 來啟動, 按鍵兩秒後即可錄音詢問 LLM/Gemini
(trash classification, IR collision detection)
(voice-control, BLE remote-control, line-notify, object-detection)
step 1. running AmebaPro2_Gemini_server.py Gemini-1.5-flash

Step 2. running HTTP_Post_ImageText_TFTLCD.ino
press button for 2 seconds, when Blue-LED is on, it starts capturing image and send to Gemini

Step 3. AmebaPro2_Gemini_server will pass the image & text to Gemini, and reply the recieved result.text
(AmebaPro2 Gemini server will add , please answer briefly. to the prompt)


