Shot Check is an automated QA tool. Its purpose is to capture screenshots of a website before and after a code change, detect differences in the before and after screenshots, and report the differences to the tester.
Download the installer for your platform (Mac OS or Windows) from the latest release page. Shot Check will automatically check for updates and install the latest stable release every time it is launched.
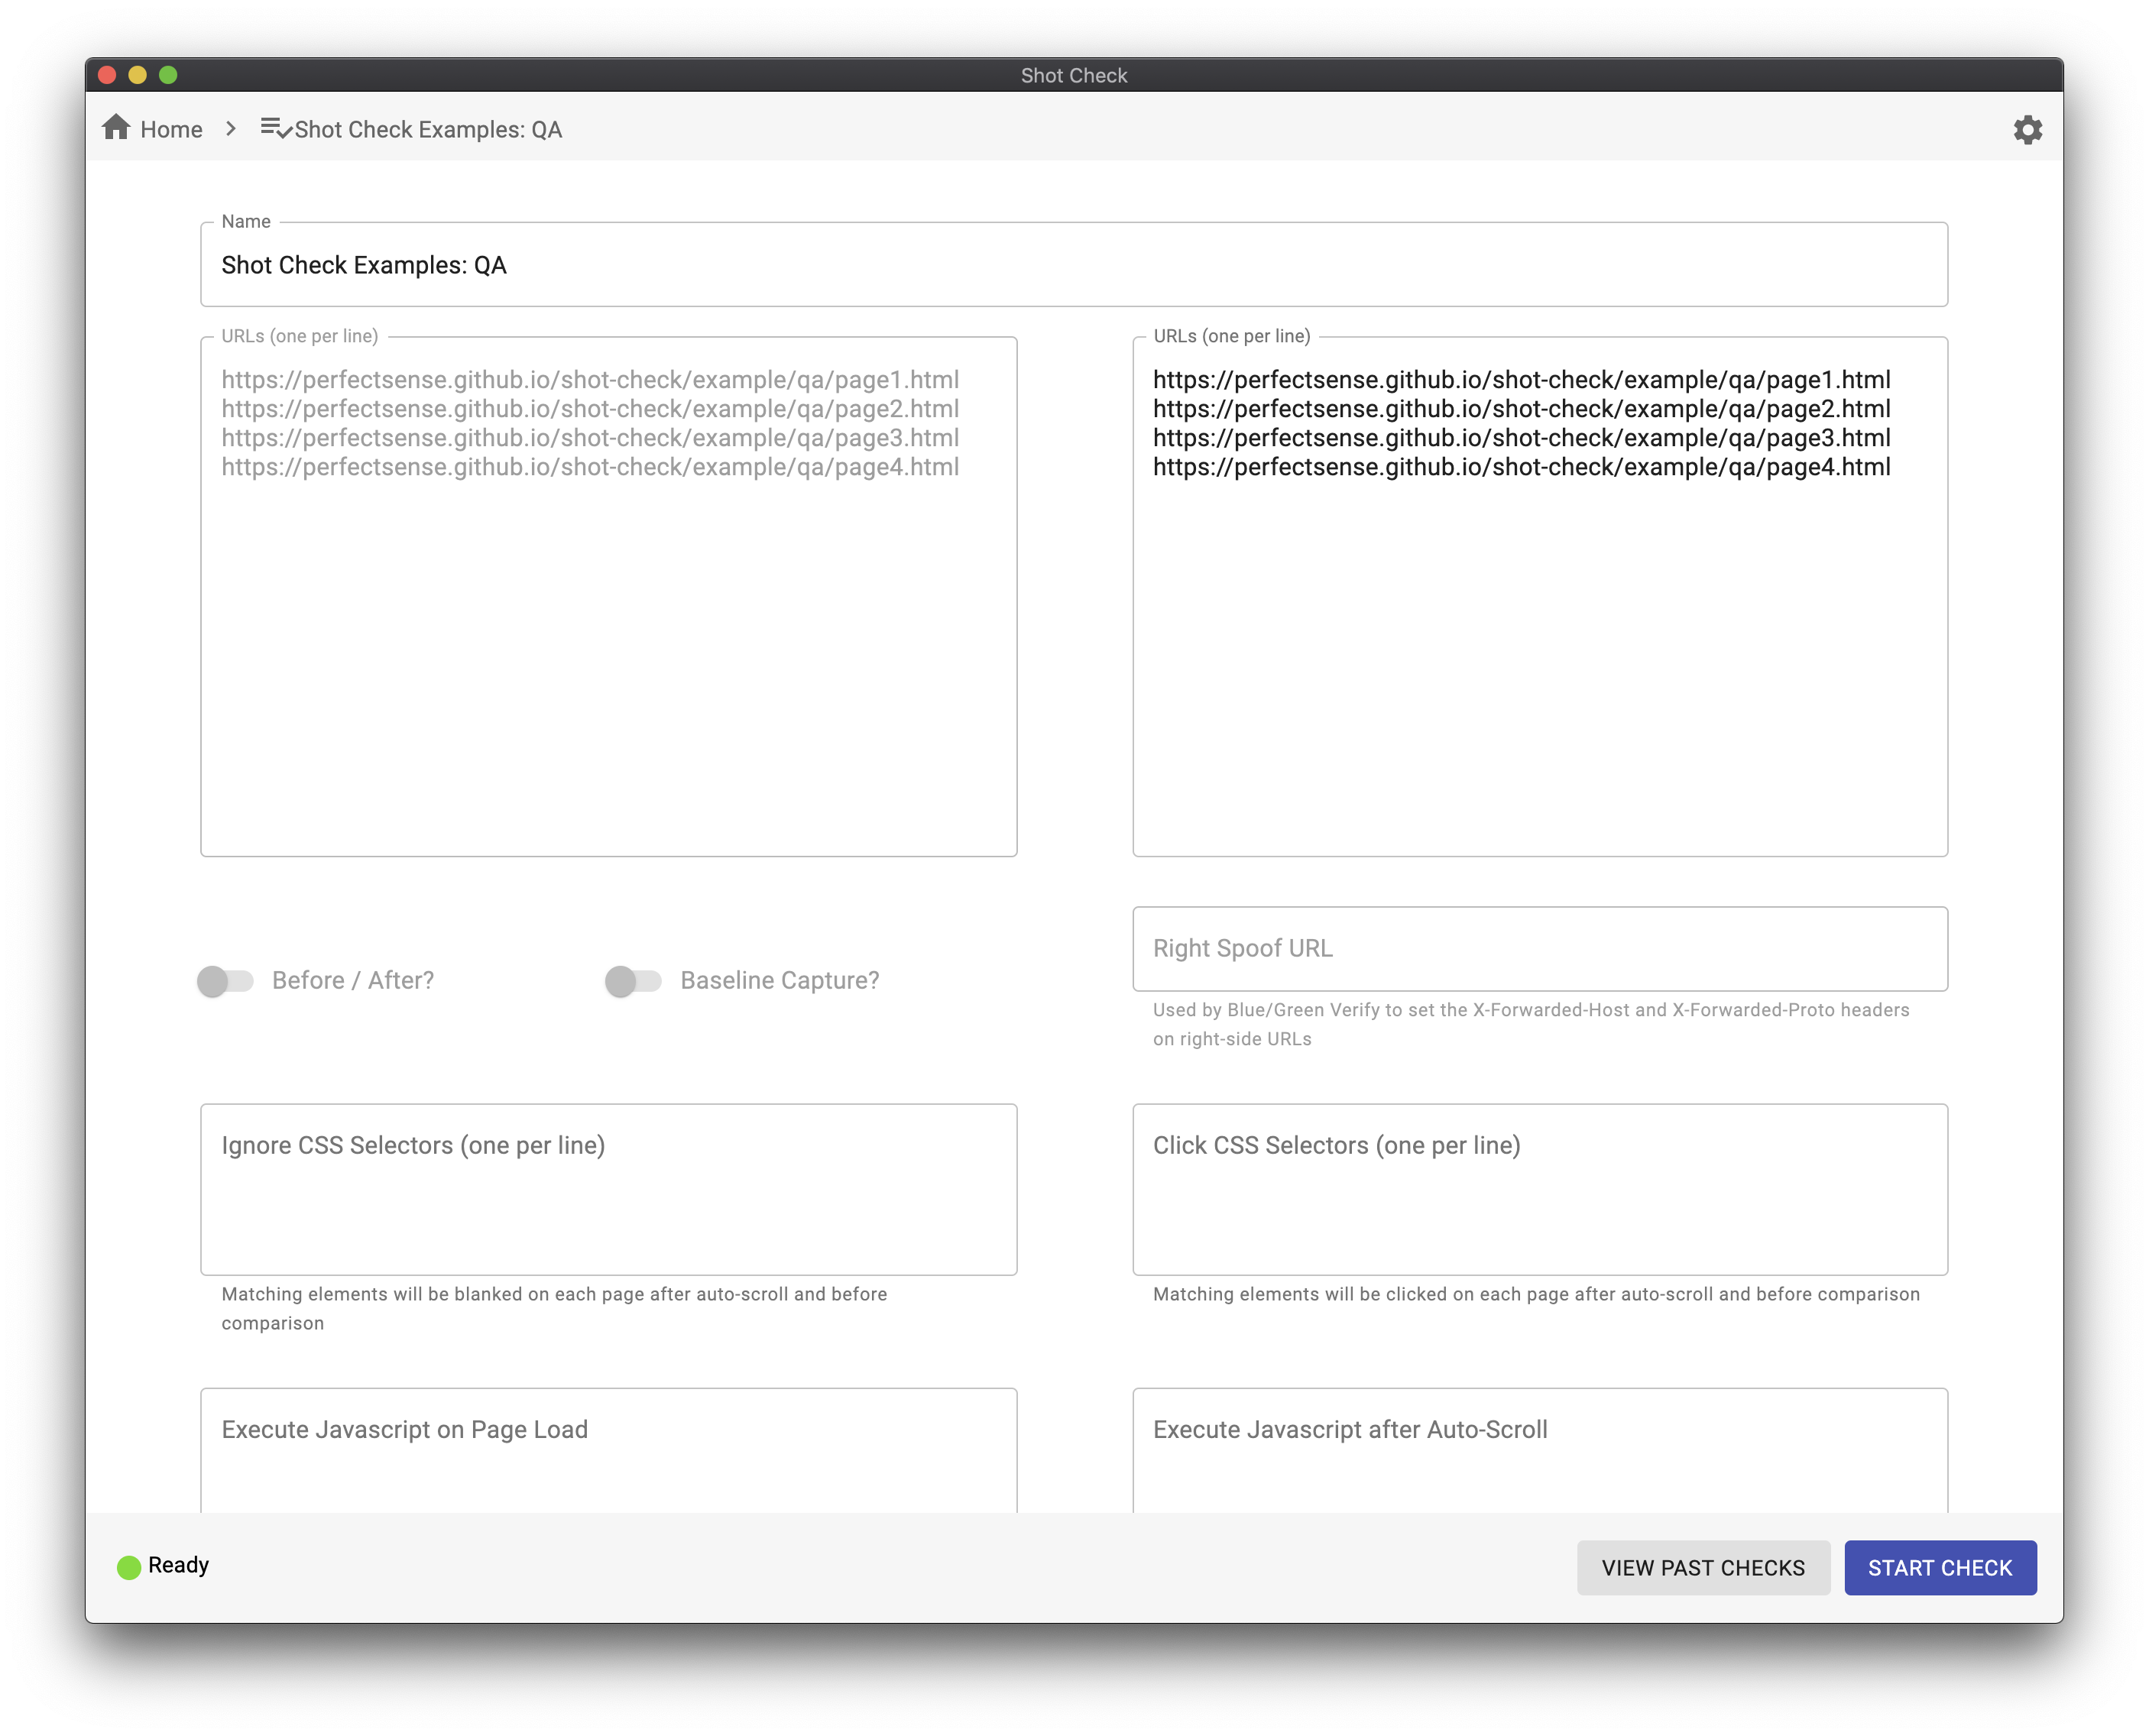
There are several types of automatic screenshot comparisons Shot Check can do depending on your scenario and use case.
- Manual Check
- Check Results Screen
- Setting up a Project
- Before and After
- Environment to Environment
- Blue/Green Verify
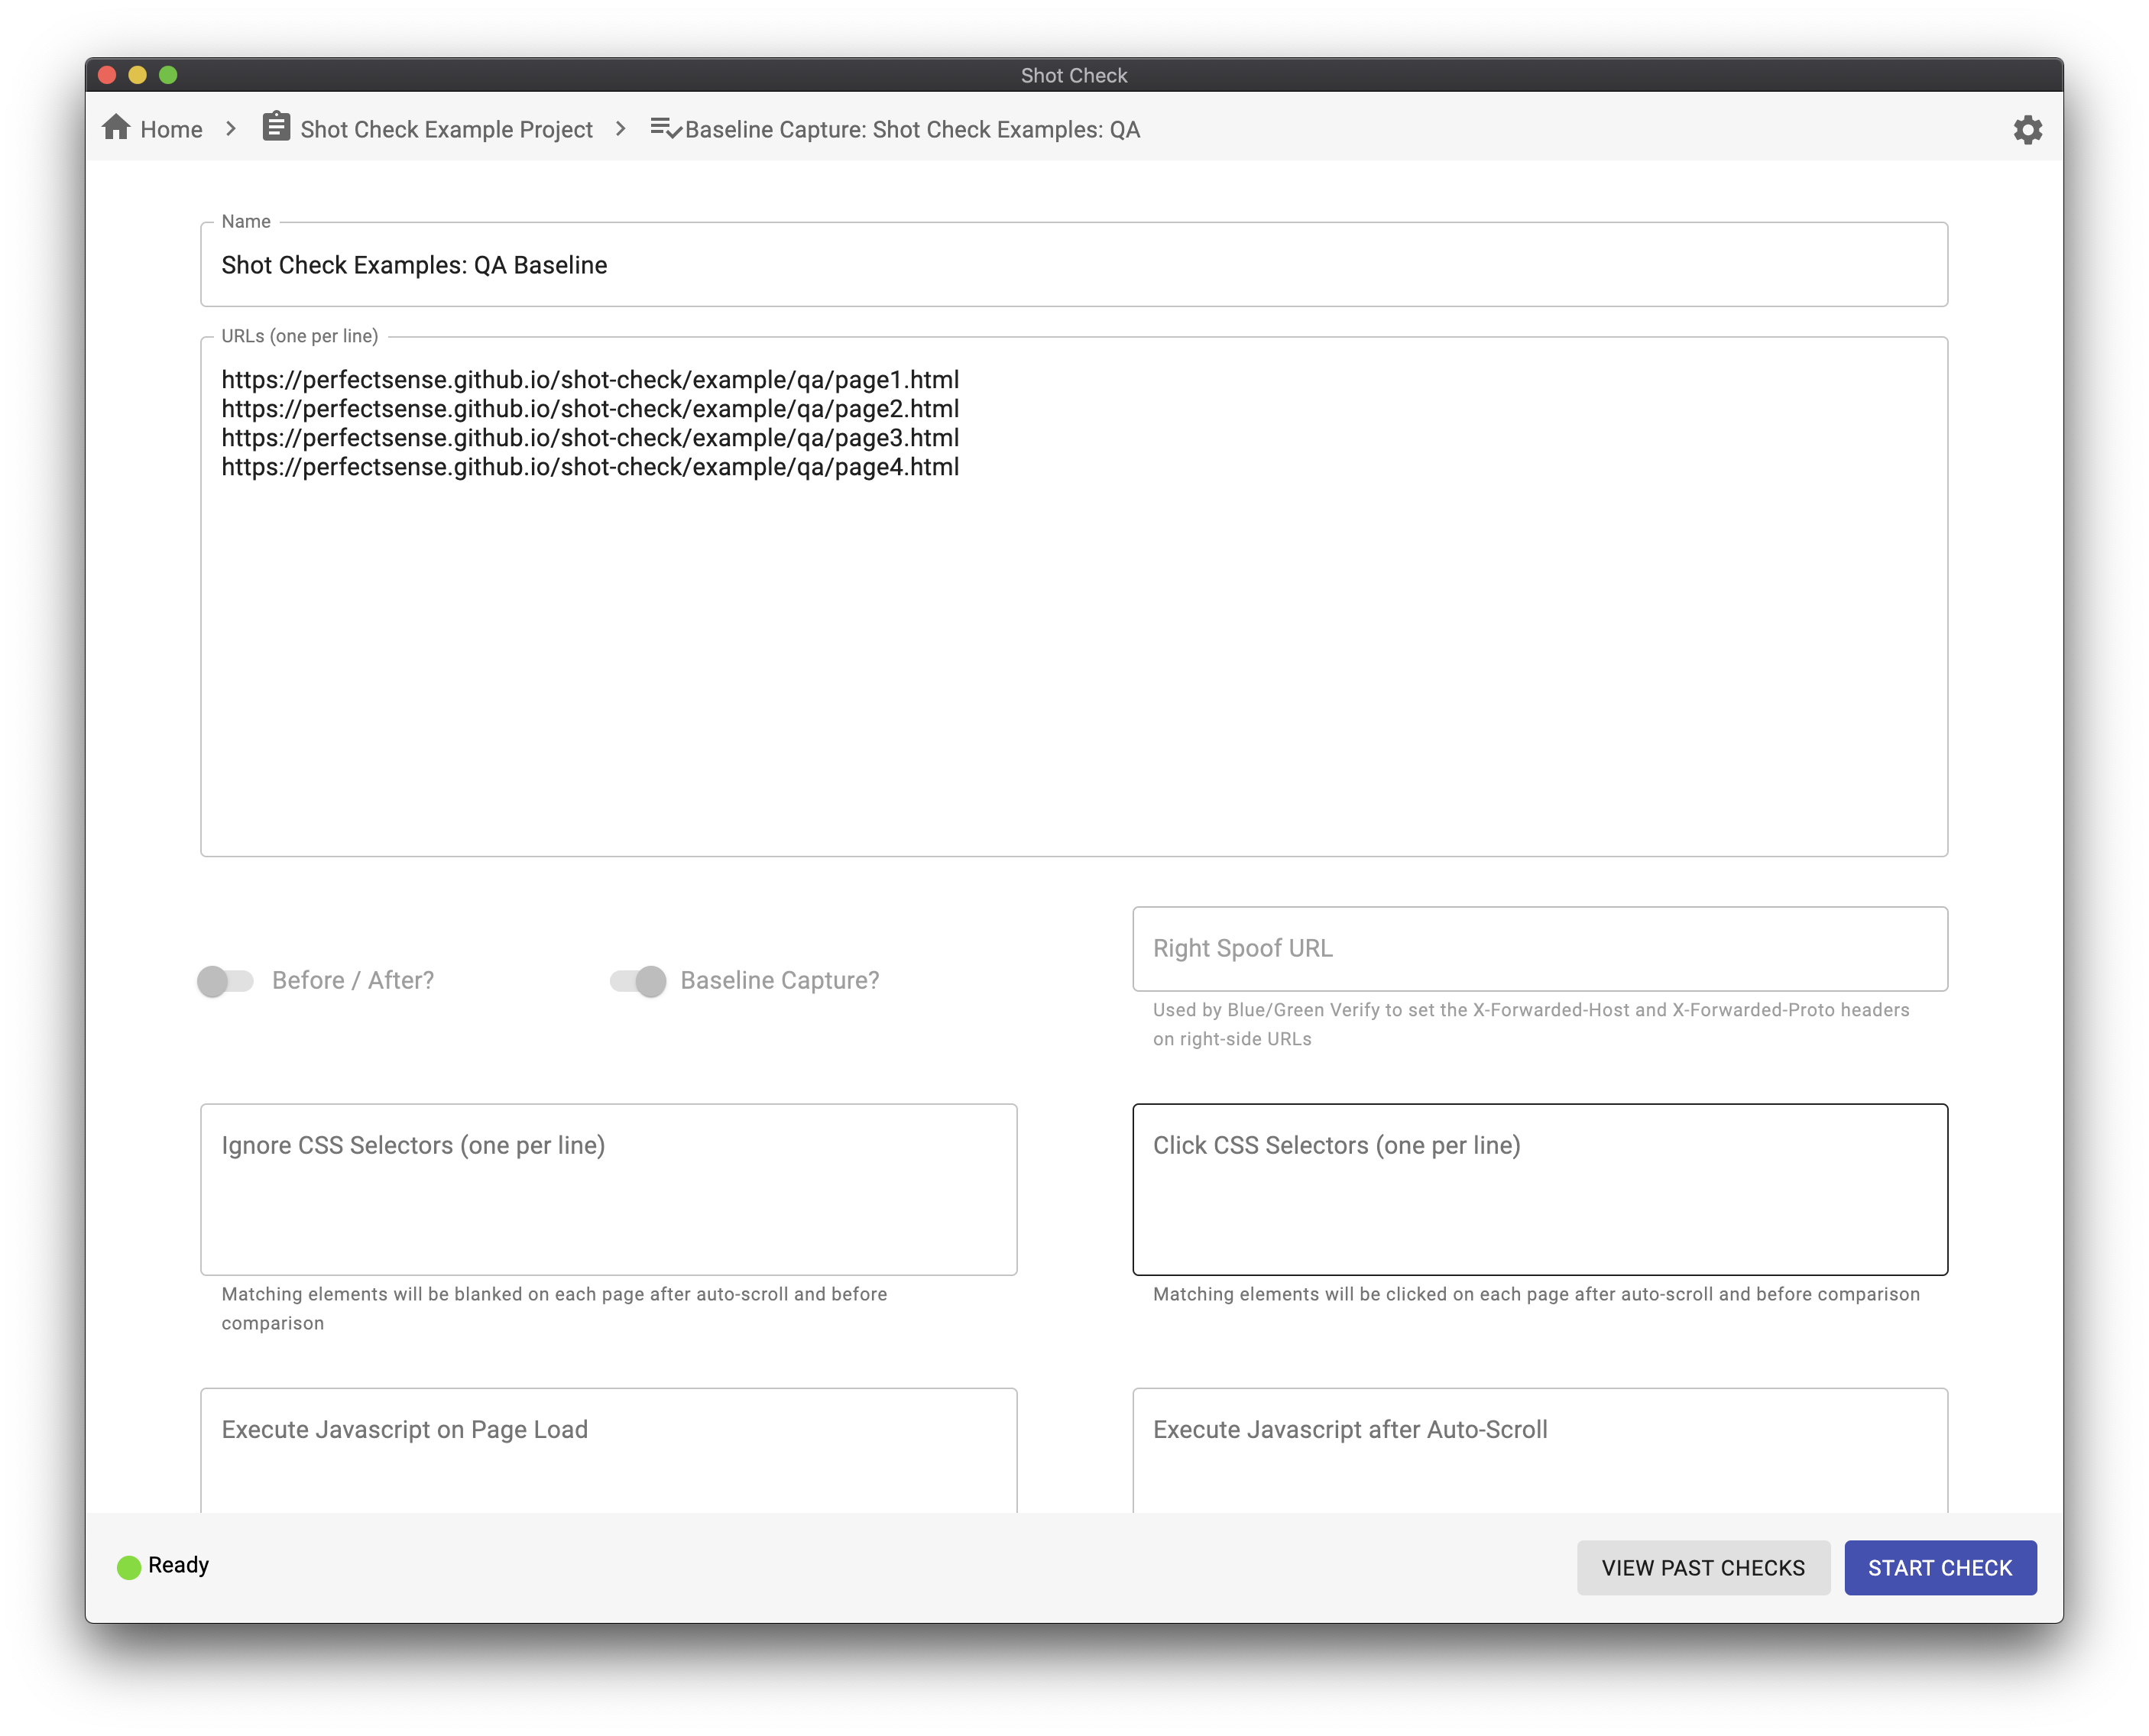
- Baseline Capture and Compare
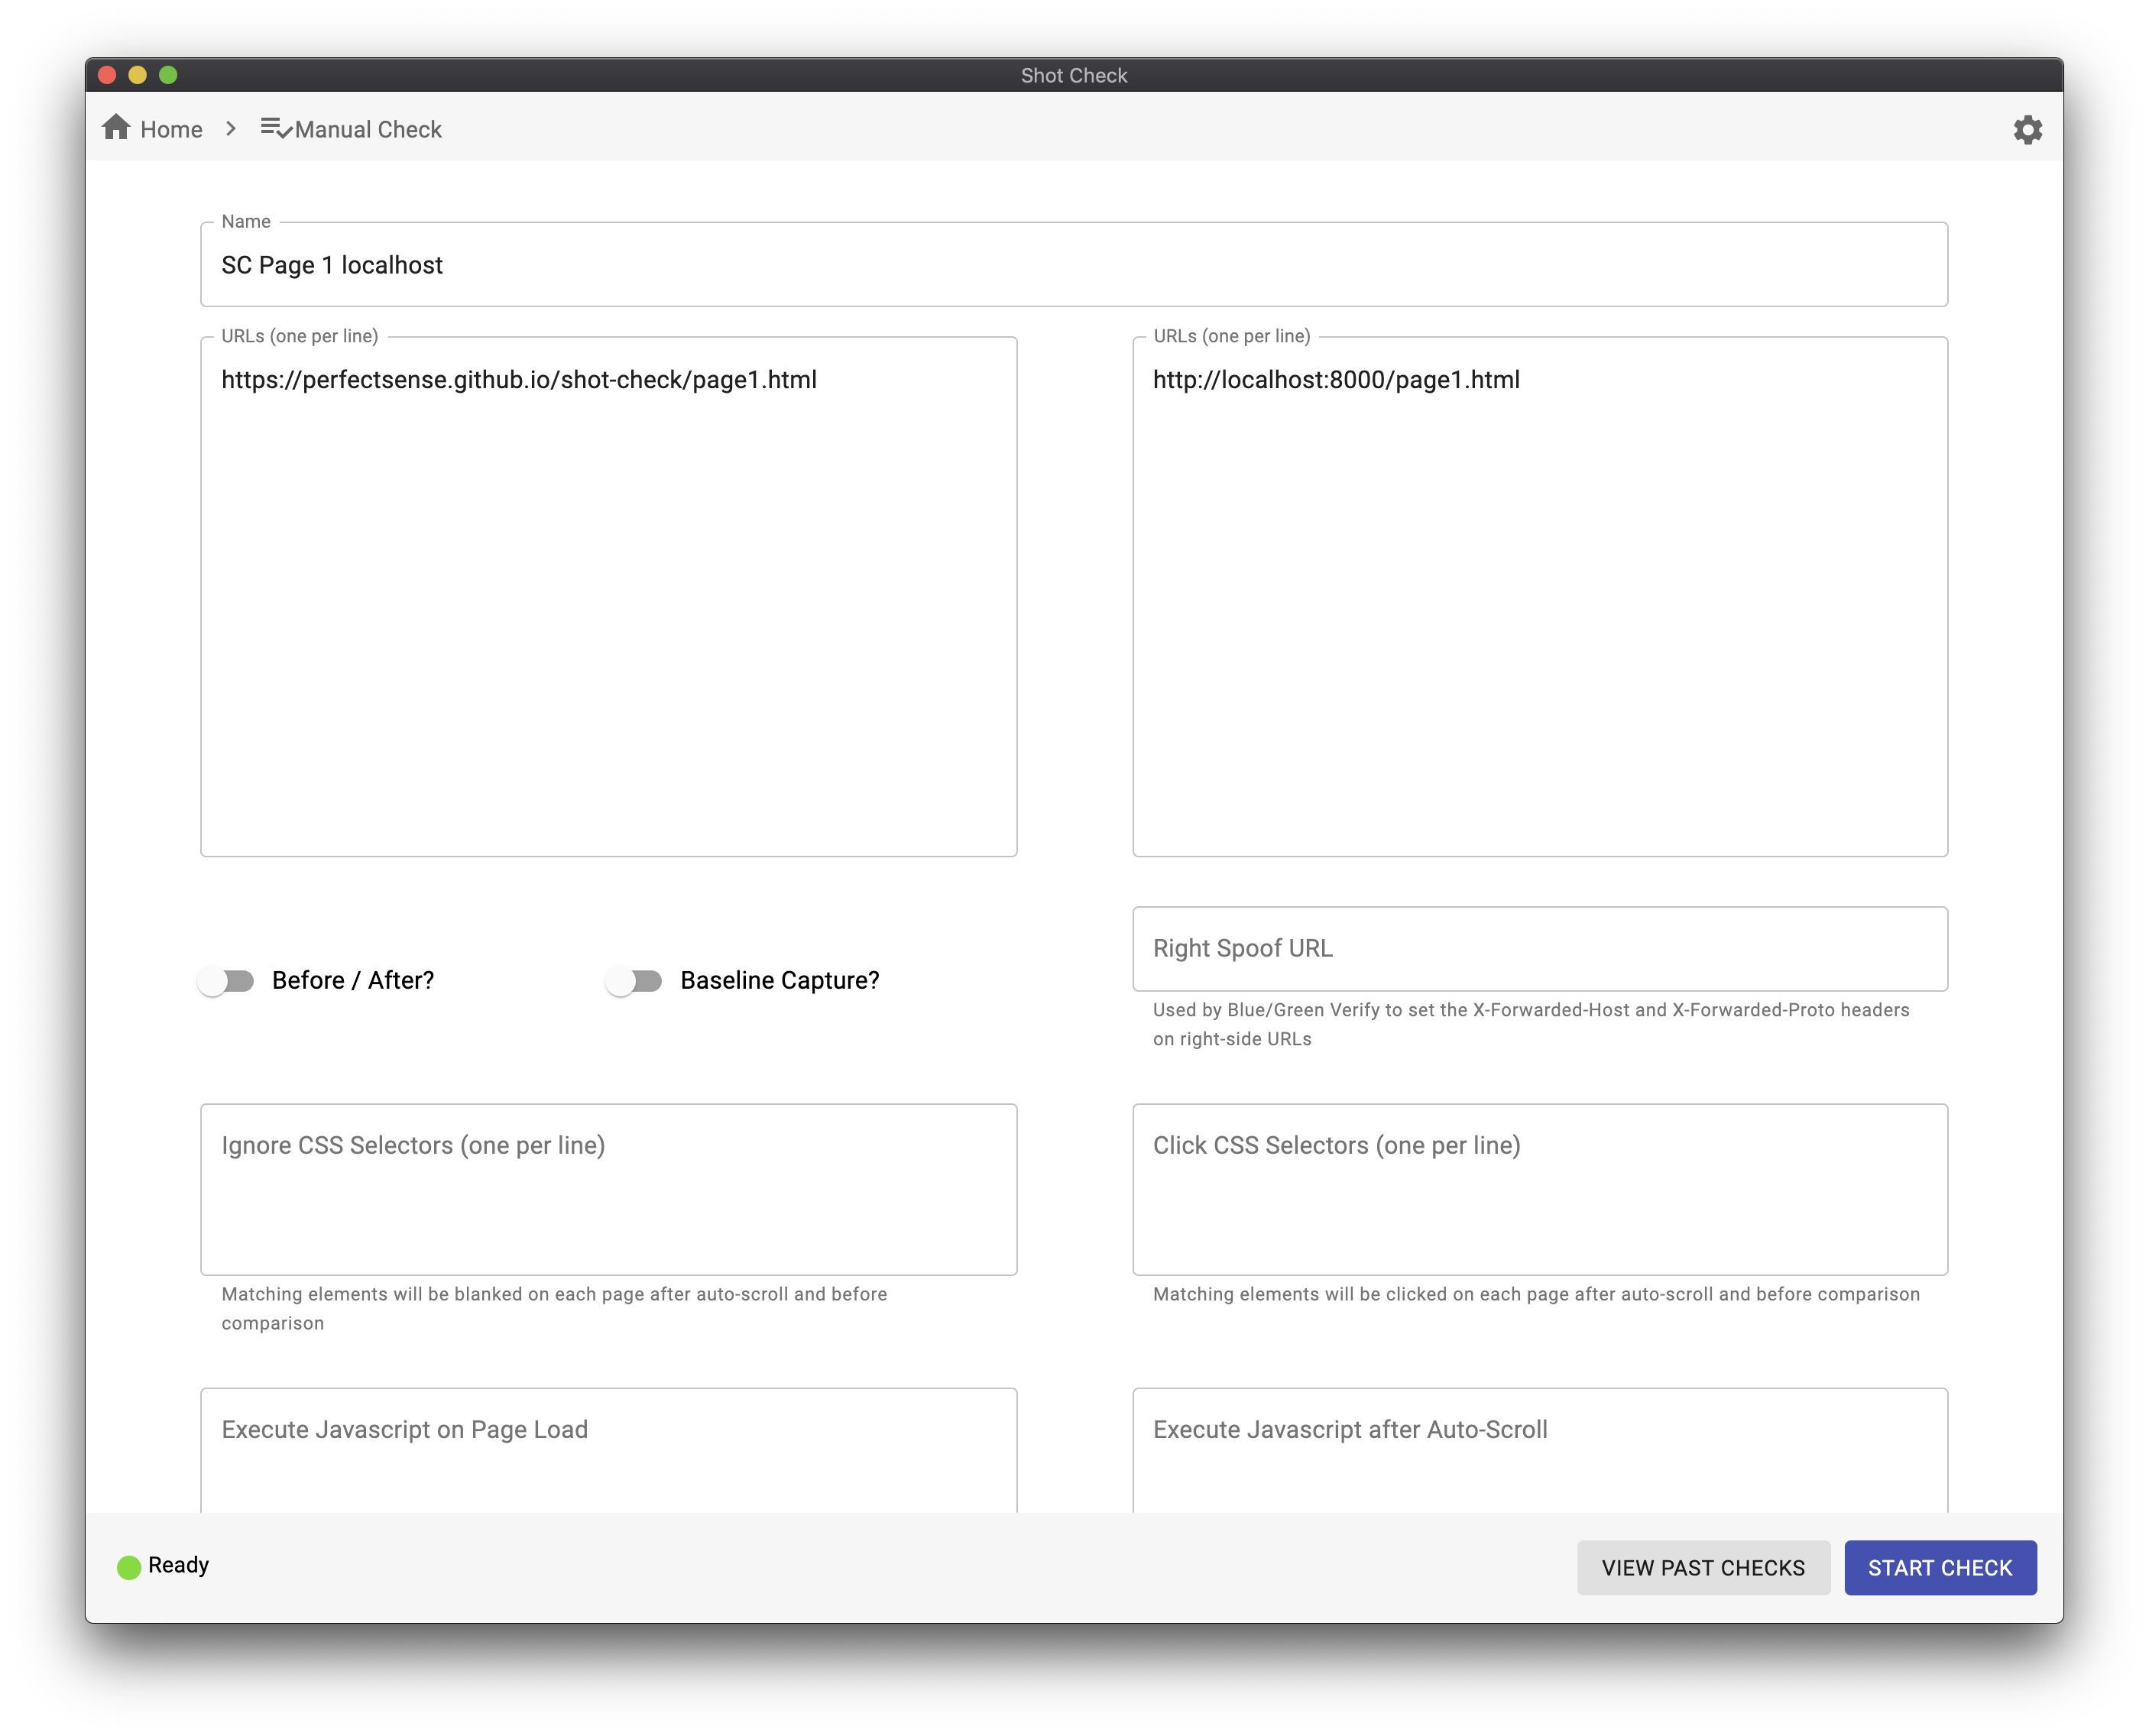
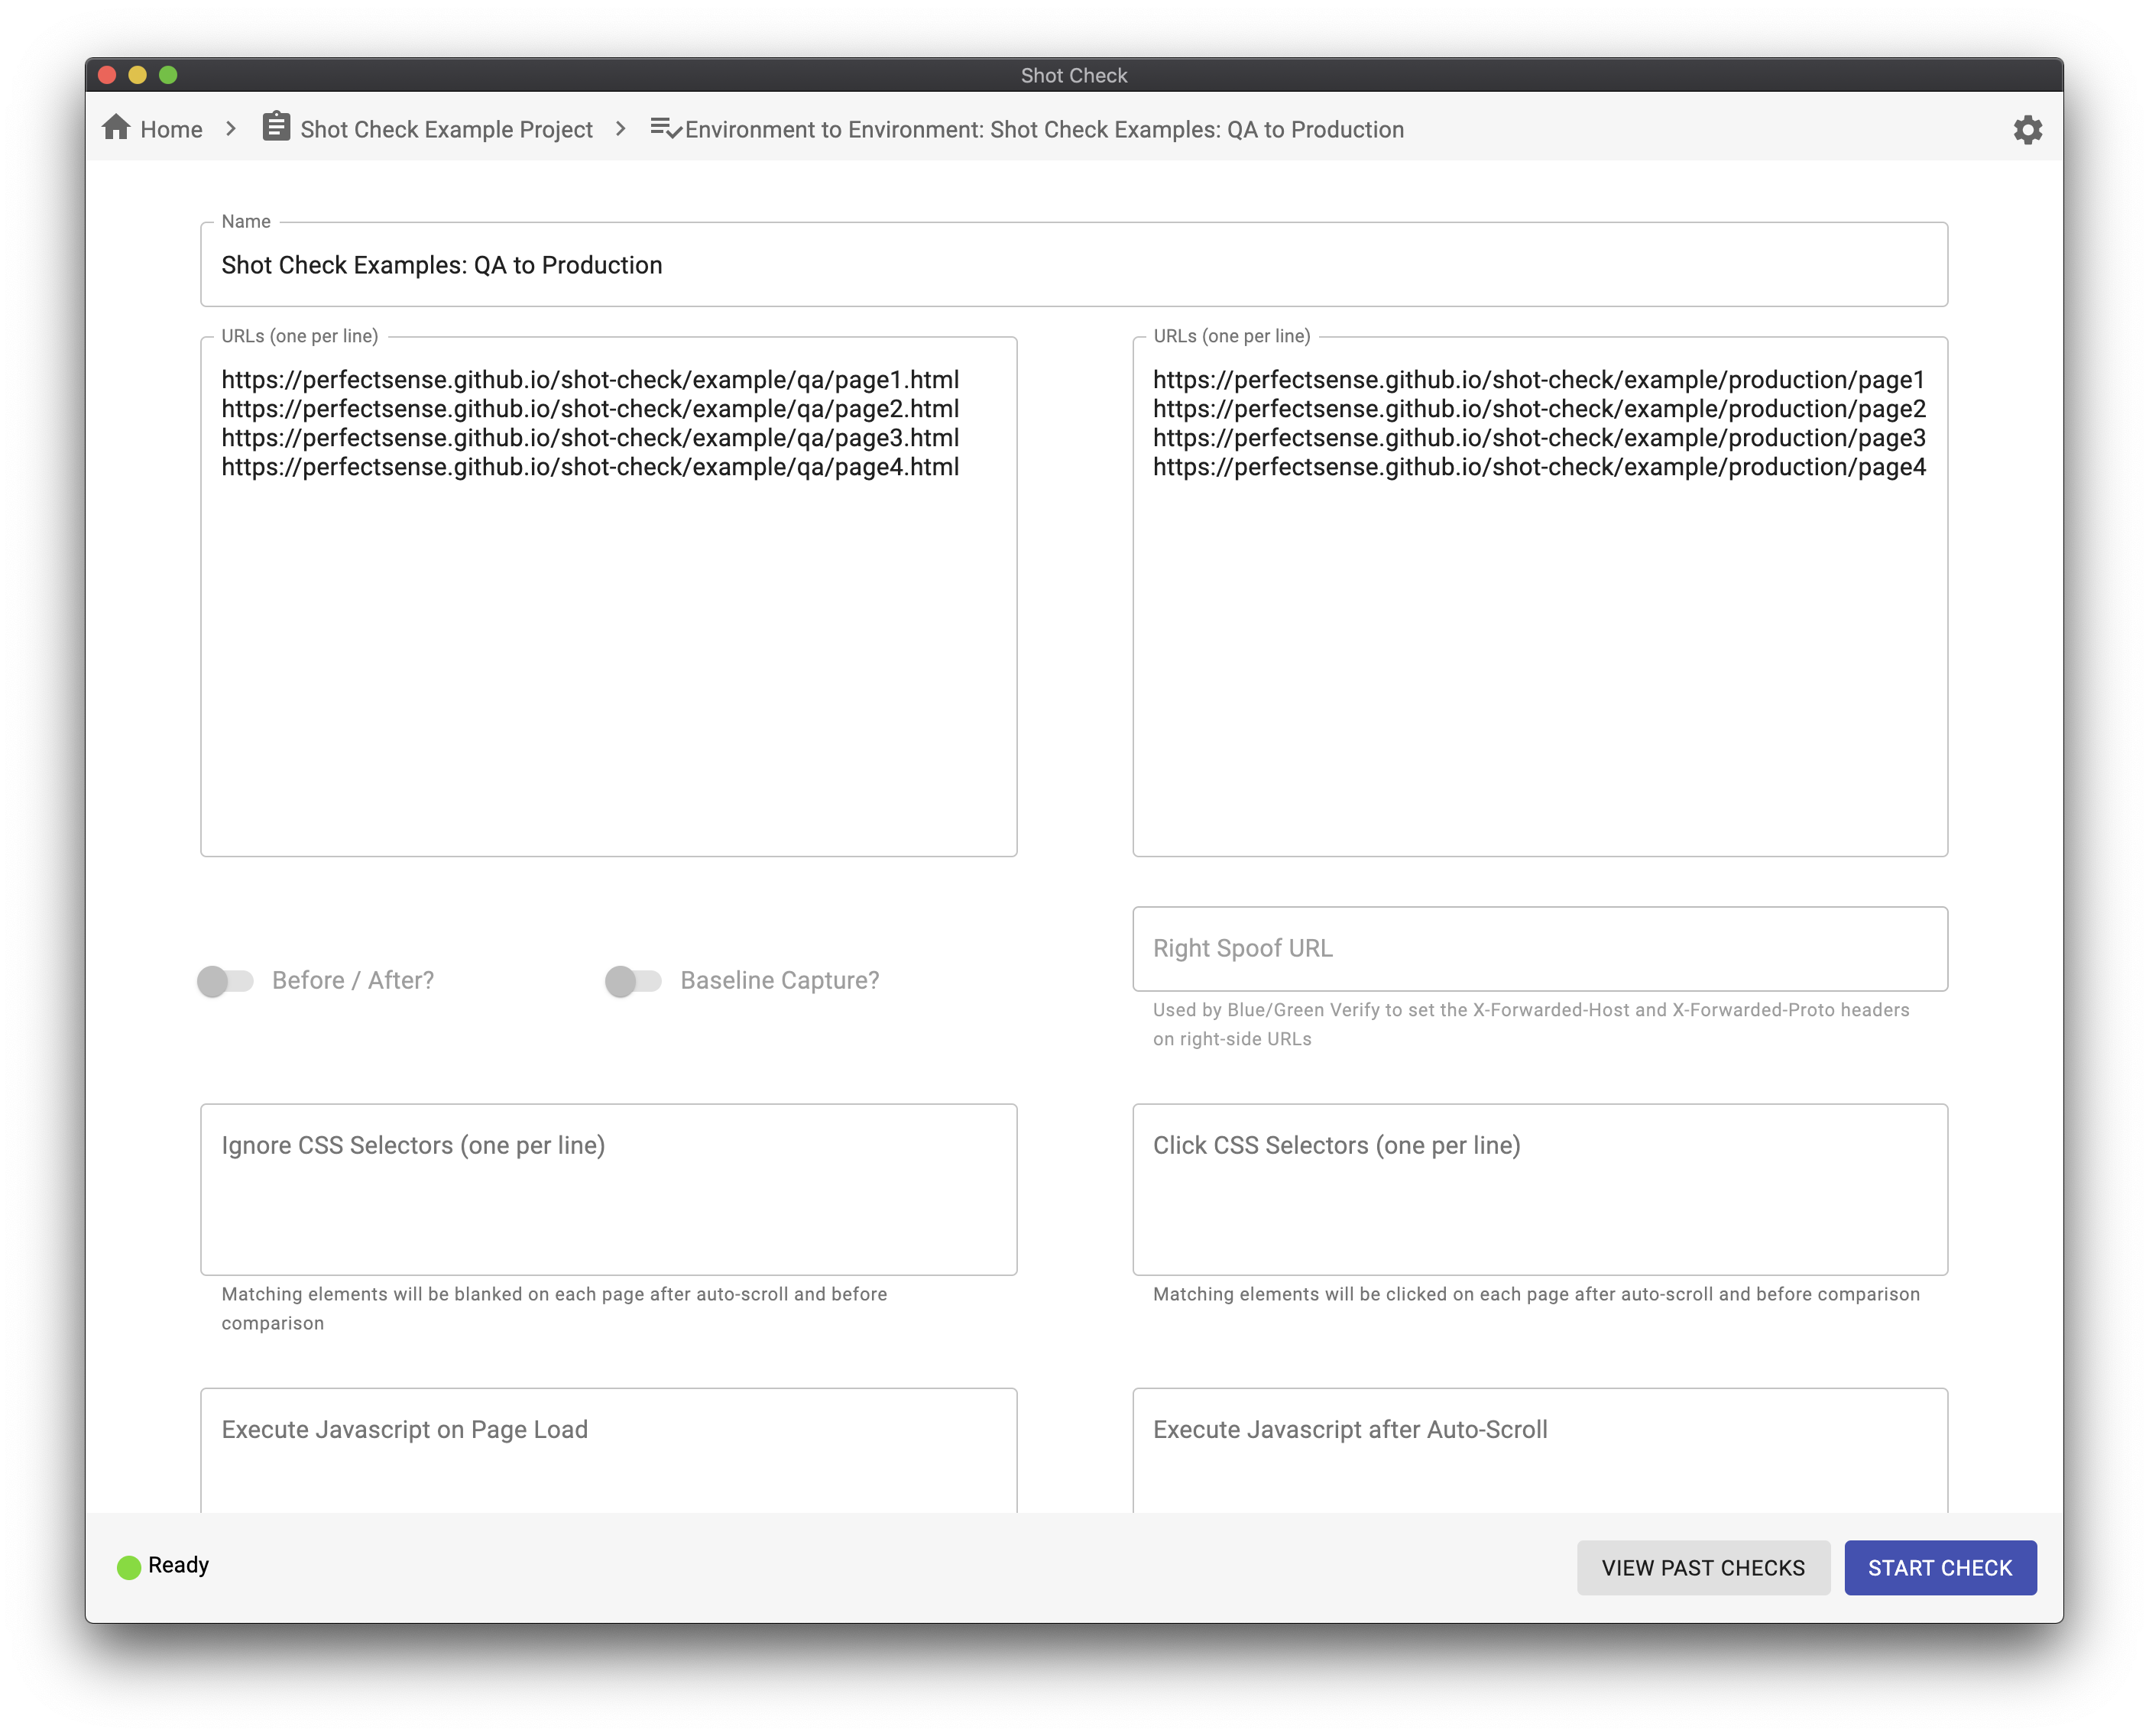
Provide two lists of URLs. Shot Check will take screenshots of each URL and compare them in order. For example:
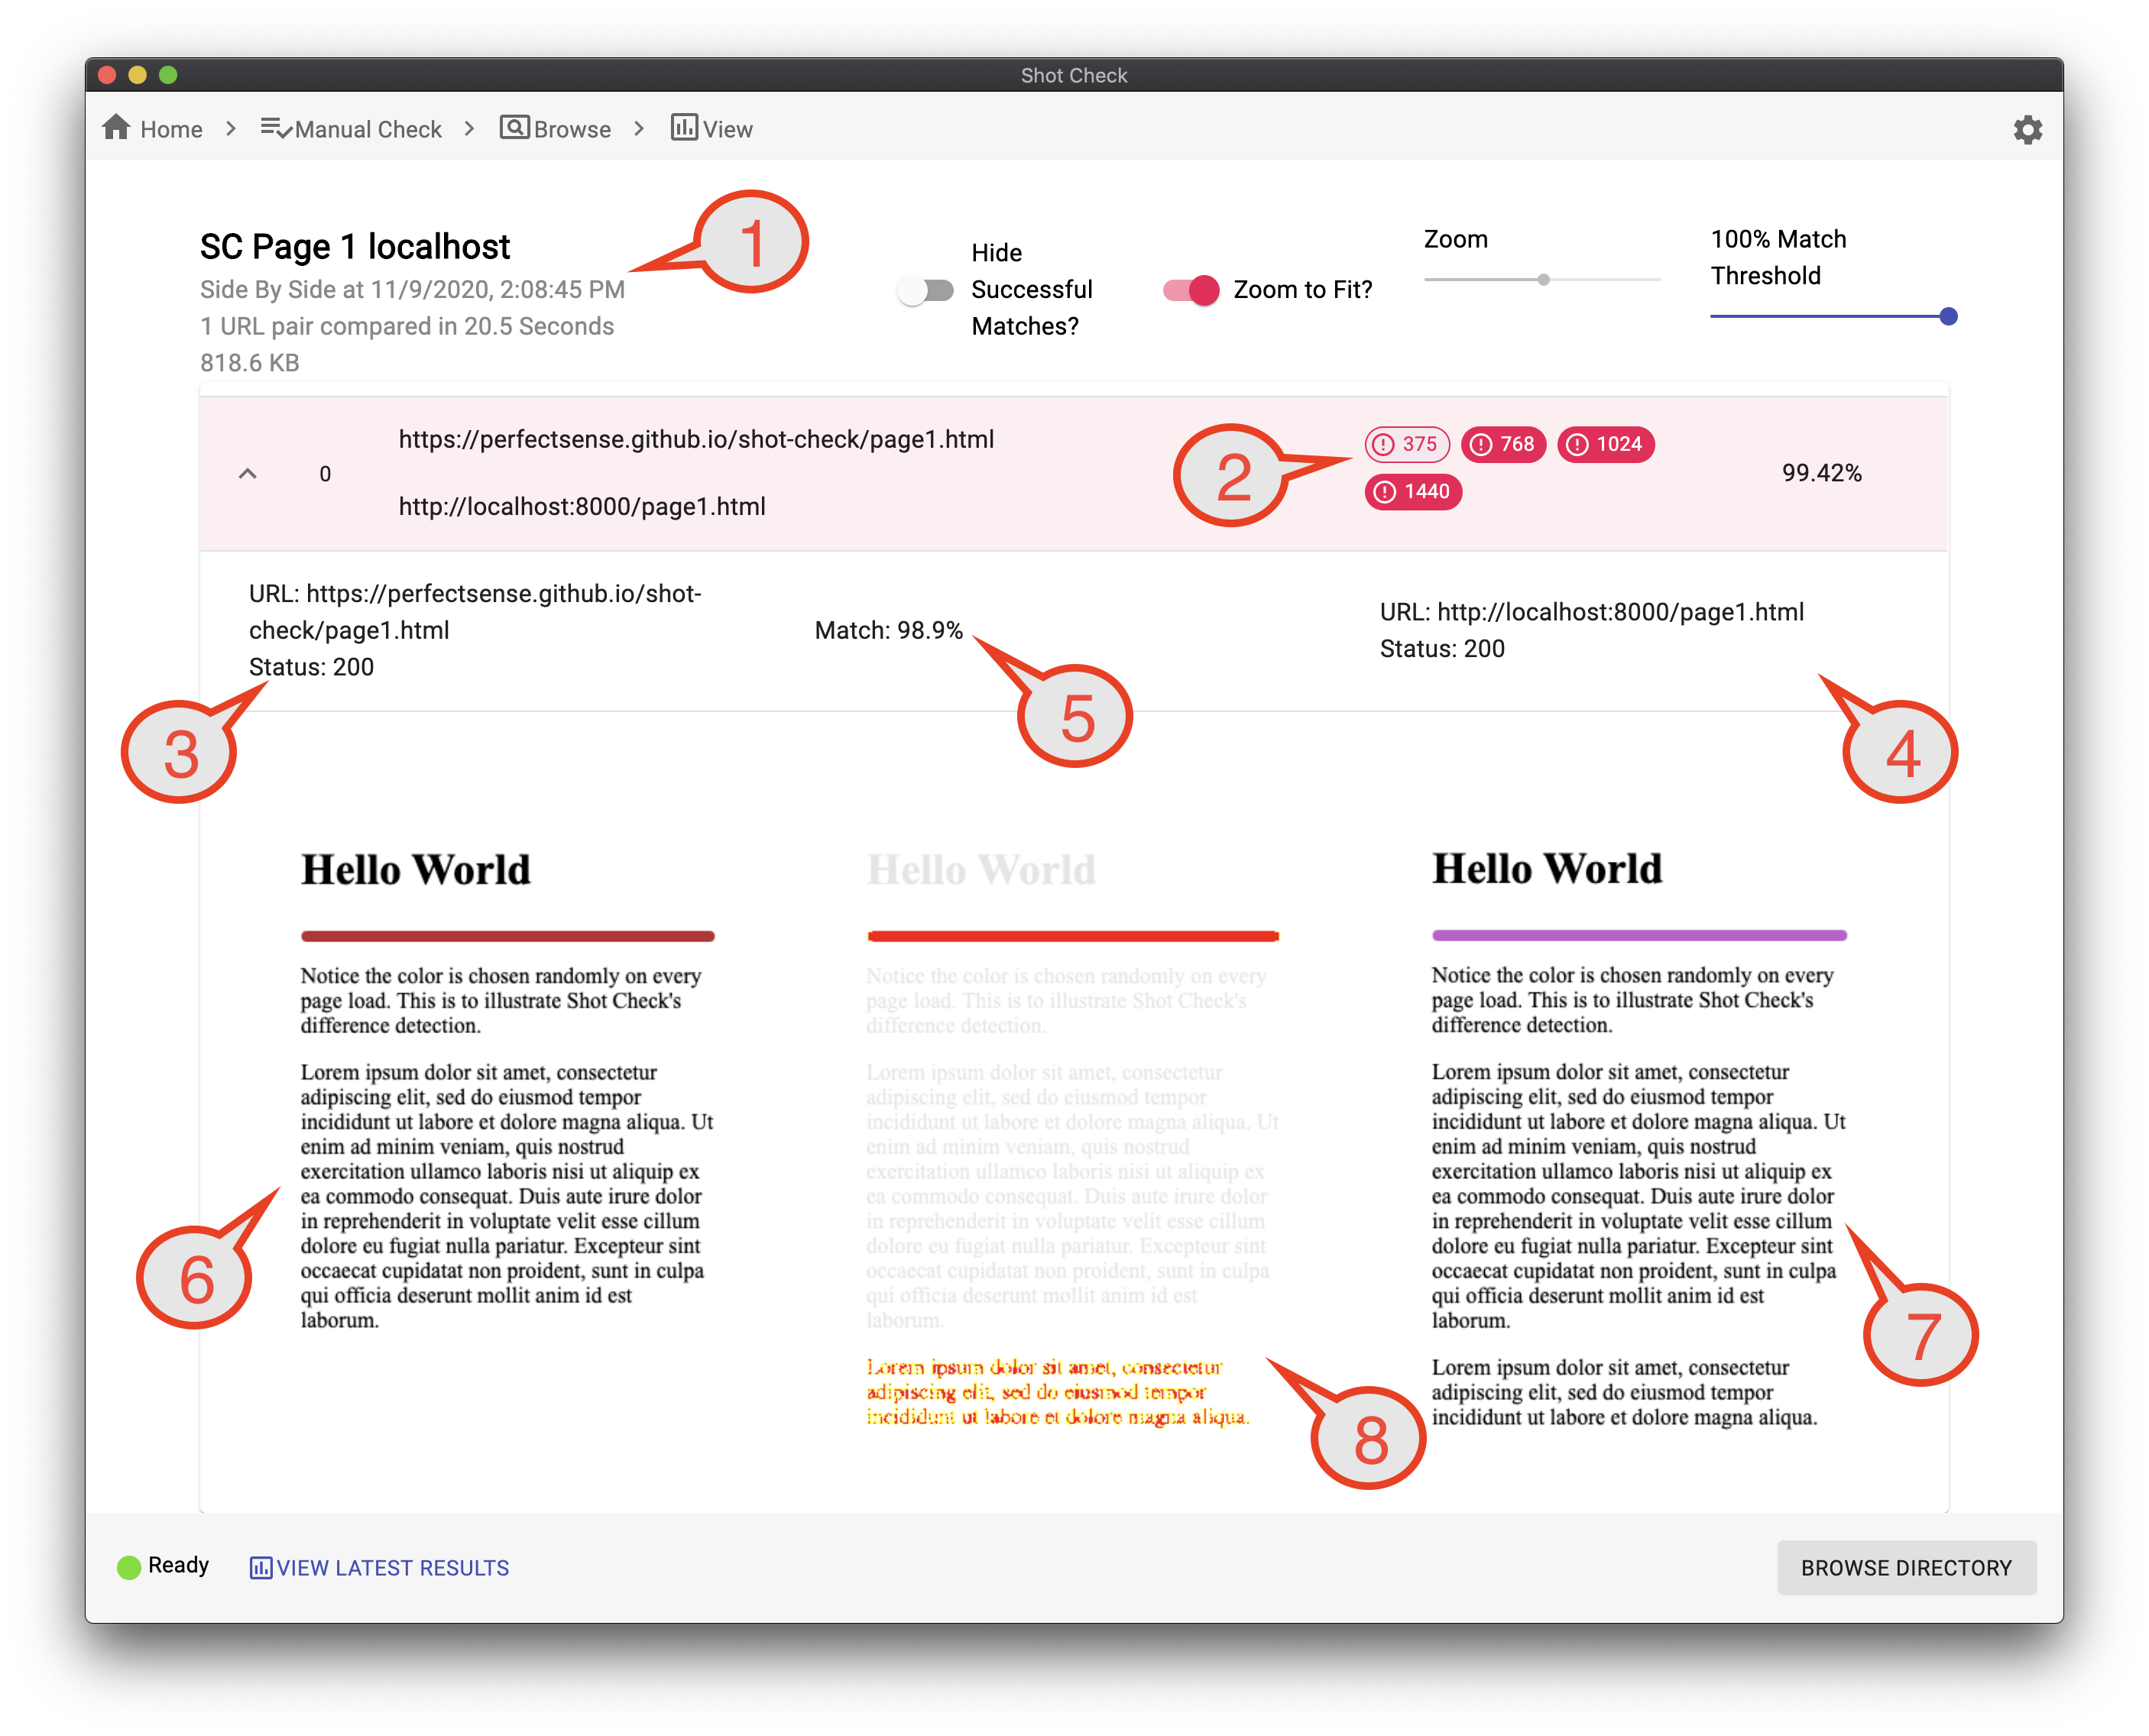
Checks can be reviewed in the Check Results Screen:
In this example you can see:
- General information about the test run including the name, date, number of URL pairs, runtime duration, and size on disk.
- The browser widths that were captured and compared. Click each one in succession to view the screenshots side by side.
- The left URL and HTTP response status.
- The right URL and HTTP response status.
- The match percentage for the selected browser width.
- The left captured screenshot in the selected browser width.
- The right captured screenshot in the selected browser width.
- The detected differences between the left screenshot and the right screenshot.
Tip: Use the j, k, h, and l keys on your keyboard to navigate to the next / previous result or breakpoint!
To make Shot Check part of your normal testing process, it is important to create a Project in Shot Check for each project you're working on to save your commonly used configuration.
On the home screen, click the "New Project" button on the bottom right. This will prompt you to name your project and optionally indicate a filesystem path where the config file will be saved.
Tip: Create this file in your project directory and check it in to version control so your entire team can share!
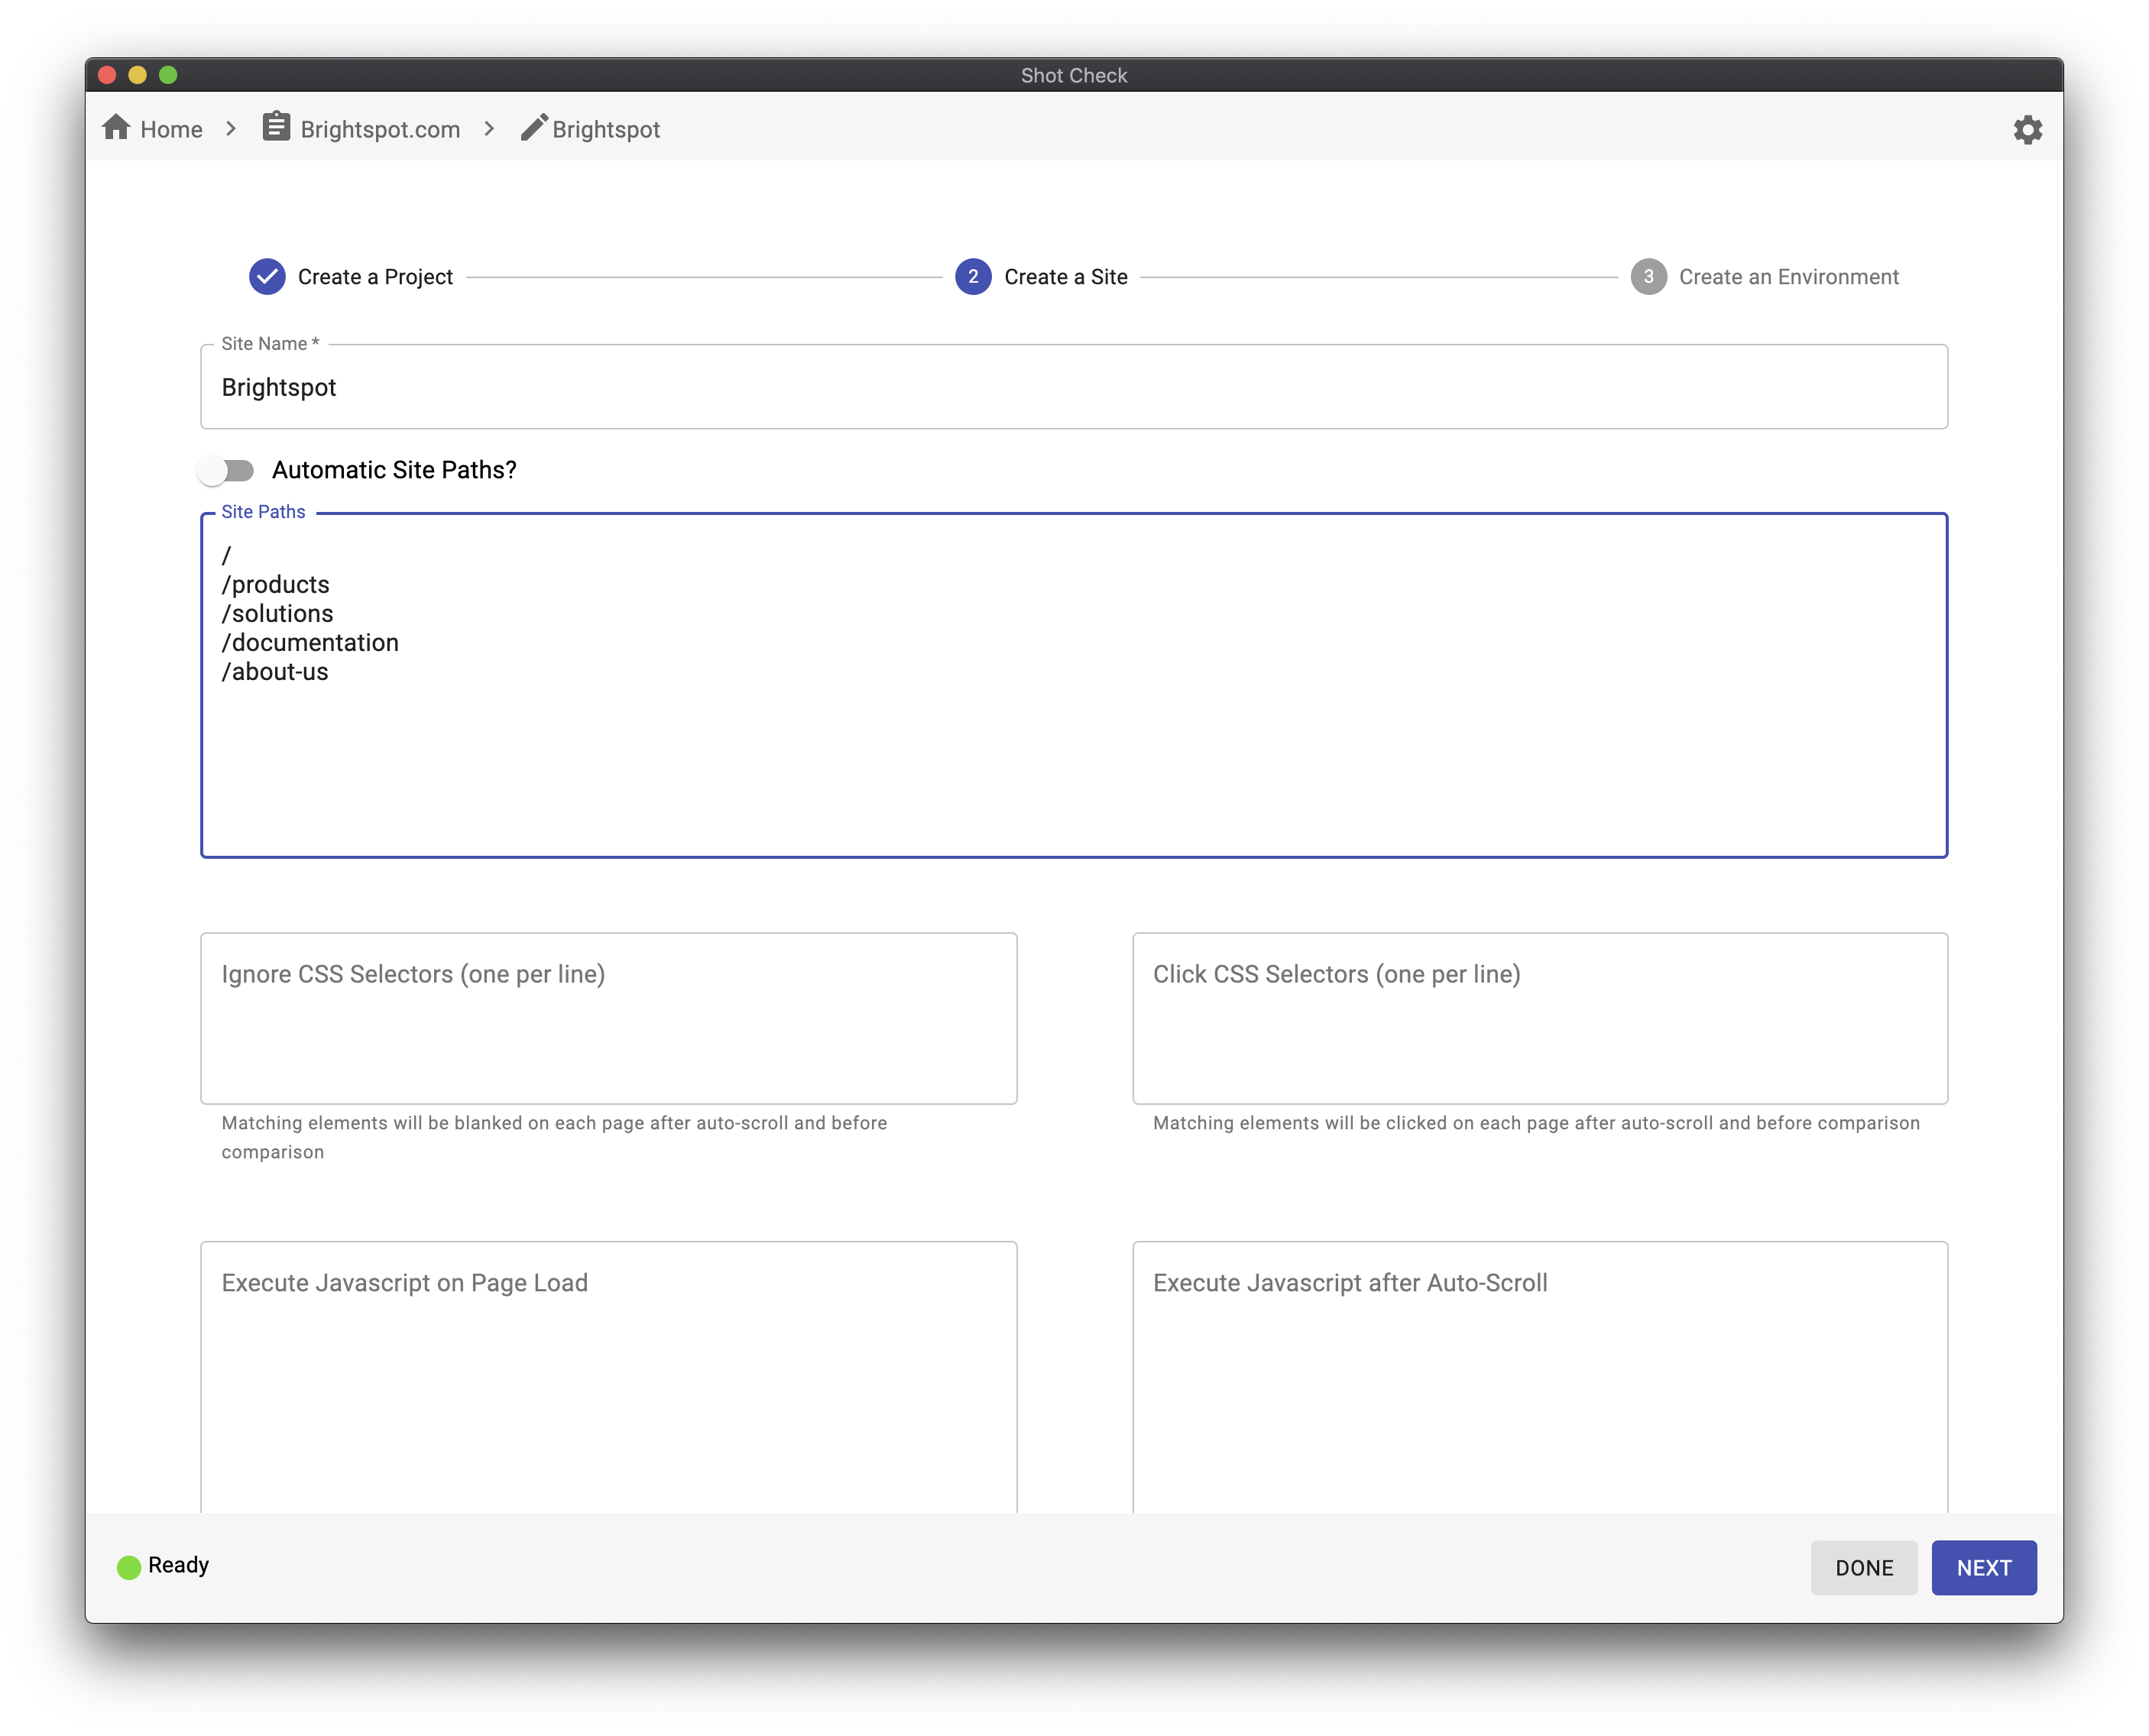
A Site is a collection of content represented by paths that are present on one or more Environments. A Site does not have a base URL - that is provided by the Environment.
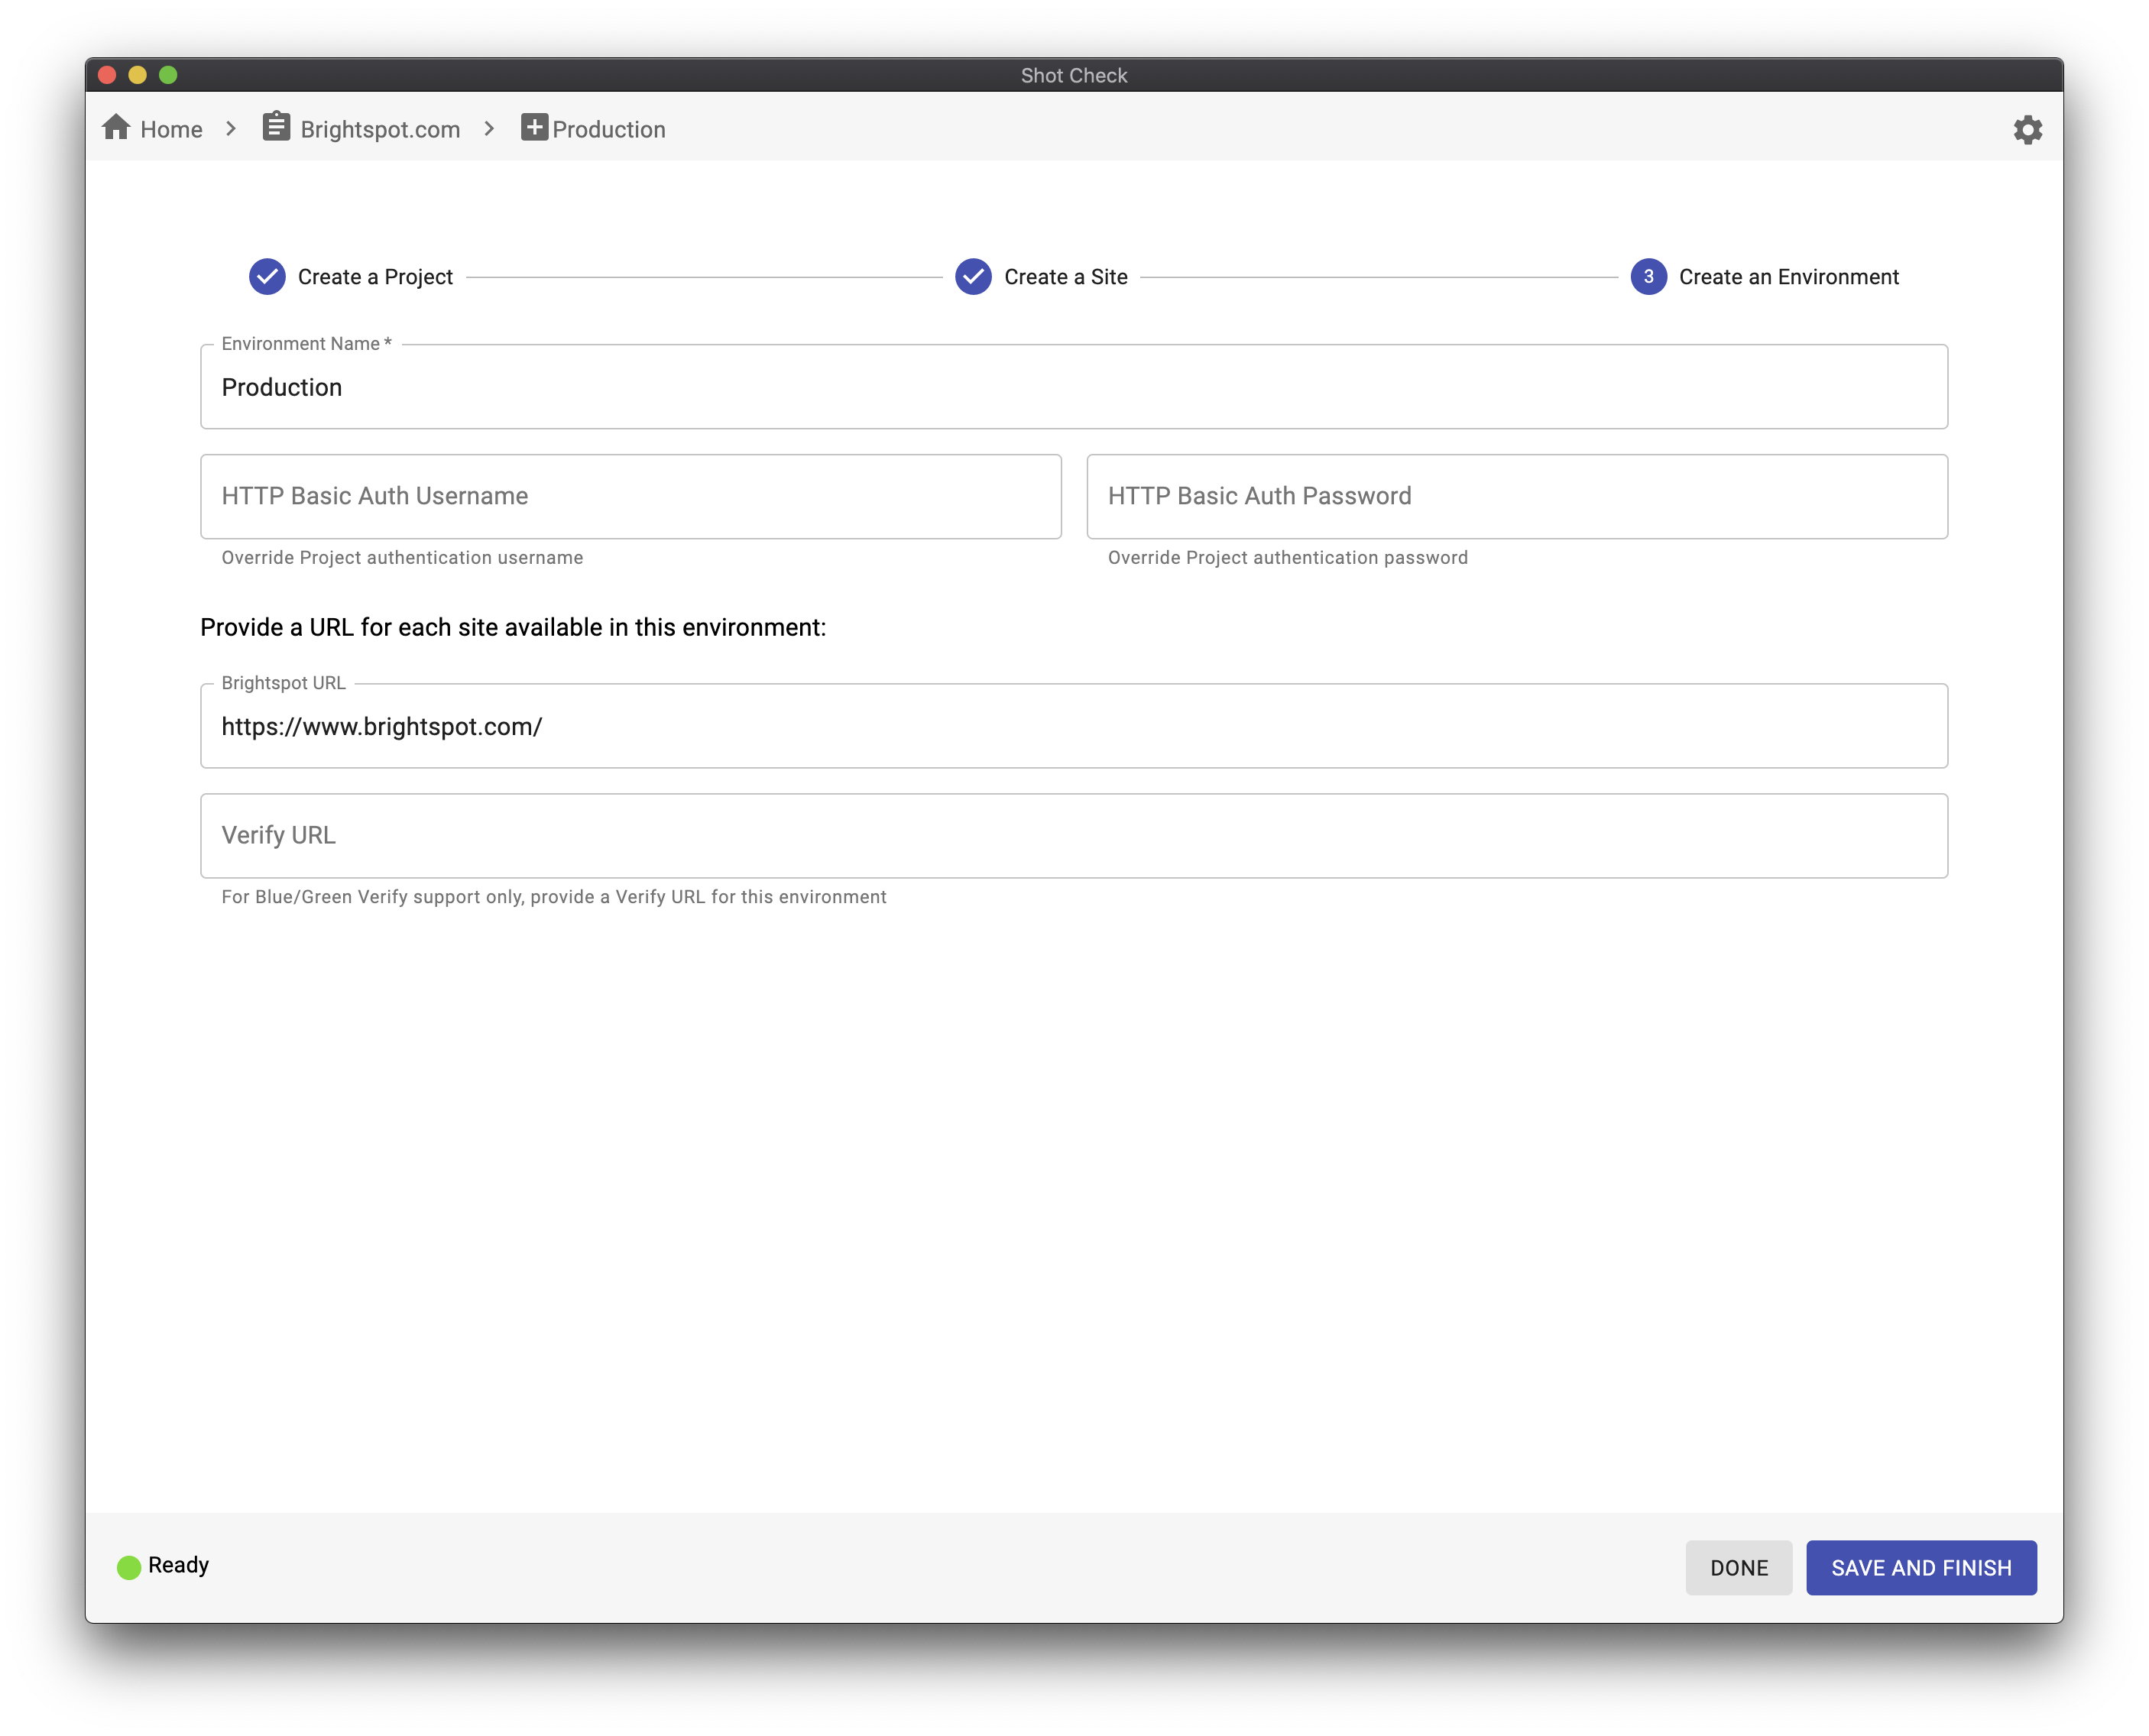
An Environment is a specific instance of your project. Usually, projects will have one or more lower test environments and one production environment. If you're a developer, you may also have a local development environment, as well.
An Environment has a base URL that, when combined with a Site's collection of paths, produces a collection of URLs. This collection of URLs will be used to run automated checks.
Note: An example project is created for you when you start Shot Check for the first time. Use it as an example when creating your own projects.
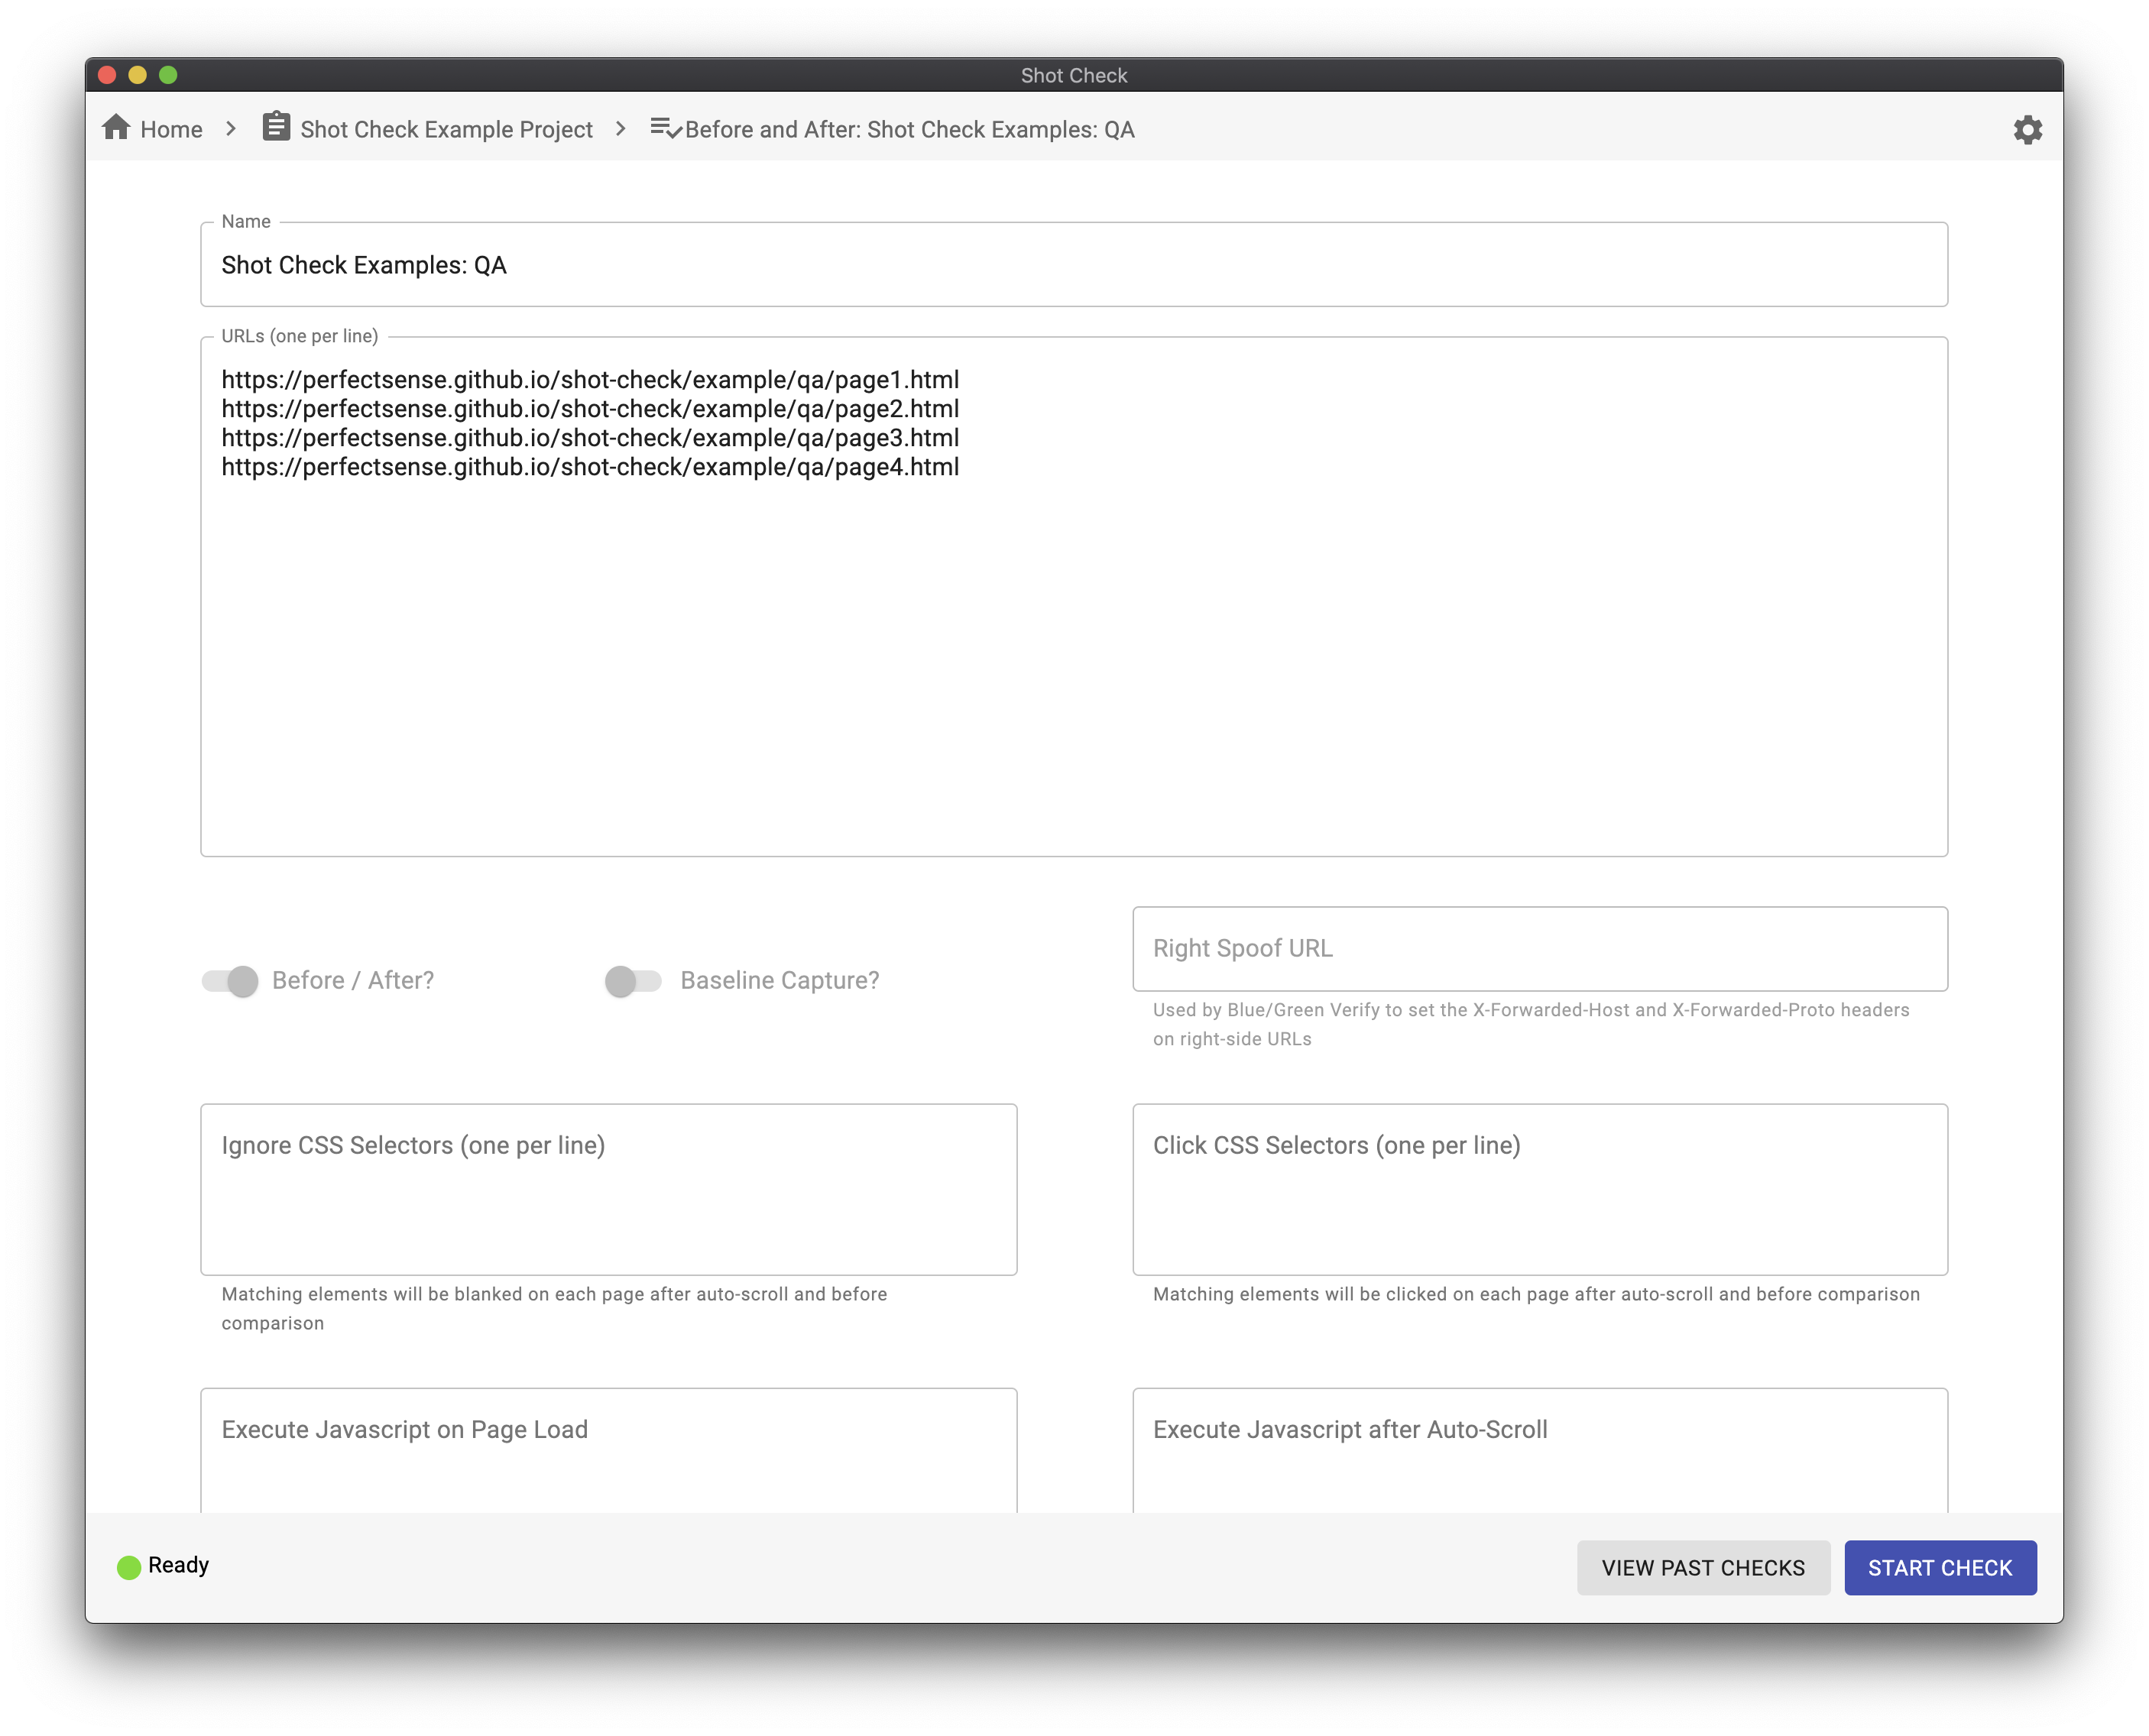
Before and After is automatically enabled for every site and environment that has a URL.
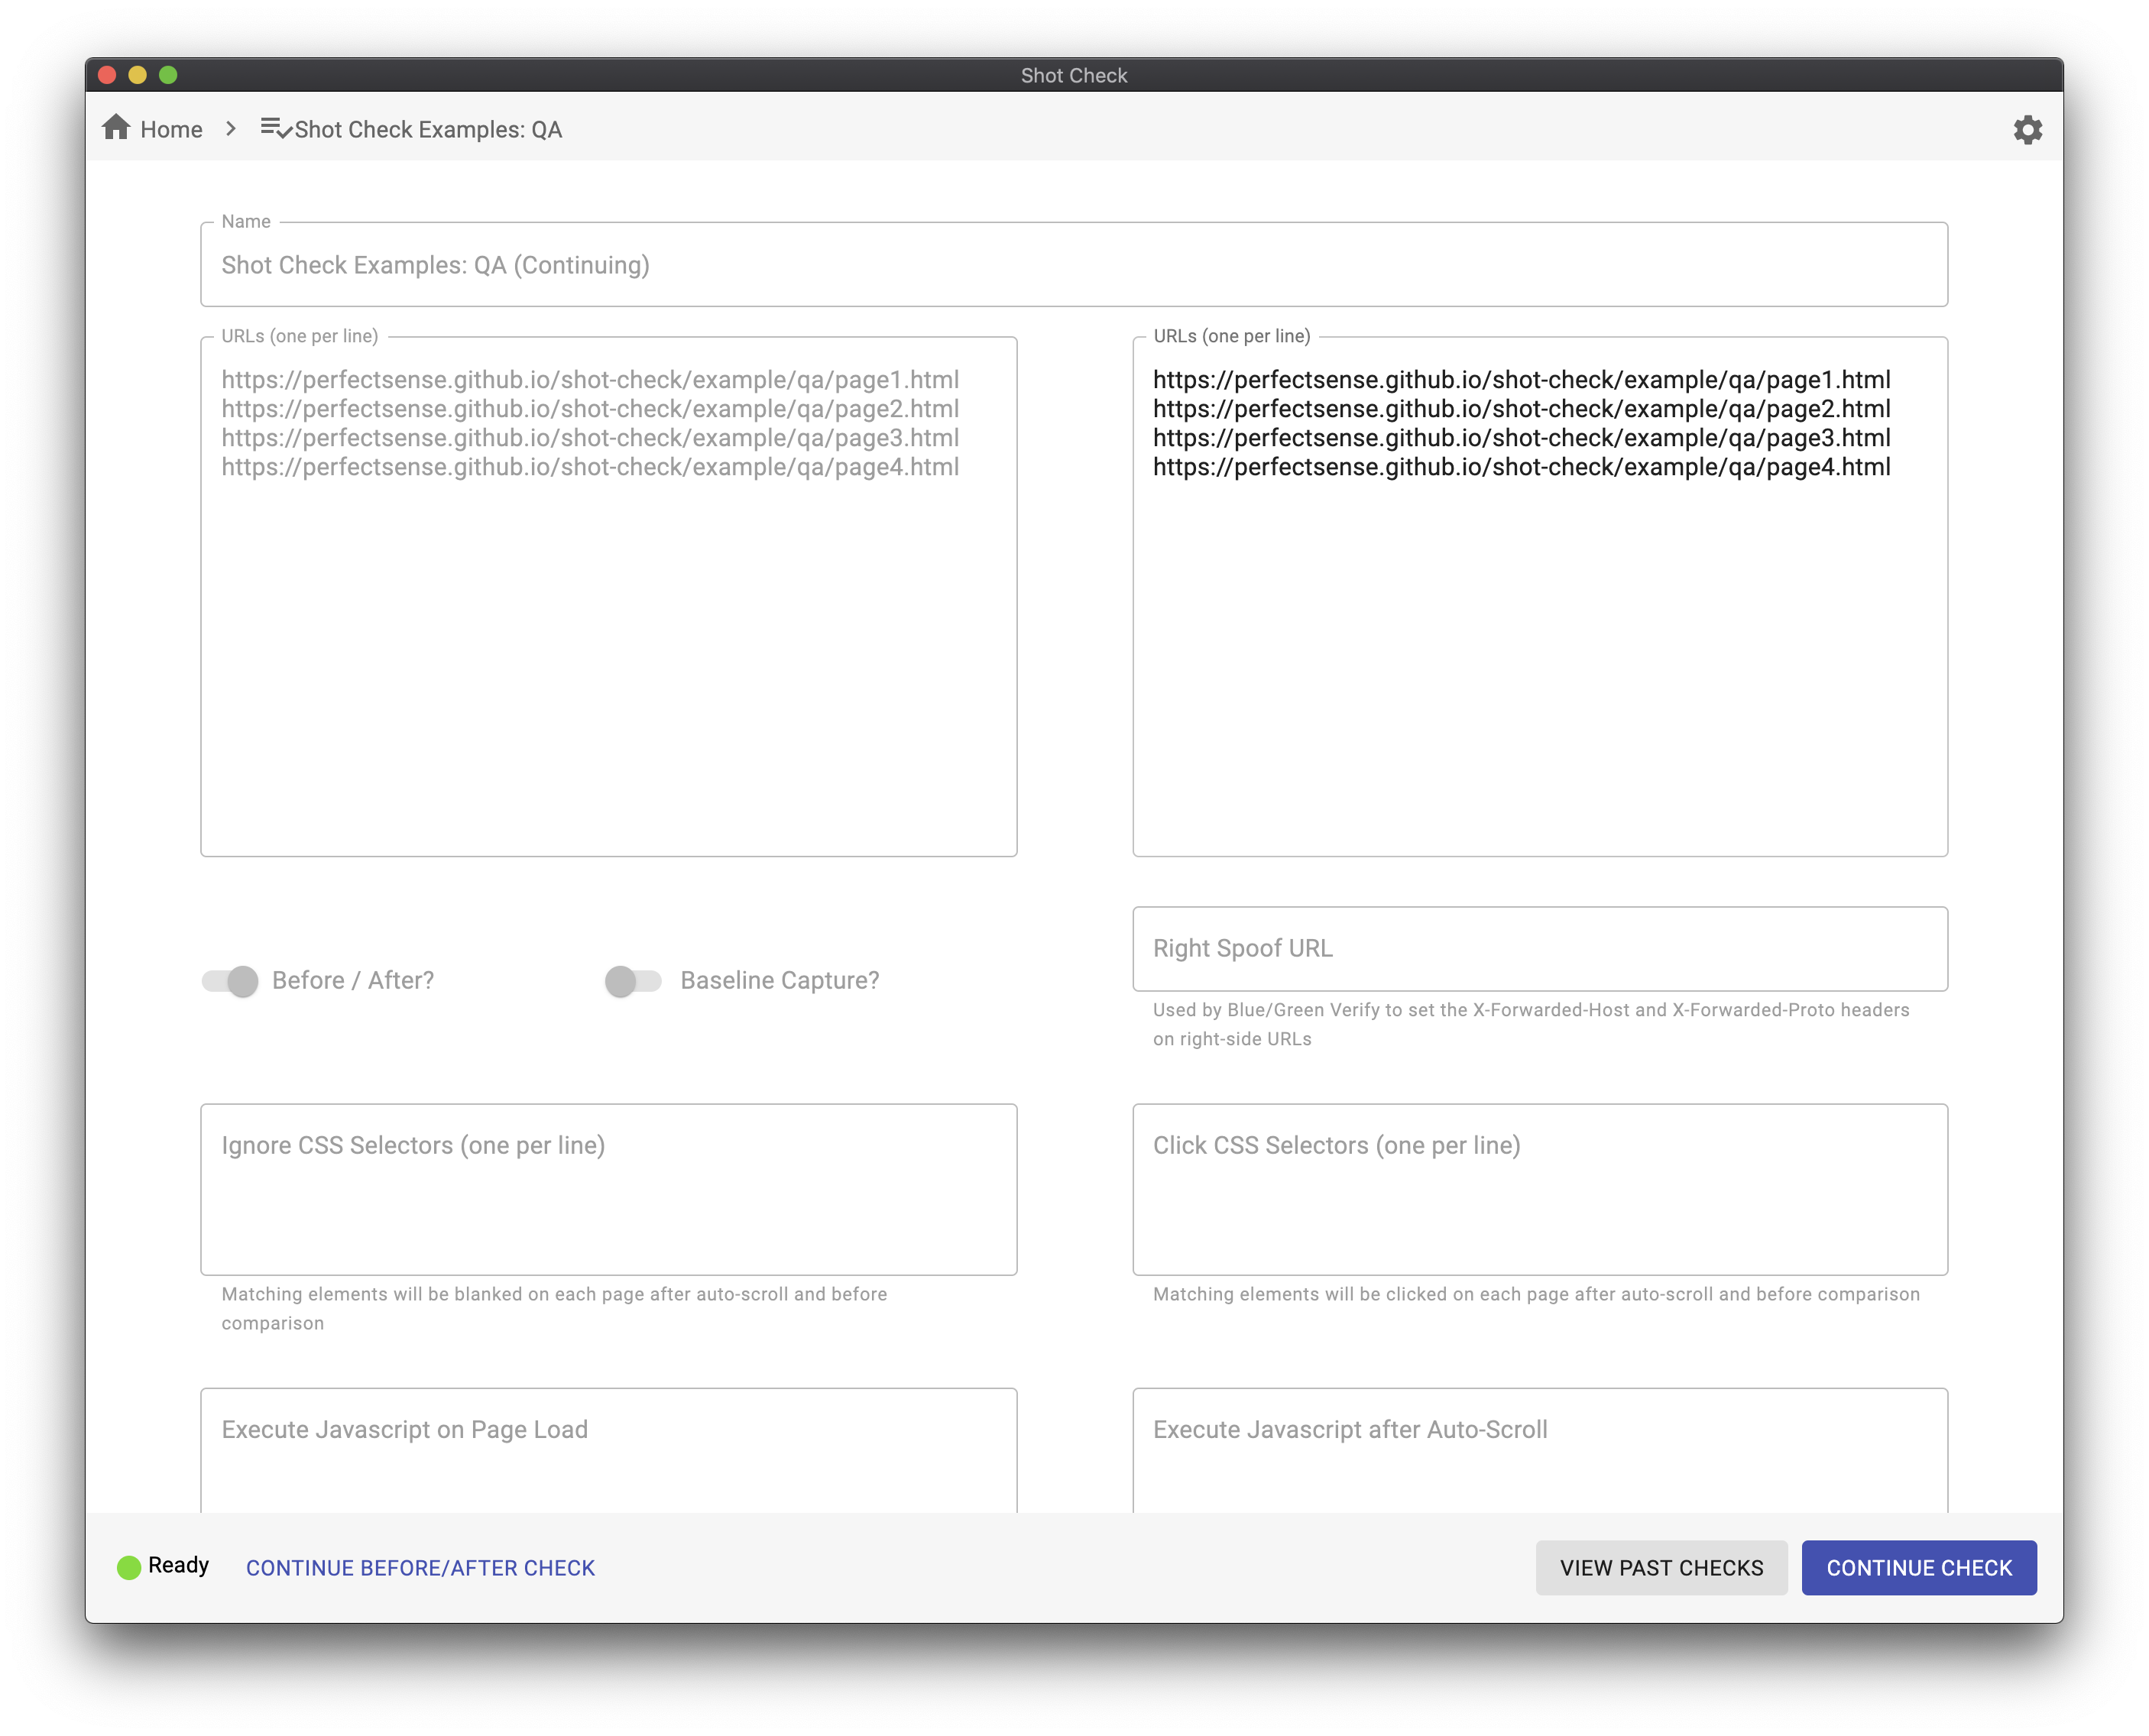
Select an environment and site and provide one list of paths. Shot Check will capture screenshots and then pause. Deploy a new build of the site or make other changes, then come back to the tool and resume. Shot Check will capture screenshots again and compare the before and after screenshots.
When the initial capture is complete, the Continue screen is loaded for you. Click the "Continue Check" button after your changes have been deployed to capture the "after" screenshots and compare.
If you have a site with the exact same content published on more than one environment, you can enter URLs for the site on both environments to enable the Environment to Environment check type.
Select a site and two environments. The list of paths will be generated for each environment, and Shot Check will capture screenshots for each path on each environment and compare.
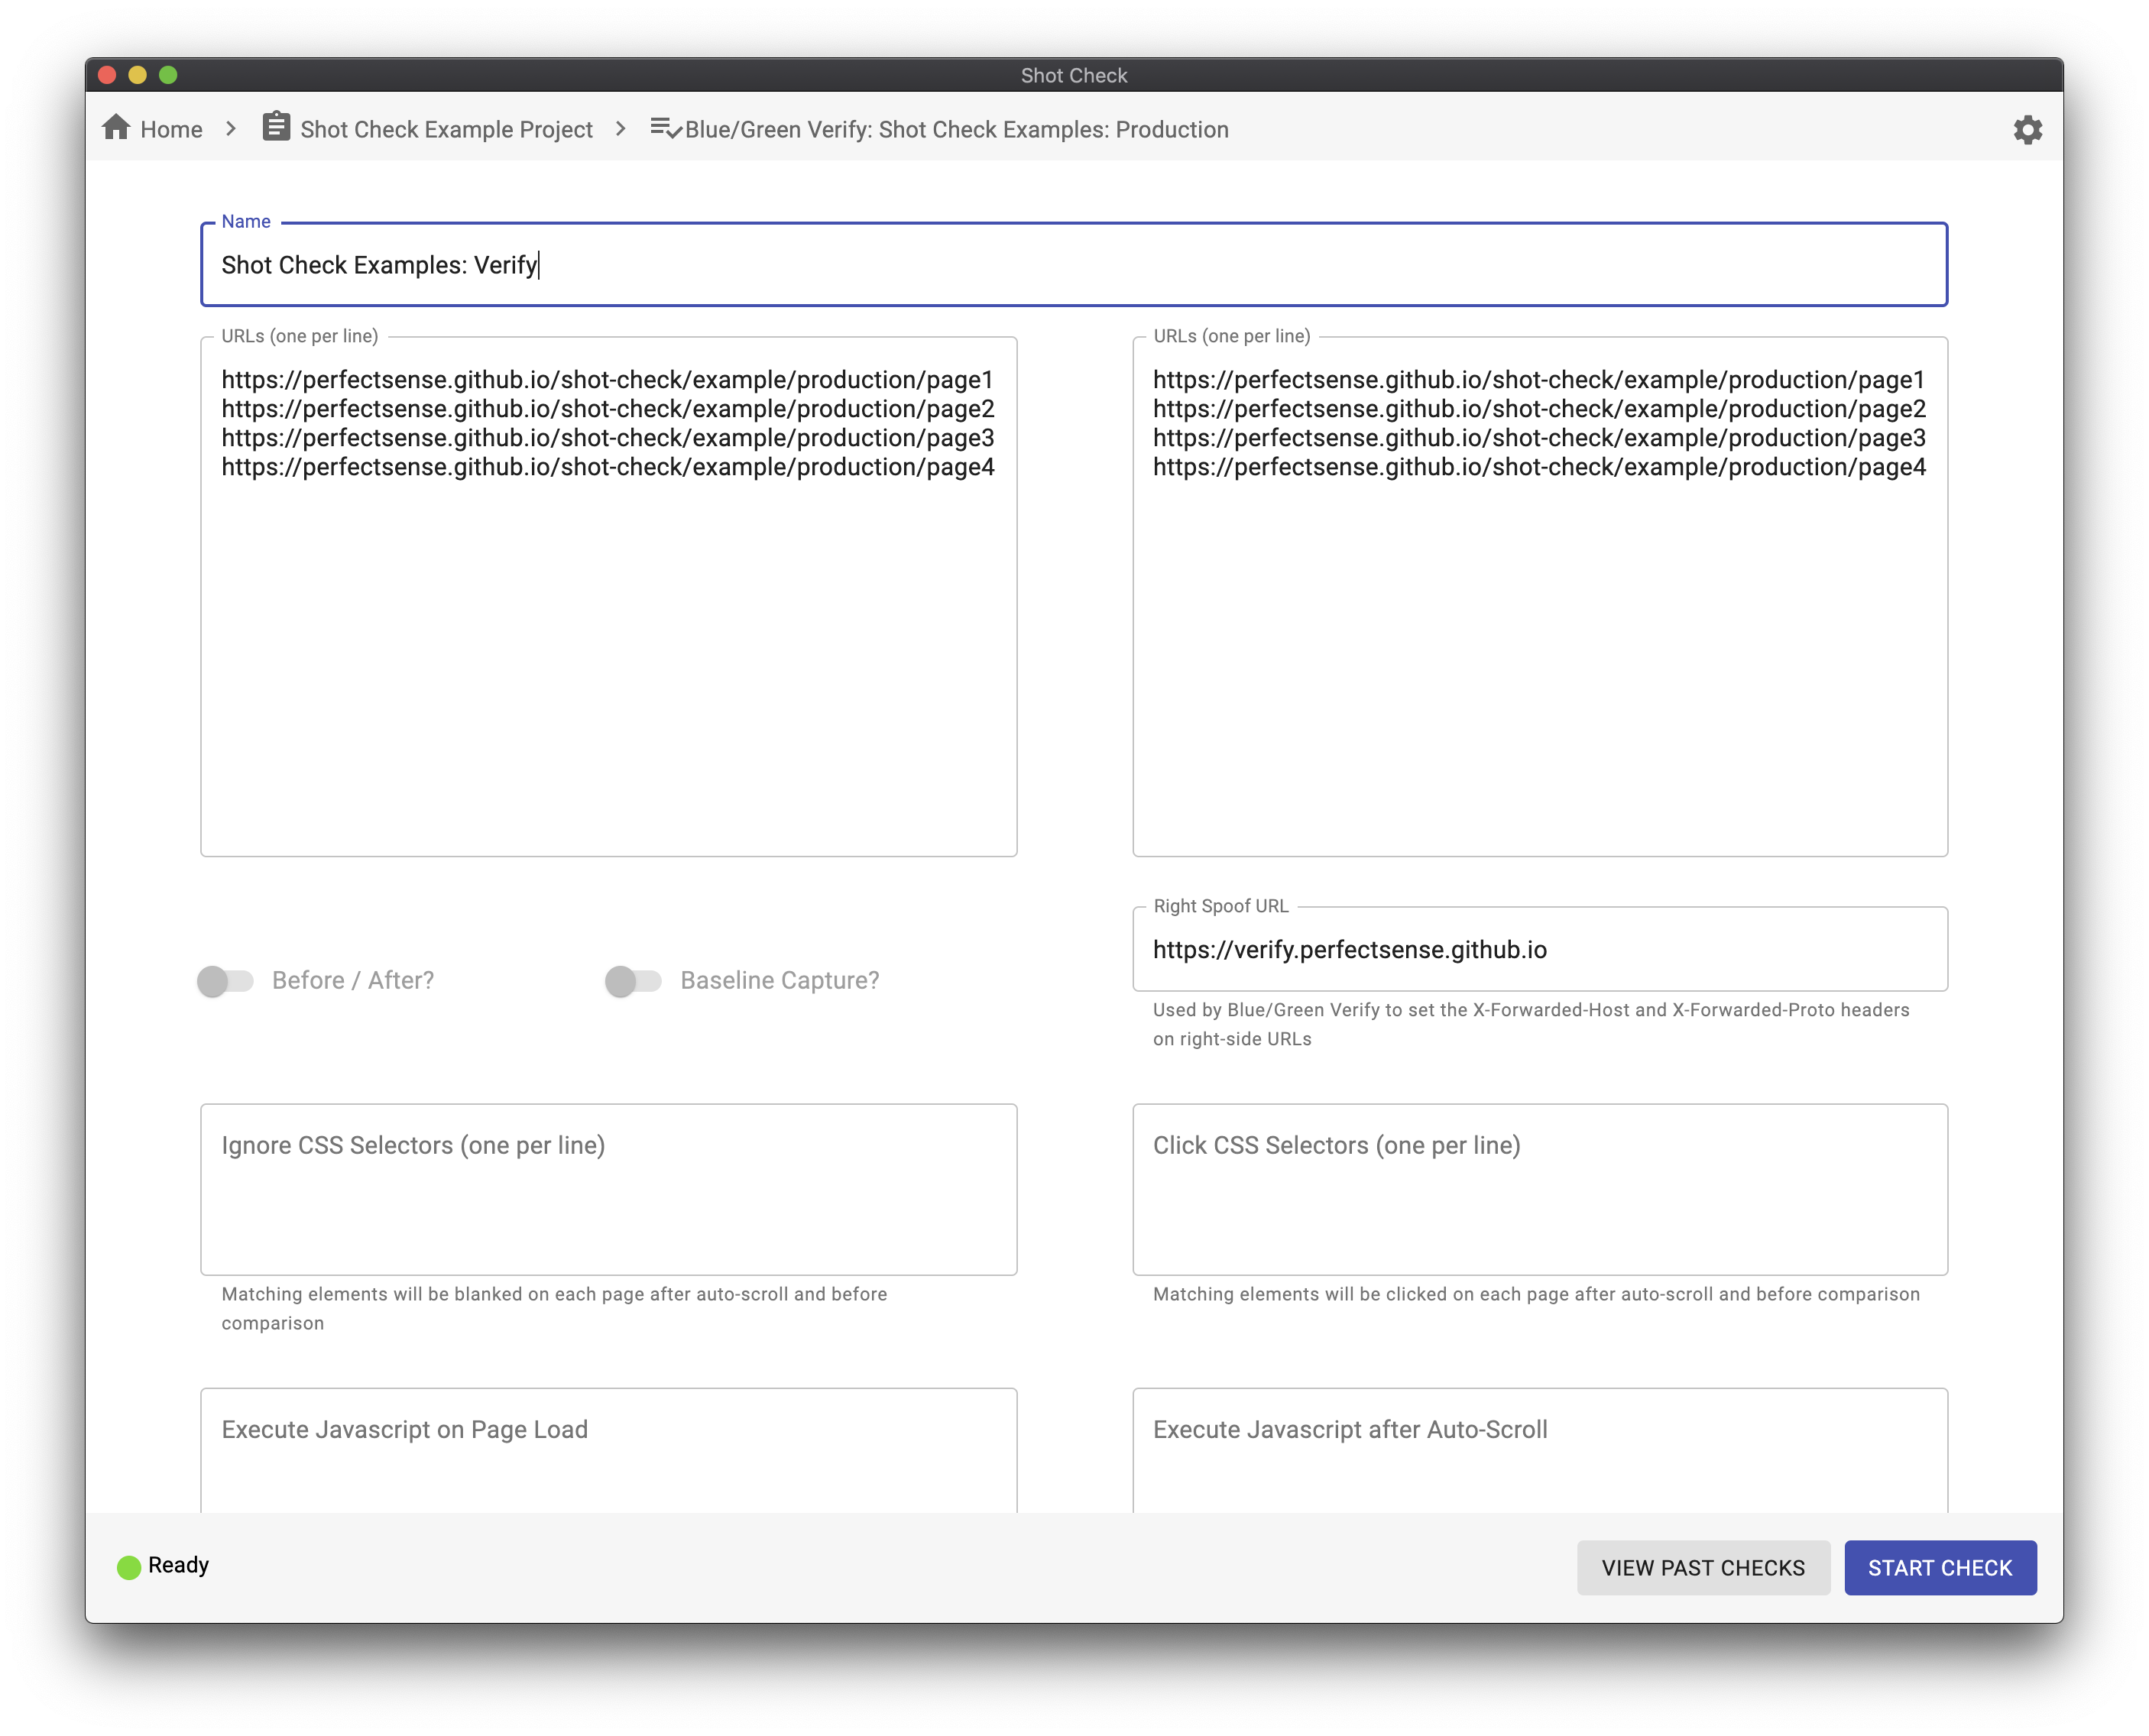
If your production environment is deployed using a Blue-Green deployment model, you can enter the secondary URL prefix (sometimes known as the "verify url") in the production environment settings to enable the Blue/Green Verify check type.
Select a production environment and a site. Provide one list of paths. During a blue/green deployment when both production instances are running, Shot Check will capture screenshots for each path on the primary URL and the verify URL and compare.
Note: It is not necessary to provide a verify URL for each site, as the base URL will be sent as the X-Forwarded-Host header in the request.
Similar to Before and After, capture a set of screenshots to establish a baseline, then capture again and again using the same site on the same environment or a different environment.
This comparison can be run against the same environment or a different environment.
The Preferences screen can be reached by clicking the gear icon in the upper right corner.
Here, you can set desired browser widths, auto-scroll speed, override the Chrome executable path, and other global settings.
If a certain element of a site (such as an ad) is very dynamic, it will cause false negatives in your comparisons. Use an Ignore CSS Selector to simply remove those elements from the DOM before the screenshot is captured.
Some sites present dialogs that must be clicked to accept cookies or decline to subscribe to newsletters, etc. Use a Click CSS Selector to click these elements on page load to dismiss the dialog before the screenshot is captured. Note: If this click causes the browser to navigate to another page, the check will fail with an error.
If ignore and click do not cover your requirements, execute any custom
JavaScript you want after the page is loaded or after auto-scroll has been
completed. The method shotCheckSleep(milliseconds) is available in the page
environment for your convenience. Use this if a site uses an animation or
loading screen that cannot otherwise be skipped.
To automatically append a querystring (?exampleKey=value) to every URL, supply
a Query String. The special value {timestamp} will be replaced with the
current timestamp in milliseconds. Use this as a cache buster if necessary, for
example _={timestamp}.
Extra request headers can be used to customize the request even further. For
example, Cookie: userId=1234 or User-Agent: Mozilla/5.0 (Linux; Android 8.0; Pixel 2 Build/OPD3.170816.012) AppleWebKit/537.36 (KHTML, like Gecko) Chrome/86.0.4240.183 Mobile Safari/537.36.
If it is more convenient for you and your team to maintain a list of URLs that should be part of regression tests on the site rather than a shared configuration file, provide that path as part of the Site configuration. It should be a path relative to the environment's base URL that emits a plain-text list of URLs. For example: https://perfectsense.github.io/shot-check/example/production/spot-check-urls.txt
Brightspot has an optional module called "Spot Check" that provides an automated method of analyzing template usage and collecting a subset of site content that is structurally representative of all content on the site. This representative subset can help drive regression testing, as it ensures every unique template placement can be tested.
No. Shot Check is a standalone Electron application that can test any site that can be rendered in a modern web browser.
In order to fully load all assets on a page before taking a screenshot, Shot Check slowly scrolls to the bottom of each page in each breakpoint before taking the full-page screenshot. If you know the assets are already loaded on a given breakpoint and wish to speed up the capture process, you can select "Turbo Auto-scroll" next to that breakpoint on the Preferences screen.
Not yet. Puppeteer, the underlying browser automation library used to capture screenshots, does have experimental support for Firefox, so it is possible to add this in a future version.
The basic auth username/password is saved in a separate file on your device, not in the main configuration file. This is to ensure the Custom Configuration File can be checked in to version control without also checking in the http basic auth username and password to version control.
Pull requests are welcome. For major changes, please open an issue first to discuss what you would like to change.
- Support for authenticated page requests (paywall) via cookies
- Add query param and/or custom header to every request (?disableAds=true for example)
- Improve report view
- Report export
- Firefox support
