-
Notifications
You must be signed in to change notification settings - Fork 489
Test Window and Camera Test Window
Oleg Klimov edited this page May 20, 2017
·
3 revisions
To open Test Window, call:
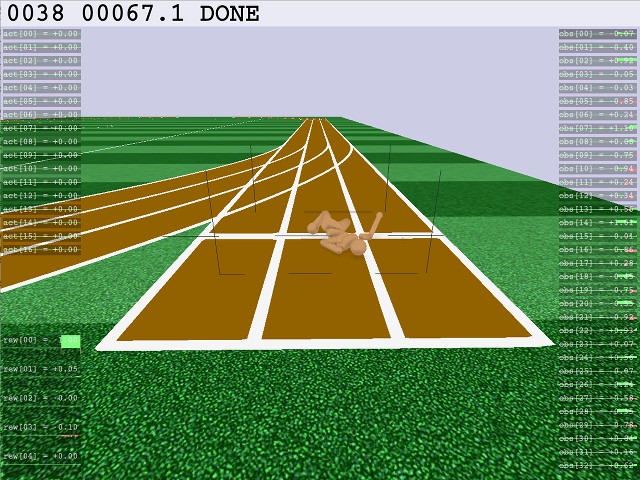
env.render("human")In this window, you can:
- turn around point in the center, using your mouse or trackpad (
LMBis left mouse button here), - move in virtual world, using
Ctrl + LMBorRMB, - Turn on/off slowmo
F1, - Turn on/off score bar
F2, - Turn on/off actions, observations, rewards
F3.
The wireframe cage you see in the center when you open Test Window, is a ruler to show zero coordinates position, height of 1, horizontal distance of 1. Distance between running lanes is 1 meter.

If you close the window, env.render("human") will start returning False.
A scene usually has a camera to chase the robot, it is used to record video.
a = env.render("rgb_array")
# Look inside a, it has shape [400,600,3] or similar
env.unwrapped.camera.test_window()
You also can create your own camera:
mycam = env.unwrapped.scene.cpp_world.new_camera_free_float(320, 200, "my_camera")
mycam.move_and_look_at(1,1,1, 0,0,0)
rgb, depth, depth_mask, labeling, labeling_mask = mycam.render(True, True, True)
rgb_array       = np.fromstring(rgb, dtype=np.uint8).reshape( (320,200,3) )
depth_array     = np.fromstring(depth, dtype=np.float32).reshape( (160,100,1) )
labeling_array  = np.fromstring(labeling, dtype=np.uint8).reshape( (160,100,1) )
Labeling is broken now, but it's expected to recover, once environments with RGB observations appear.