-
Notifications
You must be signed in to change notification settings - Fork 39
Tutorials
This tutorial will teach how to call ROS actions from the command line, how to pass parameters to them, and how to interpret their console output.
-
First we must launch OceanWATERS.
cd oceanwaters_ws
source devel/setup.bash
roslaunch ow europa_terminator_workspace.launch
-
An action client script enables the user to execute a ROS action from the terminal. All action client scripts are located in
ow_simulator/ow_lander/scripts/. -
Ready another terminal to call an action script.
cd oceanwaters_ws
source devel/setup.bash
-
Unstow the arm using an action client. In the second terminal, type
rosrun ow_lander arm_unstow.py
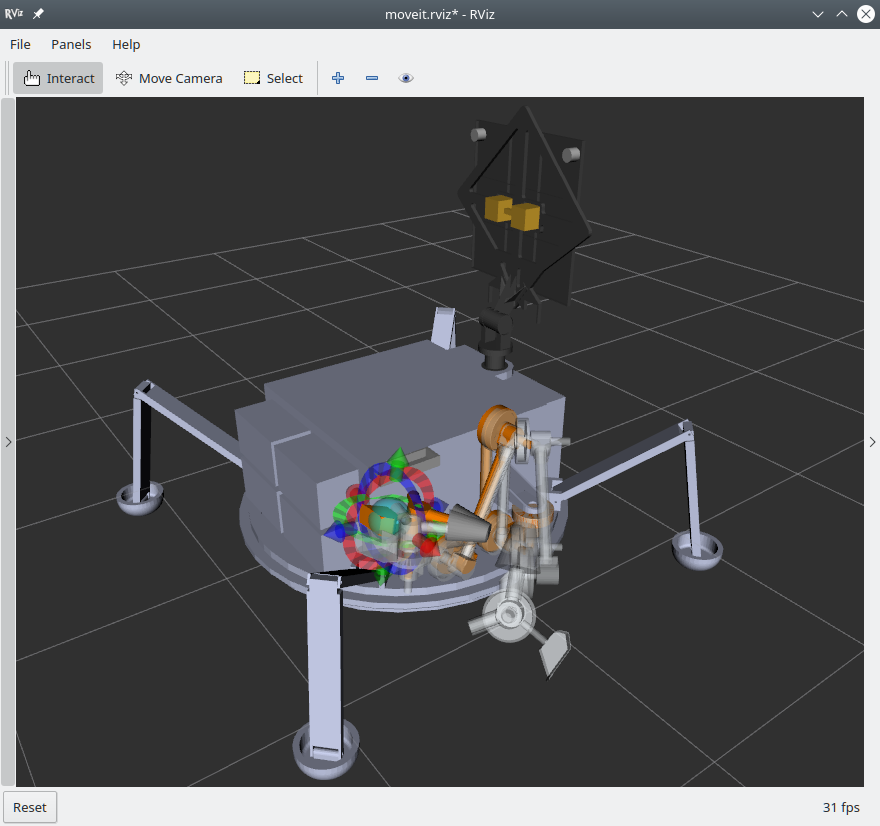
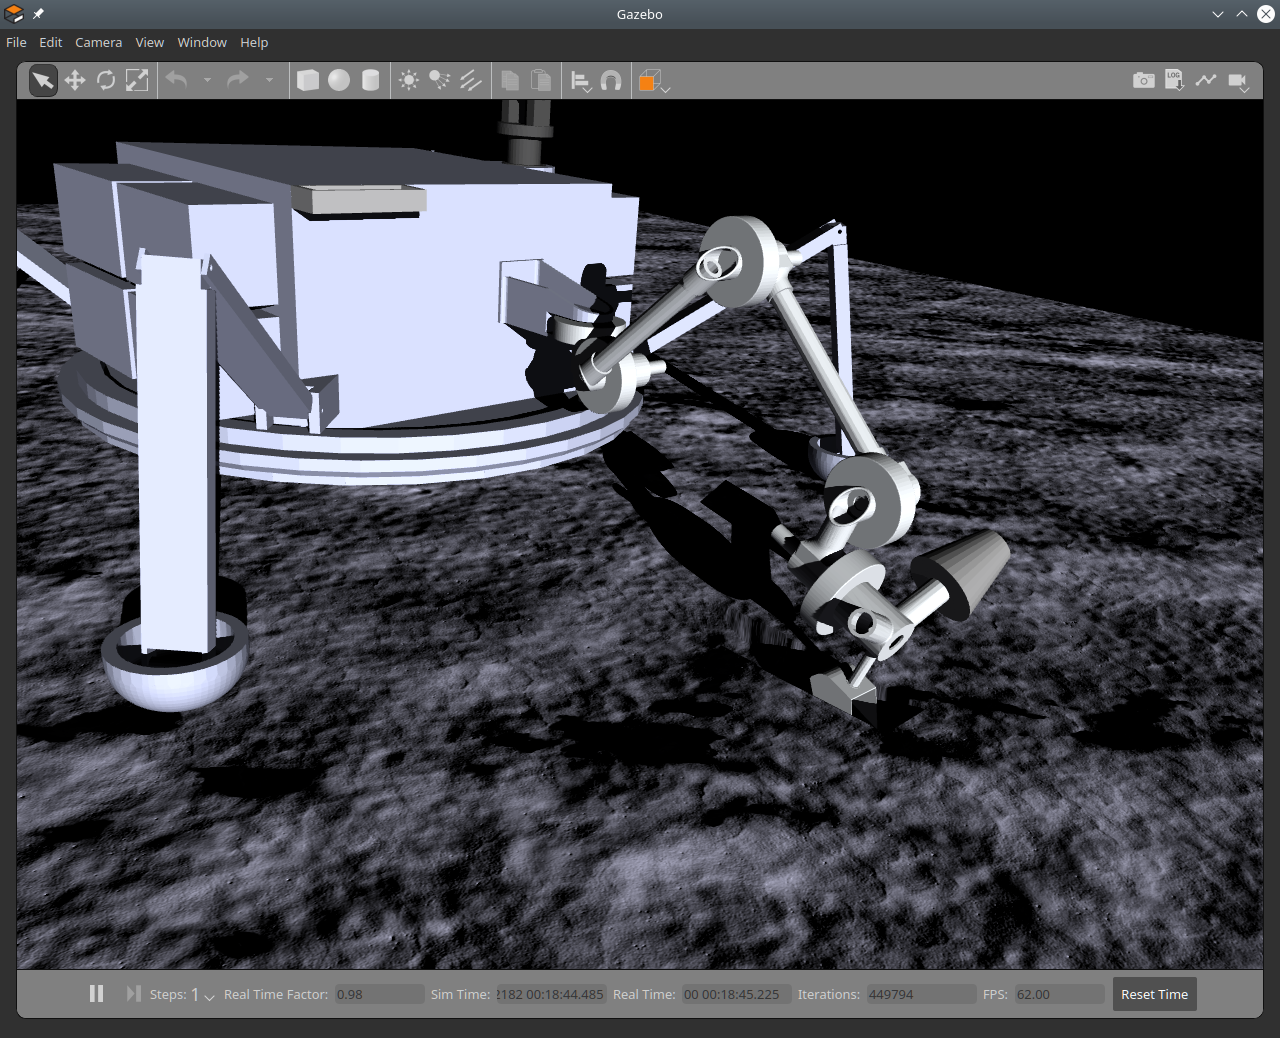
Once the action client script is called, it will block until the action either aborts or succeeds. In rviz you will see a transparent rendering of OceanWATERS arm pivot outward. This shows the planned path. Another transparent rendering of the arm will follow after it, this represents the actual pose of the arm in the simulation and should match the pose you see in the Gazebo window.
The OceanWATER arm should end in the following pose.

The simulator will indicate when an action has started, what its result was, and when the action has been completed.
[INFO] ArmUnstow action started
[INFO] ArmUnstow: Succeeded - Arm trajectory succeeded
[INFO] ArmUnstow action complete
Other OceanWATERS actions may communicate additional details in their logged result. In addition to the simulation log, all actions return a result
message on their result topic. The ArmUnstow result topic can be listened to
at/ArmUnstow/result. The name of the topic shares the name of the action definition file,ArmUnstow.action, which for all OceanWATERS actions can be found in eitherow_lander/actionorowl_msgs/actiondirectories. Some result messages return values. For a breakdown of all available OceanWATERS actions refer to Lander Simulation -
At this point it would be good to familiarize yourself with the command line arguments of the various action client scripts. You can view their argument list by calling the scripts with either the
--helpor-hflag. Try this out on the Grind action client.rosrun ow_lander task_grind.py --help
You should see something like the following output
usage: task_grind.py [-h]
                     [x_start] [y_start] [depth] [length]
                     [parallel] [ground_position]

A grinder is used excavate the terrain.

positional arguments:
  x_start          X-coordinate of grinding starting point
                   (default: 1.65)
  y_start          Y-coordinate of grinding starting point
                   (default: 0.0)
  depth            Desired excavation depth (default: 0.05)
  length           Desired trench length (default: 0.6)
  parallel         If True, resulting trench is parallel to arm. If
                   False, perpendicular to arm (default: True)
  ground_position  Z-coordinate of ground level in base_link frame
                   (default: -0.155)

optional arguments:
  -h, --help       show this help message and exit
Each of the positional arguments for action client scripts are optional and if they are not provided, the default value will be used.
-
Try calling the grind action using its action client script.
rosrun ow_lander task_grind.py
Since no arguments were provided, all grind action parameters will be set to their default values. You should now see the OceanWATERS arm point its grinder end-effector downward and grind out a rectangular trench directly in front of the lander.
Note: The terrain will not change in appearance following a grind, this is expected.
- Now try calling the scoop linear action, but this time lets pass our own
parameters to the action by calling the action client script with arguments.
The script uses only optional arguments, so they must be proceeded by a flag,
and if they are not provided the defaults will be used.
Say we want to perform a more shallow dig than the default depth, simply use the depth flag to change the depth value.
usage: task_scoop_linear.py [-h] [--frame {0,1}] [--relative] [-x X] [-y Y] [-z Z] [--depth DEPTH] [--length LENGTH] Removes tailings following a grind with a linear scooping motion. optional arguments: -h, --help show this help message and exit --frame {0,1}, -f {0,1} The index of the frame surface position will be interpreted in {0: 'base_link', 1: 'l_scoop_tip'} (default: 0) --relative, -r Position will be interpreted in the tool's frame (default: False) -x X X-coordinate on surface where trench starts (default: 1.46) -y Y Y-coordinate on surface where trench starts (default: 0) -z Z Z-coordinate on surface where trench starts (default: -0.155) --depth DEPTH, -d DEPTH Desired scooping depth (default: 0.01) --length LENGTH, -l LENGTH Length of the linear segment of the scoop's trajectory (default: 0.1)orrosrun ow_lander task_scoop_linear.py --depth 0.005
This should result in a linear scoop trajectory at half the default depth.rosrun ow_lander task_scoop_linear.py -d 0.005

Run a ROS launch script which demonstrates the PLEXIL-based autonomy node exercising common simulator functions.
-
Do the following setup if needed. We suggest putting these lines (substituting the correct pathnames) in your shell init file, e.g.
.bashrc, so that they never need repeating. Note that these commands are part of the installation instructions for GSAP and PLEXIL.export GSAP_HOME=/home/<username>/gsap export PLEXIL_HOME=/home/<username>/plexil source $PLEXIL_HOME/scripts/plexil-setup.sh
-
Launch OceanWATERS.
cd oceanwaters_ws
source devel/setup.bash
roslaunch ow europa_terminator_workspace.launch
-
Set up
rqtto show images. In theImage Viewwidget inrqtselect/StereoCamera/left/image_rawfrom the pulldown menu. -
In a separate console, run the autonomy demo.
cd oceanwaters_ws
source devel/setup.bash
roslaunch ow_plexil ow_exec.launch plan:="Demo.plx"
-
Watch
rqt,rviz, andgazeboas the lander plans and executes this sequence of operations (it will take about 8 minutes):- Brief landing site imaging: antenna tilts, pans in several iterations,
taking pictures. The images should be visible in
rqt. - The arm is made ready using the
unstowservice. - A
guarded_moveis performed in order to determine the height of the ground. - A trench parallel to the arm is dug using the
grindservice. There will likely be no visual modification to the terrain; we need to work on that. - Tailings are removed using
dig_circular. There will be visible modification of the terrain. - The arm is stowed using the
stowservice.
- Brief landing site imaging: antenna tilts, pans in several iterations,
taking pictures. The images should be visible in