-
Notifications
You must be signed in to change notification settings - Fork 1
Home
Here is the information you need to run the digital control of inverted pendulum lab for MECH 488/588. MEL and required software have already been installed on the two computers on the right when you walk into MEB 117, so just follow these instructions and you should be good.
The first thing you need to do is clone this repository (which lives on github) to your user account. To do this, we can just put the MECH488 github repository onto your user desktop (still on the computers in MEB 117). To do this, open file explorer, navigate to your desktop, click in the top bar that has the directory, type "cmd" and hit enter. This should open a command line on your computer that has the following line.
C:\Users\{yournetid}\Desktop>Now that you are in the desktop directory, pull the contents from github and place them in the current directory by copying the following and pressing enter (don't include the >).
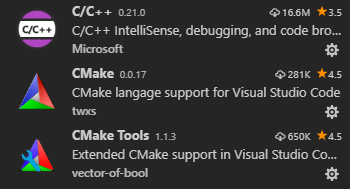
> git clone https://github.com/mahilab/MECH488.gitNow that you have the code base, you can start setting up your environment. We are going to work in Visual Studio Code because it has some nice plugins that streamline development. First make sure you install a couple extensions which are listed below, and have the picture of each of them below that.
- C/C++ - Extension from Microsoft offering code completion, IntelliSense, debuging, etc. (documentation)
- CMake Tools - Extension which integrates CMake with VS Code and C/C++ extension (documentation)
- CMake - A simple syntax highlighter for CMake files

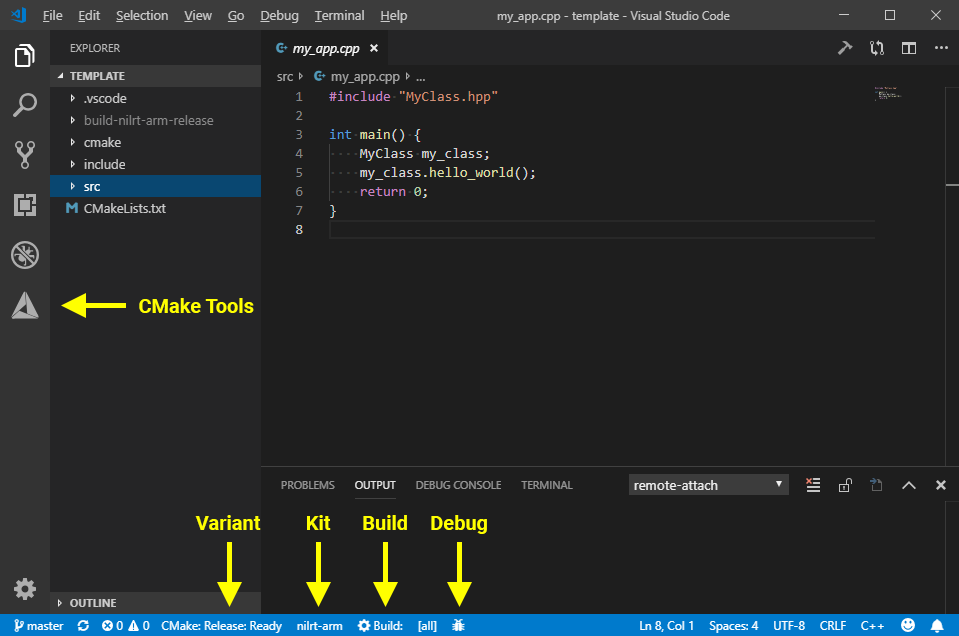
Once you have installed the extensions, close out of visual studio code to make sure that they have a chance to be properly run. Reopen VS Code, and click on File -> Open Folder. Navigate to where you have your MECH488 folder (on your desktop), click the MECH488 folder, and click Open. If the interface asks you to choose a build setting at the top, select nilrt-arm, and you can click yes if extensions ask you if you want to configure your editor properly. If you open the src folder on the left side of the screen and click on main.cpp, you should see the interface load as shown in the following picture. If you are not having the tools appear at the bottom of the screen next to build, try restarting the computer. I had some trouble the first time opening VS Code on my machine and restarting helped.

When each of the tools shows up on the bottom, click where you can select the kit and select nilrt-arm. This stands for NI Linux Real-time processor which the myRIO uses.
The only code you should have to edit is in main.cpp. You should not be editing anything outside of the the main function of the code. Inside the main function, the code begins by setting up the system, then initializing and connecting to the myRIO. This code should not be changed and is shown below.
// main(), the entry point for all C/C++ programs (all code starts here!)
int main() {
    // register our handler so its called when ctrl+c is pressed
    register_ctrl_handler(my_handler);
    // create a myRIO object
    MyRio myrio;
    // open communication with myRIO FPGA
    myrio.open();
    // enable myRIO to set intial values
    myrio.enable();
The next portion of code initializes the configuration of the myRIO and sets up the encoder (for 588 students) for use. The myRIO should be set up to use the channels indicated below already, but please check this before running, as other teams may have changed it. If your team wants to use different channels, make sure you change it at the appropriate place here. Note that the encoder uses DIO pins 0 and 2, so you will need to reserve these for encoder use.
    // enable encoder 0 (A = DIO 0, B = DIO 2)
    myrio.mspC.encoder.enable_channel(0);
    // set units per count on encoder (get_position() will return radians, make 360.0/500.0 if degrees prefered)
    myrio.mspC.encoder[0].set_units_per_count(2 * PI / 500.0);
    // configure MSPC DIO[1] to be output (all DIOs are inputs by default)
    myrio.mspC.DIO[1].set_direction(Out);
Then we will create the appropriate connection to use with MELScope (don't change this). The following lines will then create the control constants. Anything that you want to only execute once should go here. The example code has the sampling rate hard-coded, but think about how you can implement it if you want to use the sampling rate as a variable later.
    // create MelNet so we can stream data to host PC
    MelNet mn(55002, 55001, "172.22.11.1");
    // create your constants that you will use for control here
    double k_theta = 0.0;
    double k_omega = 0.0;
    // create Timer for our control loop
    Timer timer(hertz(1000));
    // create a Time point t
    Time t = Time::Zero;
Lastly, we will initialize our setup for data collection. Here, you should change the headers for your csv to be the names of whatever variables you are collecting. Make sure to have the same number of strings here as you will have variables you are writing to your data later. Then we define the filepath. You should change groupXX to be your groupnumber, and this filepath will be where you are executing your code. Lastly, we initialize the data vector which is a vector of vectors (2D vector). We will determine what exactly goes in it later, so don't change anything with that here.
    // headers for the csv file for datalogging
    std::vector<std::string> header = {"Time (s)", "Position (rad)", "Velocity (rad/s)", "Control (A)"};
    // path to csv file (absolute_folder will be created in system root)
    std::string filepath = "/home/admin/MECH488/groupXX.csv";
    // vector of double vectors which will hold information to write
    std::vector<std::vector<double>> data;
Everything in the while loop that follows will execute until you tell the code to stop. The first part of this updates the input. This physically tells the myRIO to read all of the information that is coming into it. This should always be the first part of the while loop so that the values you are reading are up to date.
   while(!STOP) {
       // get real world input values
       myrio.update_input();
Then, there is a portion of code labeled with "!!! BEGIN YOUR CONTROL IMPLEMENTATION !!!". Anything that you need to do to collect data, calculate control, and write control to the myRIO should go here. Remember that this portion will be executed every time.
At the end of the while loop, there is code that should always run to finish the loop. The first line collects data and stores it to be written to a csv later. This takes a vector of doubles, as shown. You can maybe think about how to only collect data when control is enabled so you don't have a ton of data to sift through. The second line shows sending data to a MelNet, which will be sent to a plot which you can use as an oscilloscope. This information must be a vector of doubles (see the code for how to cast an int to a double if desired). The next line updates the myRIO and writes any information calculated to the outputs. The last line waits for the remainder of the duration for the timer which was started before the while loop.
        //append data to a vector to use for datalogging
        data.push_back({t.as_seconds(), volts_write, volts_read});
        // stream doubles of interest (add/remove variables if desired)
        mn.send_data({volts_write, volts_read, (double)raw_counts, radians});
        // set real world output values
        myrio.update_output();
        // wait timer and then get elapsed time
        t = timer.wait();
Lastly, outside of the while loop, there is code to write the data to a file at the filepath that we defined earlier. You shouldn't have to change this, and this will write whatever you collected when you hit ctrl+C to close your program.
    // write the header
    csv_write_row(filepath, header);
    // append the data
    csv_append_rows(filepath, data);
Once you have the code ready to build, you can press F7 to build the code. This will create your executable in the build folder. Make sure to take a look at the output that generates as you build the code. If there are any errors, it will tell you which lines the errors are on and what you need to do.
The myRIO is a device which runs a version of Linux. To communicate with it and to send information, we will use 2 protocols called ssh (Secure Shell) and sftp (SSH File Transfer Protocol). Both of these use a terminal interface, but VS Code has a great setup that allows us to implement it easily. On the top of the screen, there should be a button that says terminal. If you click on it, you get a dropdown, from which you can select new terminal, then do this again and select split terminal. Two windows should open up at the bottom of your screen which each provide a PowerShell terminal. This lets us use ssh in one terminal, and sftp in another terminal at the same time. If you are getting errors with the following instructions look at the instructions after the commands. To do this, on one of the terminals, execute the following command. Both of the following instructions will ask for passwords. Press enter when this is prompted, as the default password for these devices is blank.
> ssh [email protected]On the other terminal, execute the following command.
> sftp [email protected]If you get an error saying "WARNING: REMOTE HOST IDENTIFICATION HAS CHANGED!", run the following command and then try it again.
> ssh-keygen -R 172.22.11.2You should now have a screen that looks like the following.

Now we need to move the app to the myRIO and change the permissions on it to make it executable. We first change our local directory (lcd) to the build folder, where the executable, app lives on our machine. Then we change directory (cd) on the myRIO to the MECH488 folder. Next, we move the file from our computer to the myRIO (put). Then we change the permissions (chmod) to let us run it using a terminal. To do these, on the terminal with sftp, execute the following commands:
sftp> lcd build-nilrt-arm-release
sftp> cd MECH488
sftp> put app
sftp> chmod 777 app
Now the executable is on the myRIO and ready to run. We will first change directory (cd) on the myRIO to the location of the app. Then we will run the executable (./) and the program will begin. Make sure you close out of your program using ctrl+C, not just closing windows.
~# cd MECH488
~# ./app
Once you have performed this set of commands once, each new time that you build your system, you should only need to execute the following two commands, the first on the sftp terminal, and the second on the ssh terminal. However, if you exit out of ssh or sftp, you need to rerun the previous steps.
sftp> put app
~# ./app
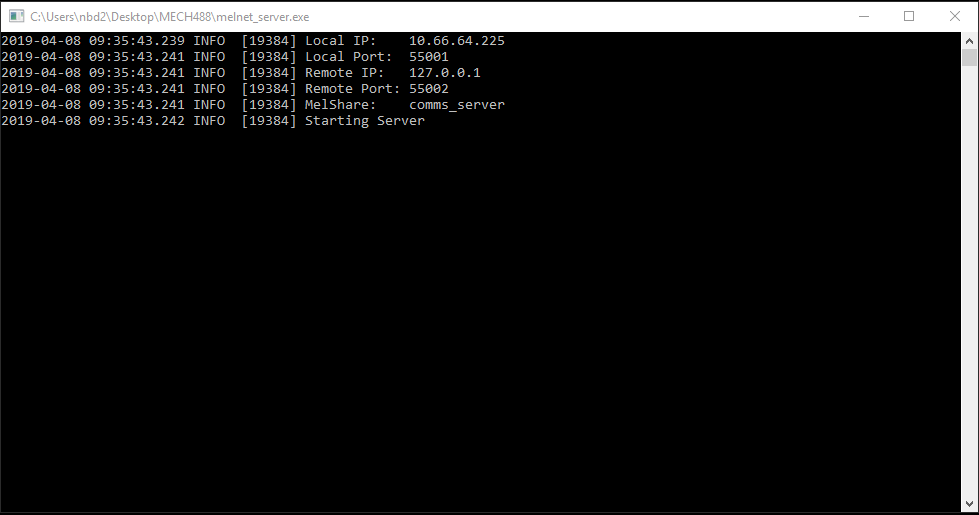
If you want to be able to look at real-time values of the variables in your system, you can use another tool that Evan has provided, called MELScope. We need to do just a couple of steps to get this to work. First, navigate to the MECH488 folder on your local computer (on the desktop if you followed these instructions). There should be a file called melnet_server.exe. Double click on it and it should start a program in a new terminal window that looks like the following. If it asks for permissions, go ahead and allow them. Leave this open for as long as you are testing.

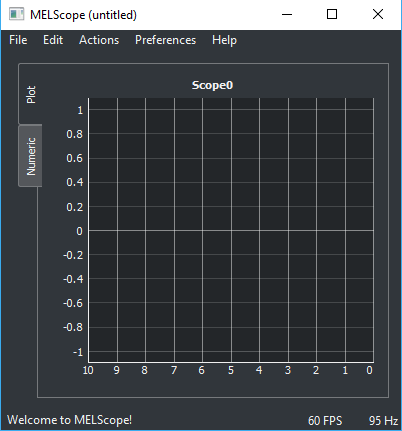
Now we can open up the scoping program. Now open file explorer again and navigate to C:\MECH488. There should be a shortcut to the application MELScope. Double click on it and it should run the program. It may ask you to approve it, and again click okay. This should open a screen like the following.

Click on Edit on the top of the window, then Add MELShare.... Where it asks for MELShare Name, write in comms_server, leave the dropdown as Read Only, and click OK. Now, back at the main scope screen. Click on Actions at the top, and then Reload. If your program is currently running, and you had information being sent through the line like follows, mn.send_data({volts_write, volts_read, (double)raw_counts, radians});, you should have some information being shown on the plot. If you don't see anything but think you should, click on Numeric on the left side of the screen, which should have an entry for each of the variables that were in your double vector in your code. If you don't see anything, try reloading the program again. If you have run things a couple of times and things seem to stop working, try closing out of MELScope and trying these instructions again.
With this scope, you can scroll in and out to expand the window, or you can set ranges and options manually by right-clicking on the plot and selecting options.
You should have implemented data collection in your code which writes desired data to a csv. Because the code is executing on the myRIO, the data will also be saved there, so we need to retrieve it. In your terminal which is loaded with sftp (if you are reopening sftp, make sure you execute cd MECH488 and lcd build-nilrt-arm-release first), execute the following command, where XX is replaced with your group number (or whatever you named your file in the c++ code).
sftp> get groupXX.csvThis should move the file to the MECH488/build-nilrt-arm-release folder on your desktop. From here, you can open it in excel and do what you wish.
- Can you set up the code so that control only happens when you do something (like press a button)? This is much safer and gives you an easy way to turn control on and off without having to hit the power supply. It also will let you run and test what your control output should be without having to actually send the control signal.