-
Notifications
You must be signed in to change notification settings - Fork 1
Home
Here is the information you need to run the digital control of inverted pendulum lab for MECH 488/588. All required software has already been installed on the two computers on the right when you walk into MEB 117 (the pendulums with myRIOs on them). If you have any questions about implementing the digital control, please email Joshua ([email protected]), not Dr. O'Malley. If you have questions about overall structure or guidelines for the project, you may email Dr. O'Malley, but please ask me questions about implementation of control.
Please take care with everything you do. However, we do know that unexpected circumstances happen. If something breaks, please notify Joshua ([email protected]) so that we can get it fixed so that everyone can use the equipment.
Do not assume the team before you plugged everything in correctly. Verify that you have made the correct connections every time you work with the system.
Make your connections to the terminals on the myrio based on the pinout listed on page 2 of this document. Note that on the physical system, there are labels on the terminals, but they are not spaced correctly, so make sure you are counting the correct number of spaces, not just plugging into the terminal below a label.
Then on the myrio, you should plug in your conditioned midori signal to AI[1]+, and your sensed current from the pendulum terminals to AI[0]+. Note that for AI channels, you need to connect the AI[]- channel to AGND as the reference voltage. If you are going to use the encoder, you should plug in one of the encoder channels (A or B on the pendulum terminal) into DIO[0], and the other encoder channel into DIO[2]. You should connect the AO[0] connection from the myrio to the REF+ connection on the pendulum terminal, and AGND to the REF- connection on the pendulum terminal. See the table below for a specific layout.
| myrio | other connection | Description |
|---|---|---|
AI[0]+ |
Pendulum terminal SNS
|
Current Sense |
AI[0]- |
myrio AGND
|
Reference for Current Sense |
AI[1]+ |
Conditioned Midori signal | Midori Position Signal |
AI[1]- |
myrio AGND
|
Reference for Midori Position Signal |
A0[0] |
Pendulum terminal REF+
|
Output command voltage |
AGND |
Pendulum terminal REF-
|
Reference for output command voltage |
DIO[0] |
Pendulum terminal A or B
|
One of the Encoder signals |
DIO[1] |
Pendulum terminal ENB
|
Enables the output of command voltage |
DIO[2] |
Pendulum terminal A or B
|
Other Encoder signal |
GND |
Pendulum terminal GND
|
Ground for encoder |
5V |
Pendulum terminal 5V
|
5V for encoder |
The first thing you need to do is clone this repository (which lives on github) to your user account. To do this, we can just put the MECH488 github repository onto your user desktop (still on the computers in MEB 117). To do this, open file explorer, navigate to your desktop, click in the top bar that has the directory, type "cmd" and hit enter. This should open a command line on your computer that has the following line.
C:\Users\{yournetid}\Desktop>Now that you are in the desktop directory, pull the contents from github and place them in the current directory by copying the following and pressing enter (don't include the >).
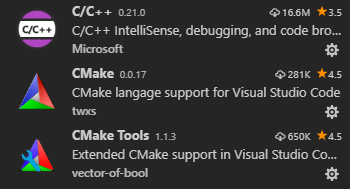
> git clone https://github.com/mahilab/MECH488.gitNow that you have the code base, you can start setting up your environment. We are going to work in Visual Studio Code because it has some nice plugins that streamline development. First, open VSCode, then make sure you install a couple of extensions which are listed below, and have the picture of each of them below that. To install them, click on the extension icon on the left side of the screen (should look like 4 blocks), search for the extensions below, then click install.
- C/C++ - Extension from Microsoft offering code completion, IntelliSense, debuging, etc. (documentation)
- CMake Tools - Extension which integrates CMake with VS Code and C/C++ extension (documentation)
- CMake - A simple syntax highlighter for CMake files

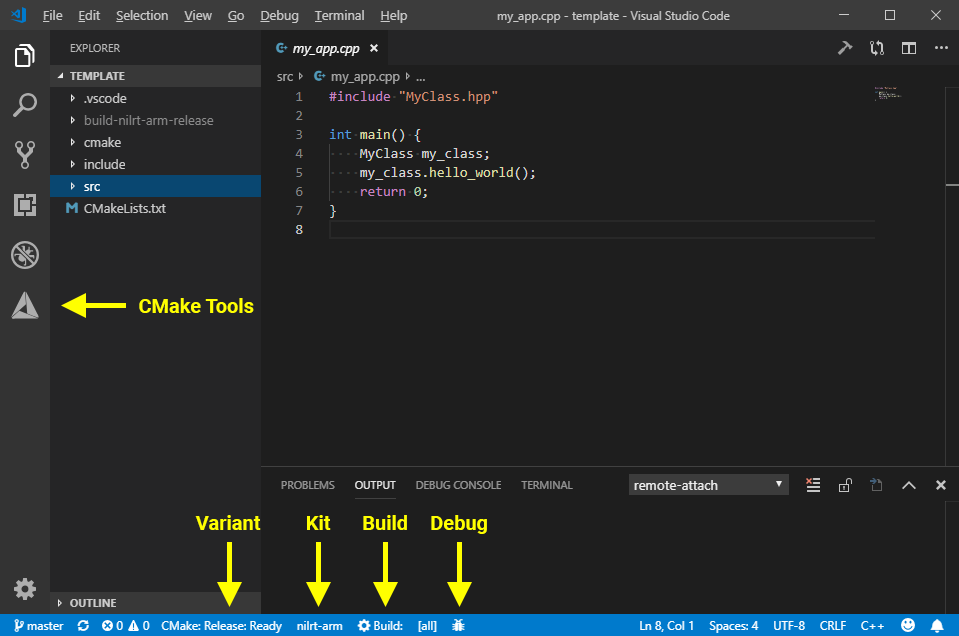
Once you have installed the extensions, close out of visual studio code to make sure that they have a chance to be properly run. Reopen VS Code, and click on File -> Open Folder. Navigate to where you have your MECH488 folder (on your desktop), click the MECH488 folder, and click Open. If the interface asks you to choose a build setting at the top, select nilrt-arm, and you can click yes if extensions ask you if you want to configure your editor properly. If you open the src folder on the left side of the screen, then the myrio folder and click on pendulum.cpp, you should see the interface load as shown in the following picture. If you are not having the tools appear at the bottom of the screen next to build, try restarting the computer. I had some trouble the first time opening VS Code on my machine and restarting helped.

When each of the tools shows up on the bottom, click where you can select the kit and select nilrt-arm. This stands for NI Linux Real-time processor which the myRIO uses.
The only code you should have to edit is found in src/myrio/pendulum.cpp inside the MECH488 folder. Further, you should only be editing code inside of the control_midori function (also control_encoder if you are in 588), which is shown below. This function will occur repeatedly at a rate according to your sample rate. The main idea is that you get 2 variables as an input, the current time in seconds, t, and either the voltage of the midori input, midori_volts, or the counts of the encoder, counts, depending on what type of control you are implementing. You must return the voltage you are going to provide to the amplifier which will power the motor, command_voltage. Make sure to check the Tips below for some help.
/// Part 1: Implement control with Midori potentiometer position feedback.
double control_midori(double t, double midori_volts) override {
    // This function should compute an amplifier command voltage given the
    // current controller time in seconds and Midori position in volts.

    // See tips in the wiki for static variables
    static double volts_last = 0.0;

    // See tips in the wiki for plotting variables
    double my_var = sin(2*PI*1.0*t);
    plot("My Variable 2", my_var);

    // See tips in the wiki for static variables
    volts_last = midori_volts;

    double command_voltage = 0;
    return command_voltage;
}
The only code you will have to adjust outside of this function is in the main function of the same file, located at the bottom. There is a single line that defines the sample rate as shown below. You can change this to adjust your sampling rate. As the comment mentions, don't change it past 2kHz.
// Don't increase past 2 kHz here
Frequency sample_rate = hertz(1000);
Once you are done writing code, you can click the build button at the bottom of your screen. You should see an exit code 0 when it is done if your code compiled correctly. It may take some time to build, but be patient with it. If it has taken quite a while, and nothing has happened, try clicking build again (there are two steps to the build process and sometimes it gets hung up on the first one). Lastly, if all else is failing, you can try deleting your build-nilrt-arm-release folder, and try again. This can fix some issues when you first log on to the computer.
TIPS:
-
static variables: If you want a variable to save data to be used for the next sample, you should label the variable
staticwhen you create it, such as thecounts_lastvariable in thecontrol_encoderfunction. Thestatickeyword means that that variable is only declared the first time that that code is encountered. Therefore, every time the function is called after the first time, that line is skipped, but the variable will still exist in that scope. -
plotting variables: The function
plot, that you see in the code below, will be useful for visualizing your output. If you want to plot some variable on a realtime graph (see Using the GUI below), you can call theplotfunction with the first argument being the name that you want to show up on the plot, and the second argument being the variable that you want plotted. -
filtering: When you are using the encoder, you may need to filter your calculated velocity, because it will calculated as discrete values based on your sample rate. To filter it, see the variable labeled
my_filterincontrol_encoder. Note that this variable is declaredstaticbecause the filter needs to hold information from previous cycles. When you declare the filter, it takes three arguments, the number of poles, the cutoff frequency (in hertz), and the sampling frequency (in hertz), in that order. After initializing it, you can simply update it every sample as shown in thecontrol_encoderexample code, as below.
double filtered_value = my_filter.update(unfiltered_value);These use cases should cover what you need for the project, but you can email Joshua ([email protected]) if you have any questions about how to use the existing code, or if you want to do something more complicated.
The myRIO is a device which runs a version of Linux. To communicate with it and to send information, we will use 2 protocols called ssh (Secure Shell) and sftp (SSH File Transfer Protocol). Both of these use a terminal interface, but VS Code has a great setup that allows us to implement it easily. On the top of the screen, there should be a button that says terminal. If you click on it, you get a dropdown, from which you can select new terminal, then do this again and select split terminal. Two windows should open up at the bottom of your screen which each provide a PowerShell terminal. This lets us use ssh in one terminal, and sftp in another terminal at the same time. To do this, on one of the terminals, execute the following command. Both of the following instructions will ask for passwords. Press enter when this is prompted, as the default password for these devices is blank. If you are getting errors with the following commands look at the instructions that follow.
> ssh [email protected]On the other terminal, execute the following command.
> sftp [email protected]If you get an error saying "WARNING: REMOTE HOST IDENTIFICATION HAS CHANGED!", run the following command and then try it again. When you try to connect again, it will give you a soft warning and ask if you want to connect. Type yes and hit enter and you should be in.
> ssh-keygen -R 172.22.11.2You should now have a screen that looks like the following.

Now we need to move the application to the myRIO and change the permissions on it to make it executable. We first change our local directory (lcd) to the build folder, where the executable, pendulum lives on our machine. Then we change directory (cd) on the myRIO to the MECH488 folder. Next, we move the file from our computer to the myRIO (put). Then we change the permissions (chmod) to let us run it using a terminal. Note that once you are in the correct directories, you no longer need to run the change directory commands if you want to move over a new version of the file. To do these, on the terminal with sftp, execute the following commands:
sftp> lcd build-nilrt-arm-release
sftp> cd MECH488
sftp> put pendulum
sftp> chmod 777 pendulum
Now the executable is on the myRIO and ready to run, which we need to do with ssh. In the ssh terminal, we will first change directory (cd) on the myRIO to the location of the executable. Then we will run the executable (./) and the program will begin. After you close your program using the GUI, you can rerun your executable (but it won't have any new changes) by only running the second line of the following again, without changing the directory.
~# cd MECH488
~# ./pendulum
Once you have performed this set of commands once, each new time that you build your code, you should only need to execute the following two commands, the first on the sftp terminal, and the second on the ssh terminal. However, if you exit out of ssh or sftp, you need to rerun the previous steps to open ssh, sftp, and navigate to the correct folders.
sftp> put pendulum
~# ./pendulum
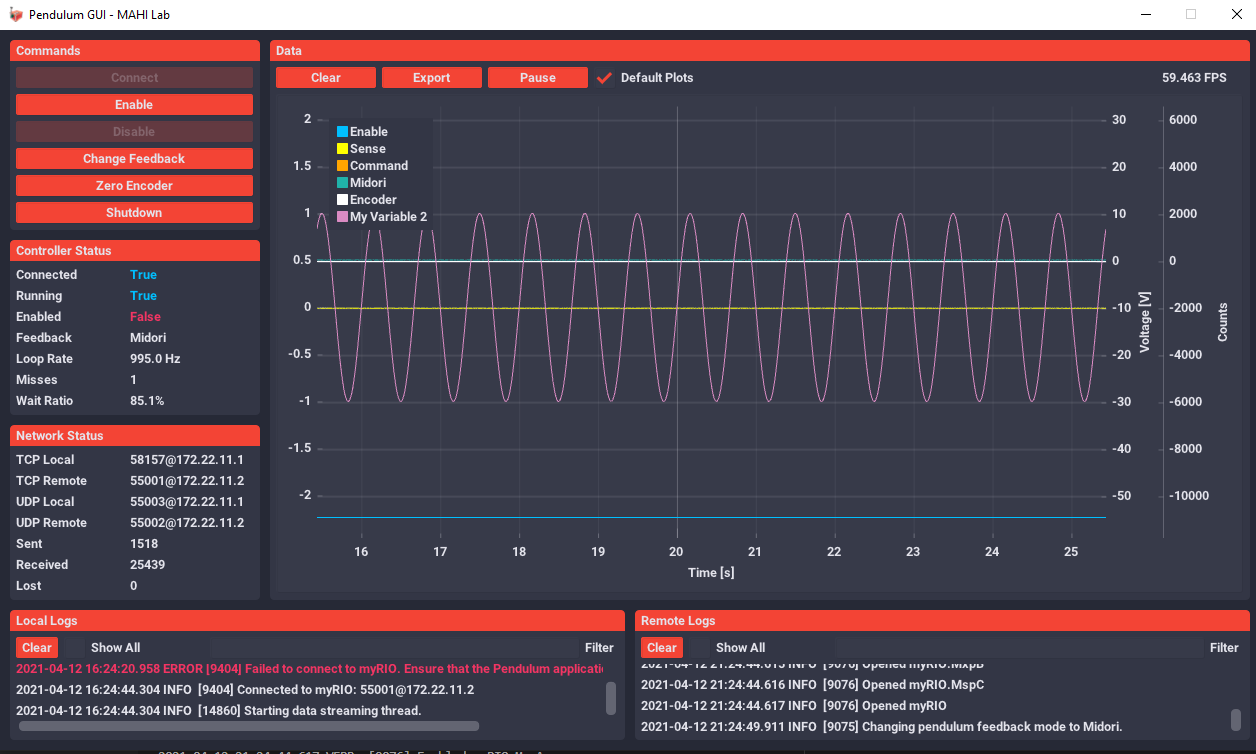
The main way you will interact with the pendulum is by using the provided GUI, shown above. You can get to the GUI by navigating to C:\MECH488Tools folder on your computer, and opening up pendulum-gui.exe. This gui provides several useful tools to control and evaluate your pendulum. First, notice the buttons on the left side of the screen under the commands tab. They have the following functions:
- Connect - connect to the pendulum. The pendulum app must be running on the myrio for this to connect
- Enable - enable the amplifier to send current to the motor. While disabled, all code will still run, but only the final commanded current won't be sent from the amplifier to the motor. Therefore, you can still verify logic while the pendulum is disabled.
- Disable - opposite of enable
-
Change Feedback - change the feedback mode between the midori and the encoder. The mode determines what function is being run to command a voltage to the amplifier,
control_midorifor the midori case, andcontrol_encoderfor the encoder case - Zero Encoder - zero the encoder at your current pendulum position. Also note that the encoder is zerod when the myrio program begins
- Shutdown - this completely stops the program running on the myrio. If you want to control the pendulum again, you will have to restart the program over ssh.
The data tab will show you some default variables, plus all of the variables that you have plotted from the functions you implemented in pendulum.cpp. You will see that there are several y-axes units on the left and the right. The y-axes on the right side will show you either the midori voltage, or the encoder counts, on the respective labeled axes. The y-axis for the left side of the plot will show you any of the variables that you have plotted from the functions. If you want to change the y-axis scales, you can scroll on the mouse while you are hovered over the axis you want to adjust.
There are additionally 3 buttons at the top of the data panel that enable you to clear the data on the screen, export the data to a csv, and pause the display, respectively. You can use these buttons to get your data so that you can analyze it later in some other software like excel, or matlab. You can also check/uncheck the default plot checkbox to only see your custom variables plotted. You can also click on specific colors in the legend to remove them from the plot.
There are three different y-axes on the plot, each with different scales. The left y-axis is for all user variables, the first right y-axis is for default variables that have voltage units (sense, command, midori), and the second right y-axis is for the encoder in units of counts. You can click and drag the y-axes specifically to move just an individual axis, or you can click and drag the plot area to move all of them.
If repository code is updated for some reason (likely if people are having trouble with something specific and we need to provide some more information), it should be easy to pull again from github. In VS Code in your MECH588 folder, click on Terminal then new terminal at the top of the page. When a new terminal opens, type the following commands.
> git add src
> git commit -m "updating to pull from repo"
> git pull
Anything new that was added to the repository should be added without affecting your code. If you are worried about this, you can always save your code to a flash drive and then add things back in if you need to.
