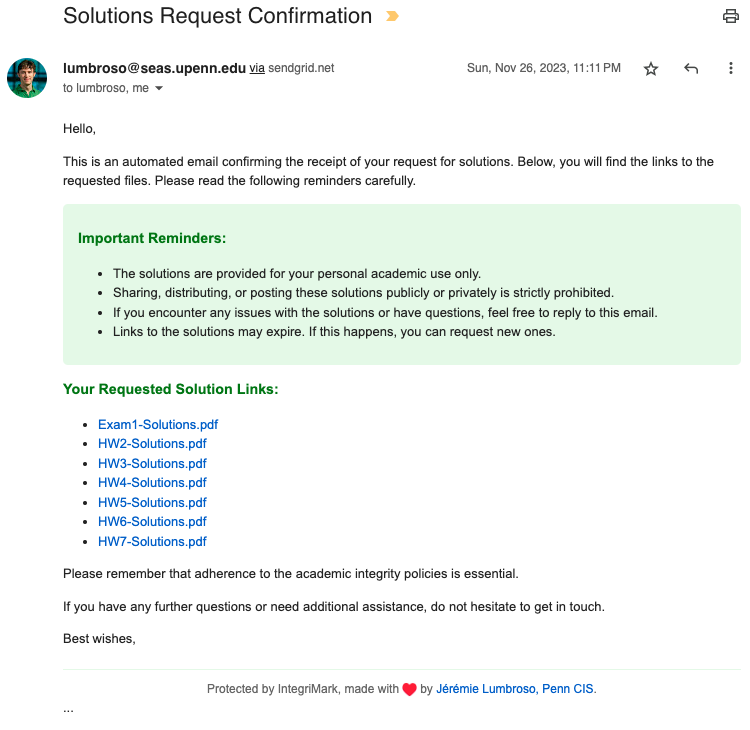
This repository is a template for creating a secure vault for your documents, using the open-source document watermarking tool, IntegriMark and the integrimark-publish-action.
After setting this up, you should be able to send watermarked URLs hosted on GitHub Pages at the URL: https://<username>.github.io/<repository>/.
Here is a step-by-step guide to set up your own secure vault:
- Use this template to create your own repository
- Make sure the repository you have created is private
- Upload
*.pdffiles to the root of the folder - After every commit of
*.pdffiles, the GitHub Actions will run and update (or create) both:- the
passwords.jsonin the root of the repository; - the HTML bundle in the
gh-pagesbranch.
- the
Troubleshooting GitHub Actions:
- If you do not see an "Actions" tab at the top of your repository on GitHub, it could be that GitHub Actions is not enabled for your repository. Learn how to turn on GitHub Actions.
- If you see the "Actions" tab, but the continuous integration doesn't seem to work (no
passwords.jsonfile, nogh-pagesbranch are created), then check the logs of the GitHub Actions to see what went wrong.
Once the vault has been configured, you still need a way to generate the watermarked URLs. This can be done one of two ways:
-
You can use the
integrimark-mailing-action, which uses Google Forms and Google Spreadsheets to create an "on-demand" system, where students requests solutions which are then emailed to them. -
You can manually blast emails with all solutions to a list of students, using the command-line tool,
integrimark.
To send emails locally, you can use the integrimark command-line tool.
-
First make sure that you have installed the tool:
pip install integrimark
-
Next, you need to have a local copy of the
passwords.jsonfile (it contains all the information needed to generate watermarked URLs: the name of the encrypted files, their encryption passwords, and the base URL of the vault). You can do so by cloning your repository:git clone https://github.com/<your username>/<your vault repo>/
-
Sending emails requires either access to an SMTP server, or a SendGrid API key. We recommend SendGrid for simplicity, and you can sign up for a free SendGrid account (limit of 100 emails/day) and then create and retrieve your API key.
-
Then you can use the
integrimark mailcommand to send emails. Here is the latest version of the help message:Usage: integrimark mail [OPTIONS] Send solution mailers based on Google Spreadsheet data. Options: --sendgrid-api-key TEXT SendGrid API Key (can also be provided as environment variable SENDGRID_API_KEY). --smtp-server TEXT SMTP server address. --smtp-port INTEGER SMTP server port. --smtp-username TEXT SMTP username. --smtp-password TEXT SMTP password. --from-email TEXT From email address. [required] --csv-input-file PATH Path to a CSV file to use as input, instead of a Google Spreadsheet. --google-spreadsheet-id TEXT Google Spreadsheet ID. --google-worksheet-index INTEGER Worksheet index in the spreadsheet. --service-account-json PATH Google Spreadsheet API service account JSON file path (the contents of the file can also be provided as environment variable SERVICE_ACCOUNT_JSON). --email-column TEXT Column name or index for email addresses. [required] --files-column TEXT Column name or index for files. --passwords PATH Path to the passwords.json file (by default, './passwords.json'). --template-file PATH Path to a custom email template file. --email-status-file PATH Path to the email status JSON file (by default, './email-status.json'). --no-send-mode Flag to run in no-send mode. --help Show this message and exit.The help message is a bit overwhelming, and there are many optional arguments. The most important ones are:
--sendgrid-api-key: the SendGrid API key (can also be provided as environment variableSENDGRID_API_KEY, possibly defined in a.envfile);--from-email: the email address from which the emails will be sent;--passwords: the path to thepasswords.jsonfile;
In addition, you need to specify an input source for the list of emails. There are several ways to do this: Either a Google Spreadsheet (which requires some configuration, but has the benefited of being hosted in the cloud), or a CSV file (which is simpler, but requires you to have a local copy of the list of emails).
-
The simplest way to send emails is to use a CSV file. Here is an example of a CSV file, called
student_list.csv, with two columns:emailandmemo_column(there could be many more, all of which would be ignored):email,memo_column [email protected],"some comment" [email protected],"some other comment"You can then use the
integrimark mailcommand with the--csv-input-fileoption:integrimark mail --sendgrid-api-key "<your_sendgrid_api_key>" --from-email "[email protected]" --passwords "./<your vault repo>/passwords.json" --csv-input-file "student_list.csv" --email-column "email"
-
By default, when no files are specified, the emails will provide new links for all the files in the vault.
