A lack of good dependency management can quickly turn a Unity project into a tangled mess of references between GameObjects, methods with ever-growing signatures, MonoBehaviours that need to be wired up "just right", and Manager classes that have a disconcerting number of static properties. While these simple techniques might work well for small demos and prototypes, they can quickly become a source of pain while evolving your game's architecture and adding new features. The Dependency Injection technique is a way of disentangling these balls of mud by separating the responsibility of managing dependencies between objects into a single place: the Container. In this example, we'll use the Zenject dependency injection container for Unity to wire up a simple interaction between two separate game components.
This is also a simple example of Domain Driven Design, in which a high-level (abstract game rules) domain model is defined first, followed by the implementation of low-level presentation (input and output via Unity) and infrastructural (wiring) concerns (ie: growing from the center of the Onion outwards). By enforcing the direction of dependencies so that they only point inwards to the domain model, and by avoiding horizontal coupling between components of the infrastructural and presentation layers, the system can evolve in a manner which is easier to change and reason about than one which lacks clearly defined boundaries and dependency rules. A little architecture can go a long way, however this is by no means a complete solution; it is necessary for a game's architecture to evolve in accordance with its actual needs (ie: persistance, networking, physics, etc.) rather than sticking to a proscribed abstract.
The model layer defines the domain of the system as high-level concepts and interactions, independent of how these concepts might be presented to the user, saved to disk, transmitted over a network, etc.. For this system we will use a simple event-based model that accepts commands and emits events, but does not otherwise expose state (ie: no readable or mutable properties, no query methods).
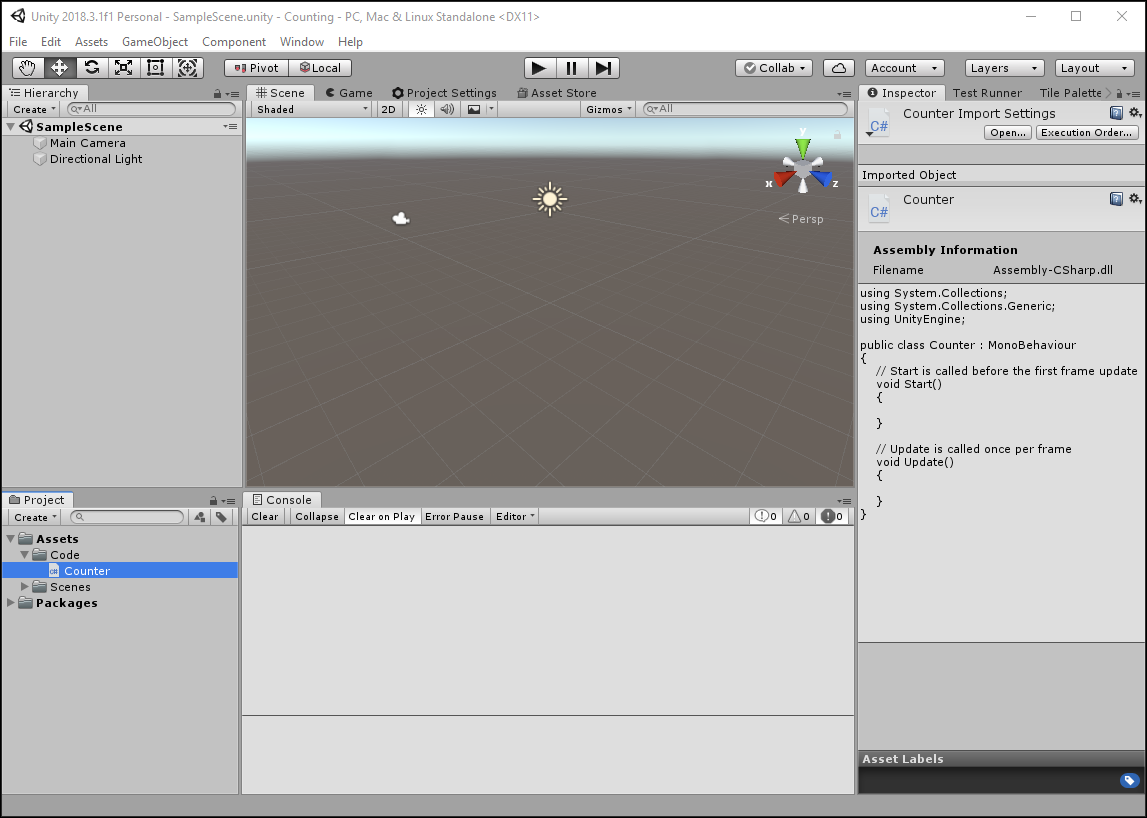
Create a new Unity project with the name Counting, and then create a Code folder in the project's Assets folder.
In the Code folder create a new C# Script with the name Counter
Open Counter and rewrite it to be a simple class
namespace Assets.Code
{
	public class Counter
	{

	}
}
This is going to be our domain model. It's a simple domain model; all it does is increment a counter. For now, we'll just expect it to emit an Incremented event containing the current count as an integer.
using System;

namespace Assets.Code
{
	public class Counter
	{
		public event Action<int> Incremented;
	}
}
We'll now need a way to trigger the Incremented event. Working back from the past tense to the imperative, an Increment command can be added to the model. The model also needs to define state, so that each time the Increment command is called the next integer in sequence is emitted with the event.
using System;

namespace Assets.Code
{
	public class Counter
	{
		private int _currentCount;

		public event Action<int> Incremented;

		public void Increment()
		{
			_currentCount++;
			Incremented?.Invoke(_currentCount);
		}
	}
}
Note that the _currentCount state of the model isn't exposed publicly; this is intentional. Instead, any other class interested in the state of the model needs to observe the Incremented events, thereby allowing the data model to change without affecting the dependents of this model.
The presentation layer is the closest to the user, and is concerned with handling user input and output. In this system, the presentation layer is comprised both of content defined in the Unity editor and scripts which form the "glue" between Unity and the Model layer (ie: Presenters).
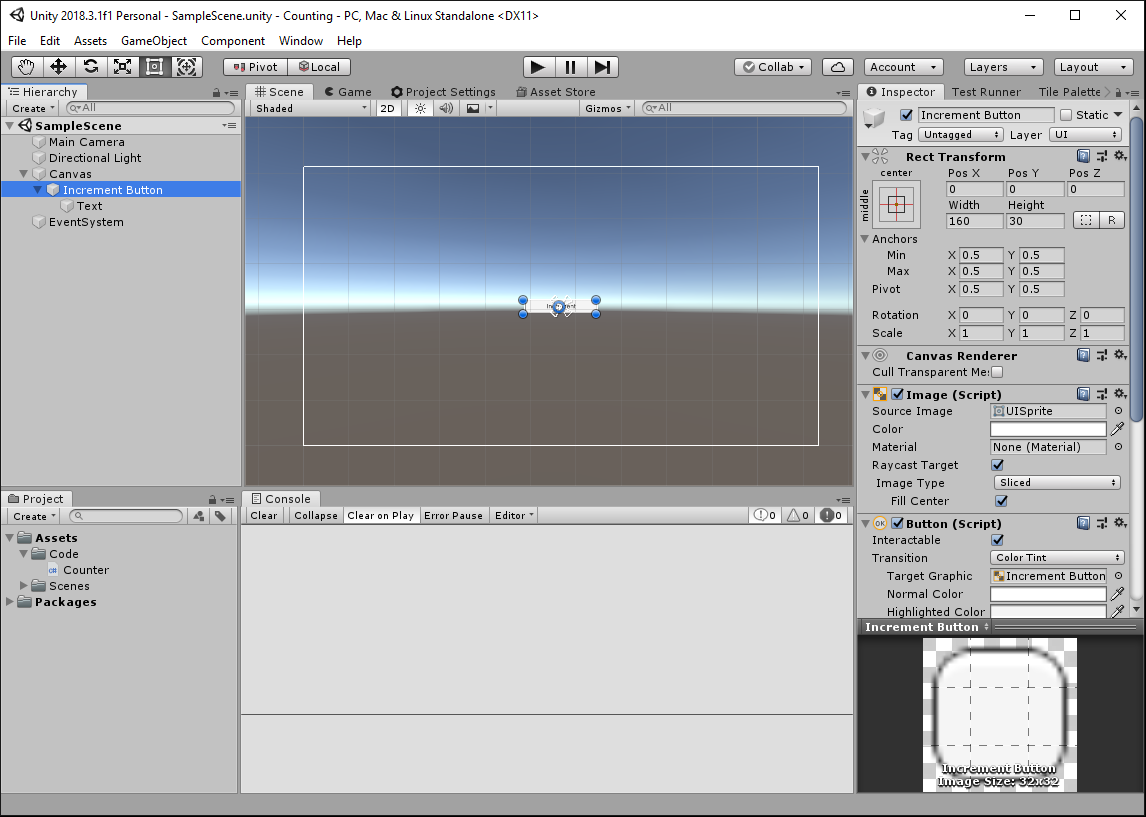
Add a UI > Canvas to the scene, and a UI > Button to the canvas. Name that button Increment Button and update the text to read "Increment", the width to 160, and the height to 30. Also, ensure the Pos X, Y, and Z are all set to 0.
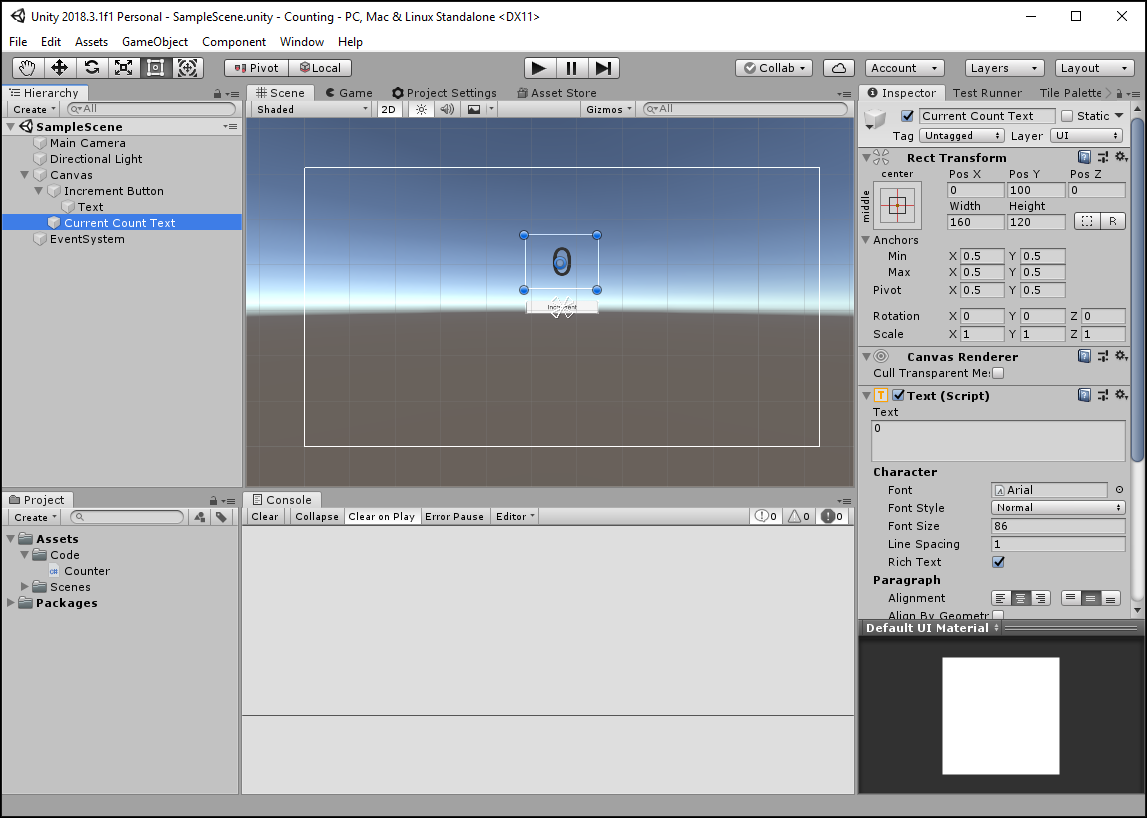
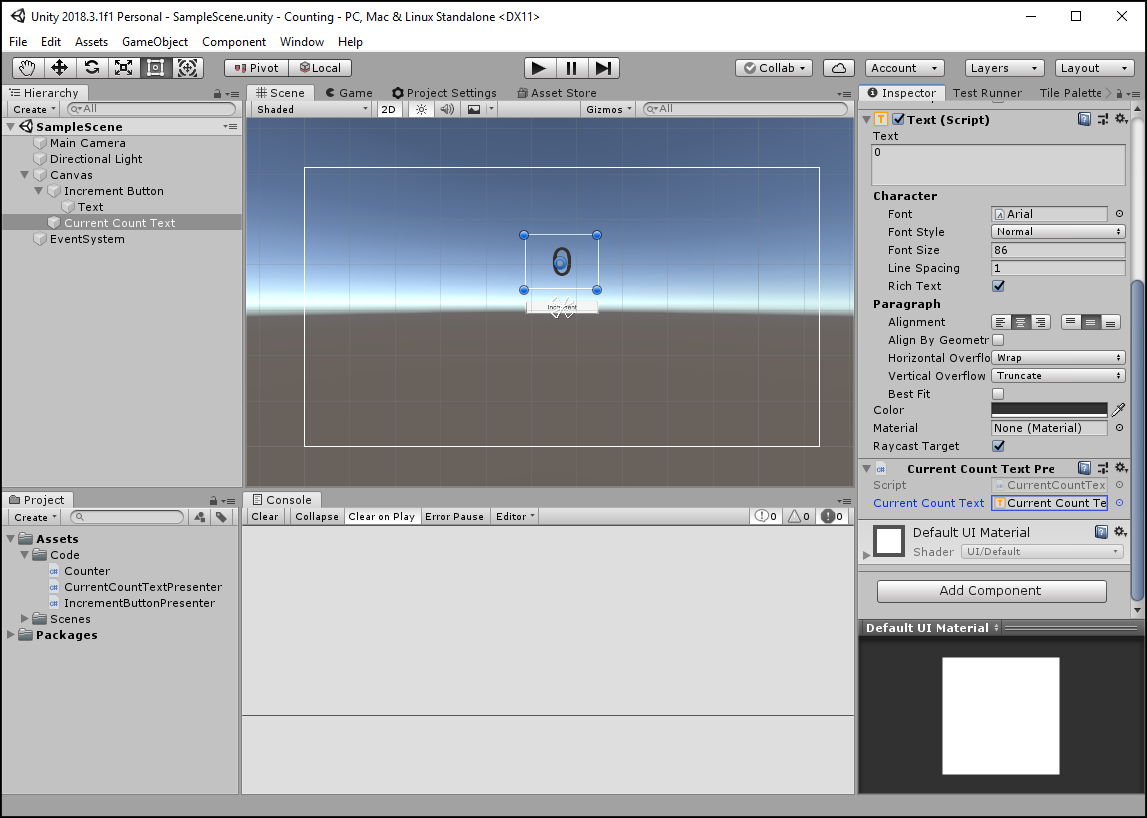
Add a UI > Text to the canvas and name it Current Counter Text. Adjust the Y position to 100 (off the center), the height to 120, the font size to 86 and center the text vertically and horizontally.
Create a new C# Script IncrementButtonPresenter and rewrite it to be:
using UnityEngine;

namespace Assets.Code
{
	public class IncrementButtonPresenter : MonoBehaviour
	{

	}
}
This presenter class will be the glue that binds together the view (the Increment Button created above) and the model (the Counter class). To accomplish this, it will need a reference to both objects.
Because the presenter is a MonoBehaviour which will be attached to the button in the Unity editor, the simplest way to reference the Increment Button is to assign it through a public field. While fields assigned in the editor can lead to a brittle dependencies when they cross large distances in the hierarchy, they are relatively stable when assigned to other components of the same GameObject.
using UnityEngine;
using UnityEngine.UI;

namespace Assets.Code
{
	public class IncrementButtonPresenter : MonoBehaviour
	{
		public Button IncrementButton;
	}
}
We will also need the Counter model reference injected into the presenter. Since the presenter is a MonoBehaviour, constructor injection isn't possible, and so instead we will make use of method injection in order to both inject the model dependency and initialize the binding between the button and the model. The body of this method will then just wire up the Counter model's Increment() method to the Increment Button's onClick event.
using UnityEngine;
using UnityEngine.UI;

namespace Assets.Code
{
	public class IncrementButtonPresenter : MonoBehaviour
	{
		public Button IncrementButton;

		public void Initialize(Counter counter)
			=> IncrementButton.onClick.AddListener(counter.Increment);
	}
}
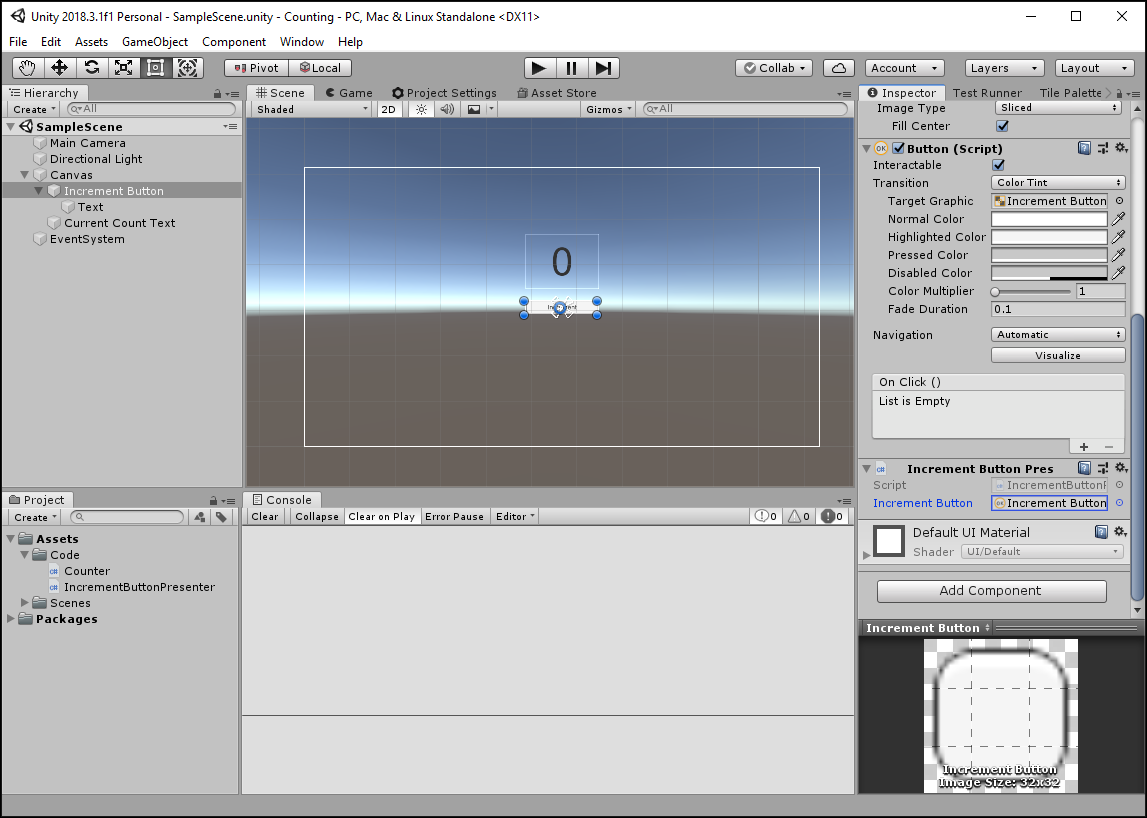
The IncrementButtonPresenter can now be added to the Increment Button in the editor, and the IncrementButton field can be assigned to the Button component.
Similarly, create a CurrentCountTextPresenter C# Script with a public property reference to the current count Text component, and a method injected with the Counter model which updates the text when an Incremented event occurs.
using UnityEngine;
using UnityEngine.UI;

namespace Assets.Code
{
	public class CurrentCountTextPresenter : MonoBehaviour
	{
		public Text CurrentCountText;

		public void Initialize(Counter counter)
			=> counter.Incremented += newCount => CurrentCountText.text = newCount.ToString();
	}
}
This presenter can now be added to Current Count Text in the editor, and the CurrentCountText field can be assigned to the Text component.
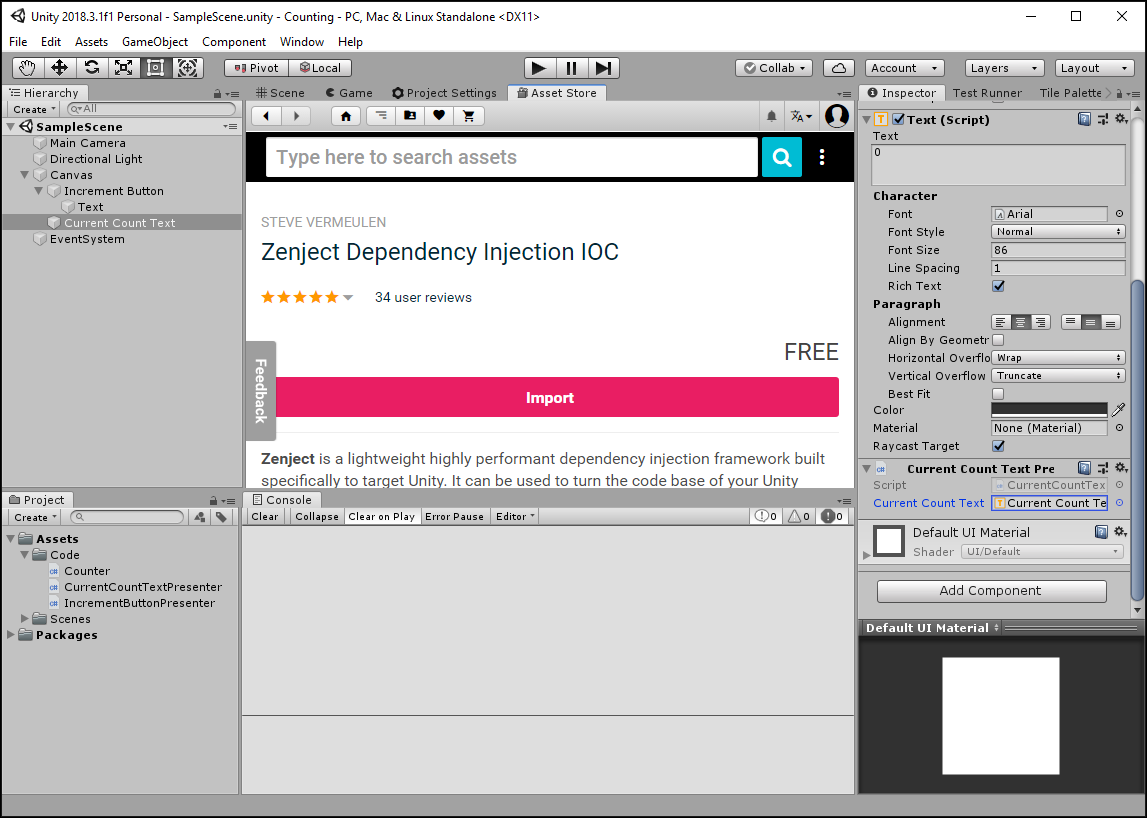
Now it's time to use the Zenject dependency injection container to satisfy the Counter model reference shared between the IncrementButtonPresenter and the CurrentCountTextPresenter. First, download and import the Zenject Dependency Injection IOC package from the Unity Asset Store.
Next, create a new C# Script named SceneInstaller. This class will be used to configure the Zenject container by inheriting from the Zenject.MonoInstaller base class and overriding the InstallBindings() method.
using Zenject;

namespace Assets.Code
{
	public class SceneInstaller : MonoInstaller
	{
		public override void InstallBindings()
		{

		}
	}
}
The only binding which we need to be configured in the container is the Counter model binding. The same instance of this model needs to be injected into both the IncrementButtonPresenter and the CurrentCountTextPresenter, and so the model will be bound as a singleton.
using Zenject;

namespace Assets.Code
{
	public class SceneInstaller : MonoInstaller
	{
		public override void InstallBindings()
		{
			Container.Bind<Counter>().AsSingle();
		}
	}
}
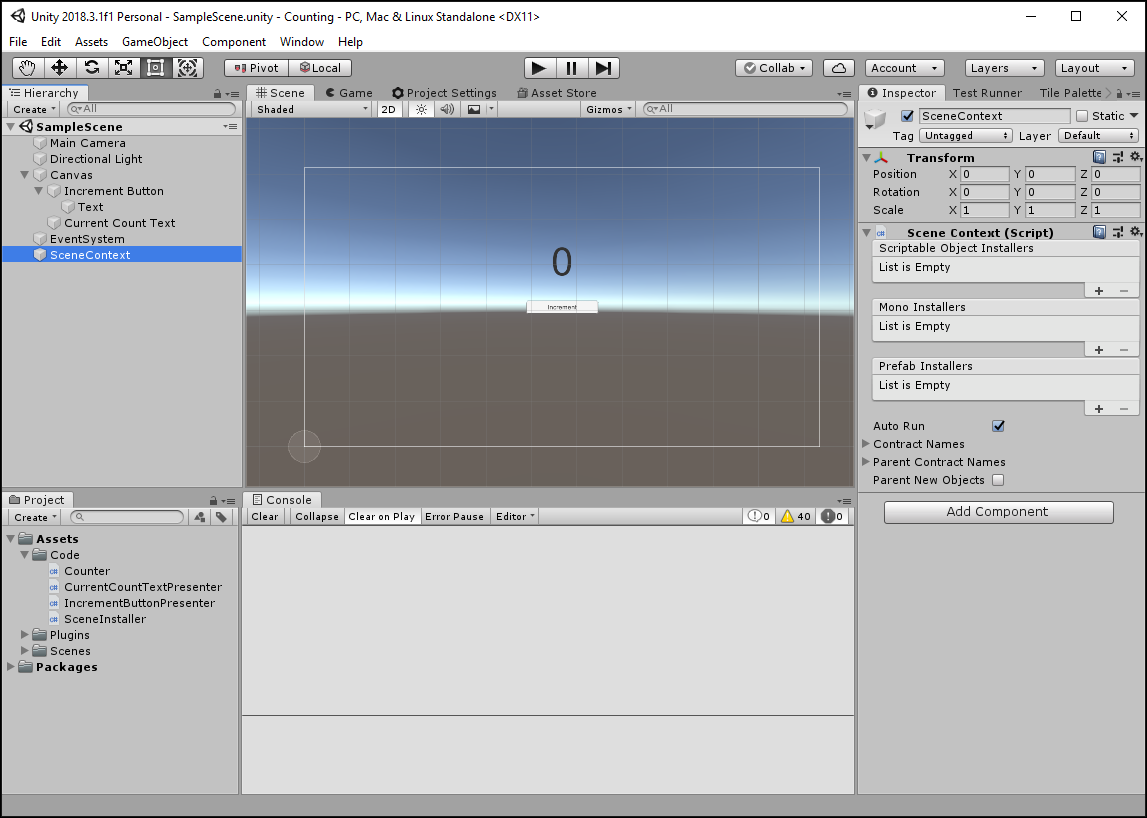
Next, add a Zenject > Scene Context to the scene.
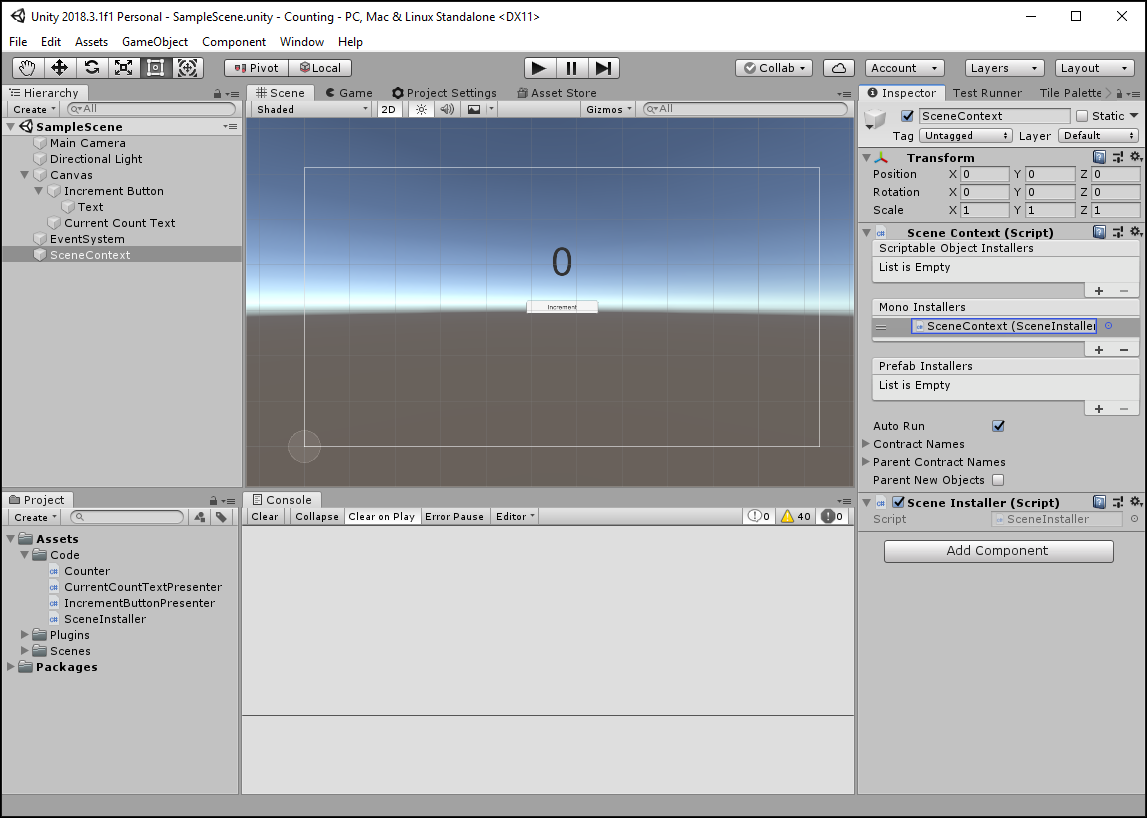
Then add the SceneInstaller script to the newly created SceneContext, and add a SceneContext reference to the list of Mono Installers.
Finally, it is necessary to mark the Initialize(...) methods in IncrementButtonPresenter and CurrentCountTextPresenter with the [Inject] attribute provided by Zenject. When the scene is started, the SceneContext will satisfy the dependencies of all public methods marked with the [Inject] attribute in scripts attached to GameObjects in the scene.
using UnityEngine;
using UnityEngine.UI;
using Zenject;

namespace Assets.Code
{
	public class IncrementButtonPresenter : MonoBehaviour
	{
		public Button IncrementButton;

		[Inject]
		public void Initialize(Counter counter)
			=> IncrementButton.onClick.AddListener(counter.Increment);
	}
}
using UnityEngine;
using UnityEngine.UI;
using Zenject;
namespace Assets.Code
{
public class CurrentCountTextPresenter : MonoBehaviour
{
public Text CurrentCountText;
[Inject]
public void Initialize(Counter counter)
=> counter.Incremented += newCount => CurrentCountText.text = newCount.ToString();
}
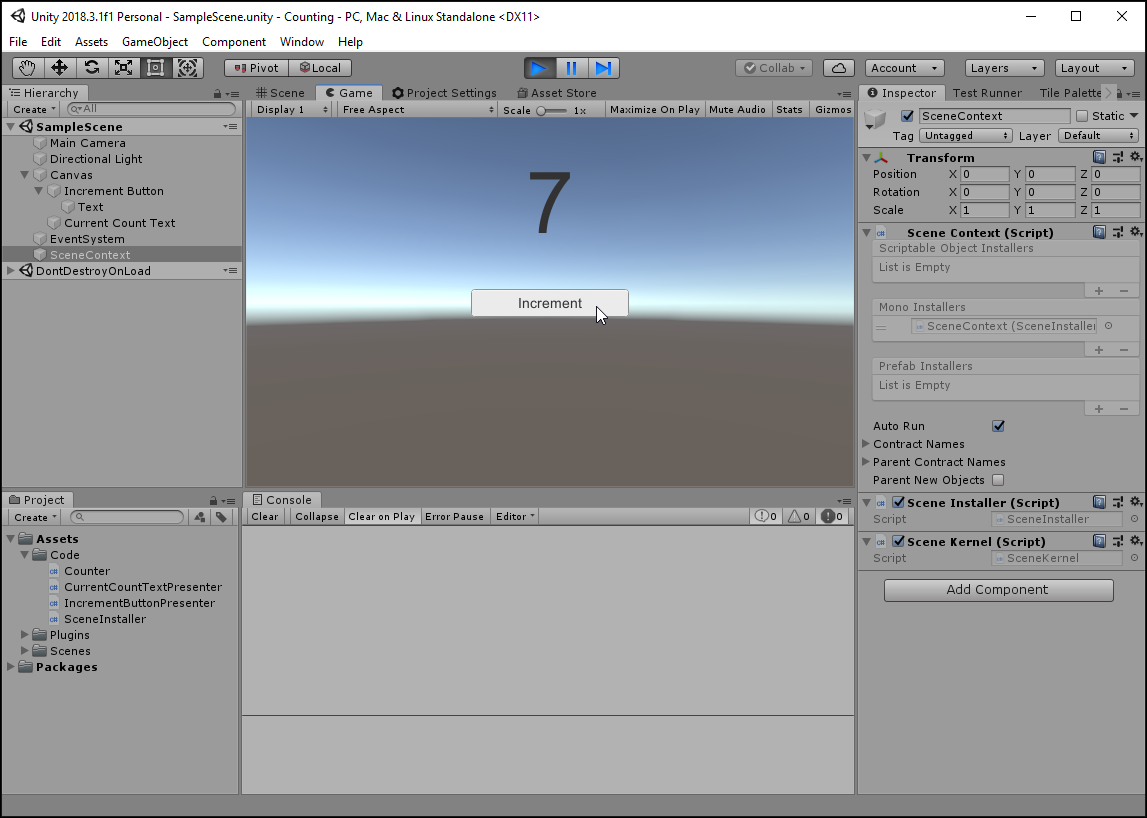
}Return to the Unity editor and play the scene.
Clicking the Increment Button fires the onClick event, on which the IncrementButtonPresenter registered the Counter.Increment() method as a listener. The model's Increment() method then updates its state and emits the Incremented event, which has a listener registered by the CurrentCountTextPresenter that updates the current value of the Current Count Text.
Architecture is concerned with the organization of a system in order to guide the changes that are made to the system over time. Packages are an organizational tool which can be used to draw boundaries and establish directions of dependency within a system. Unity has recently introduced the ability to create Assembly Definitions, which can be used to designate a folder as belonging to a specific assembly (the .Net term for "package"), as well as to define dependency relations between assemblies. By encapsulating the code we've written so far into separate assemblies and then defining the dependencies between these assemblies, we can prevent model code from being accidentally coupled to presentation or infrastructure code, and thereby create clear architectural layers within the system.
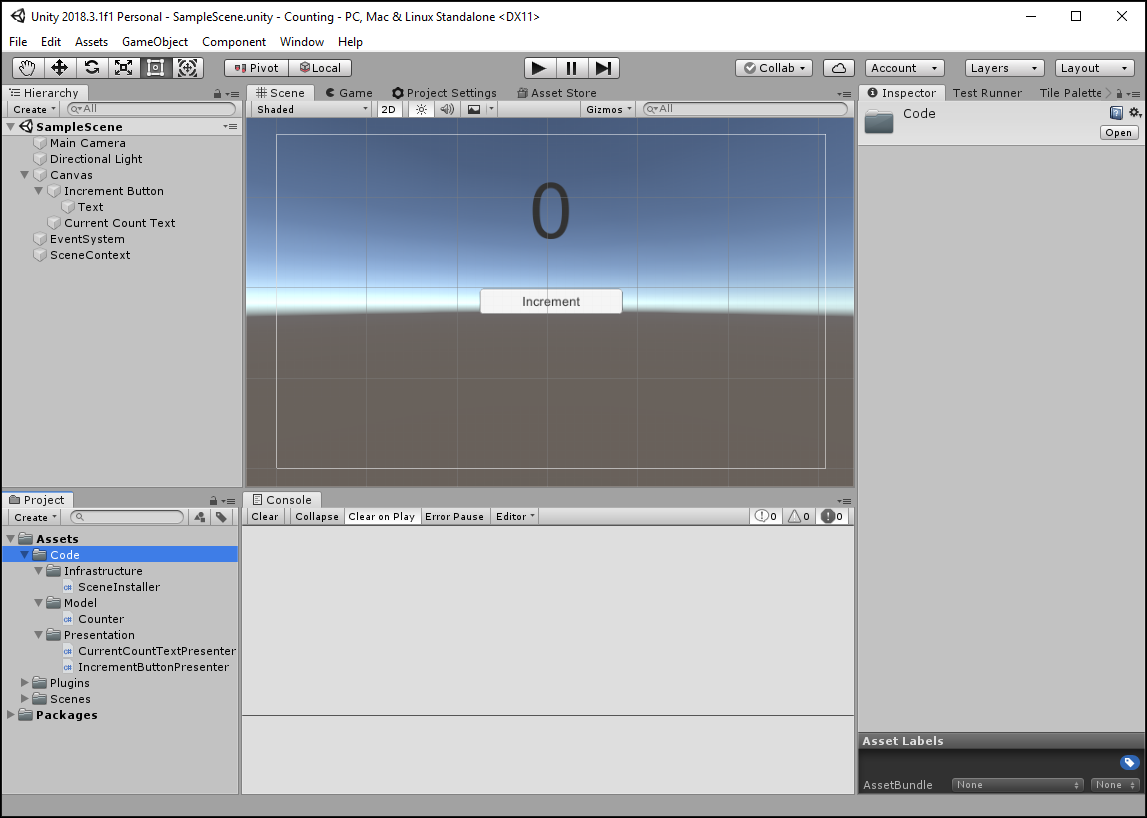
Create a new folder named Model and move Counter into it, then move IncrementButtonPresenter and CurrentCountPresenter into a new folder named Presentation, and finally move SceneInstaller into a new Infrastructure folder.
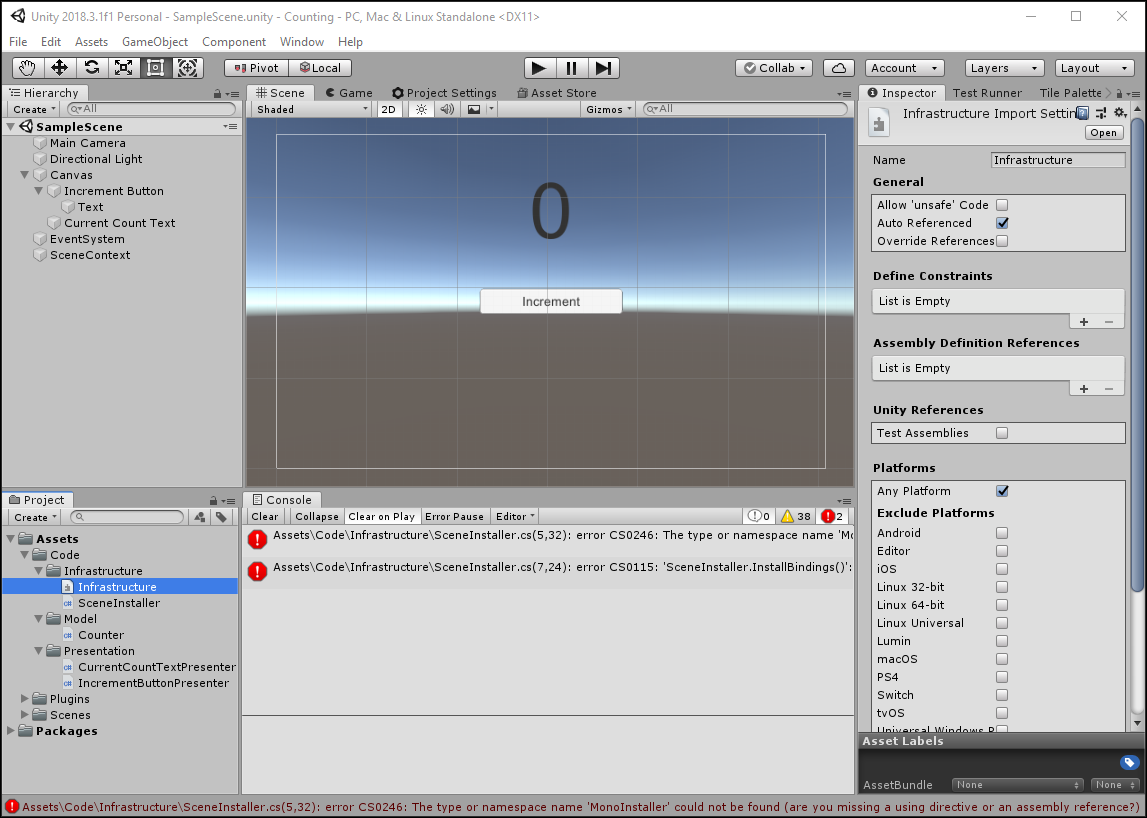
Under the Infrastructure code folder, create an Assembly Definition also named Infrastructure.
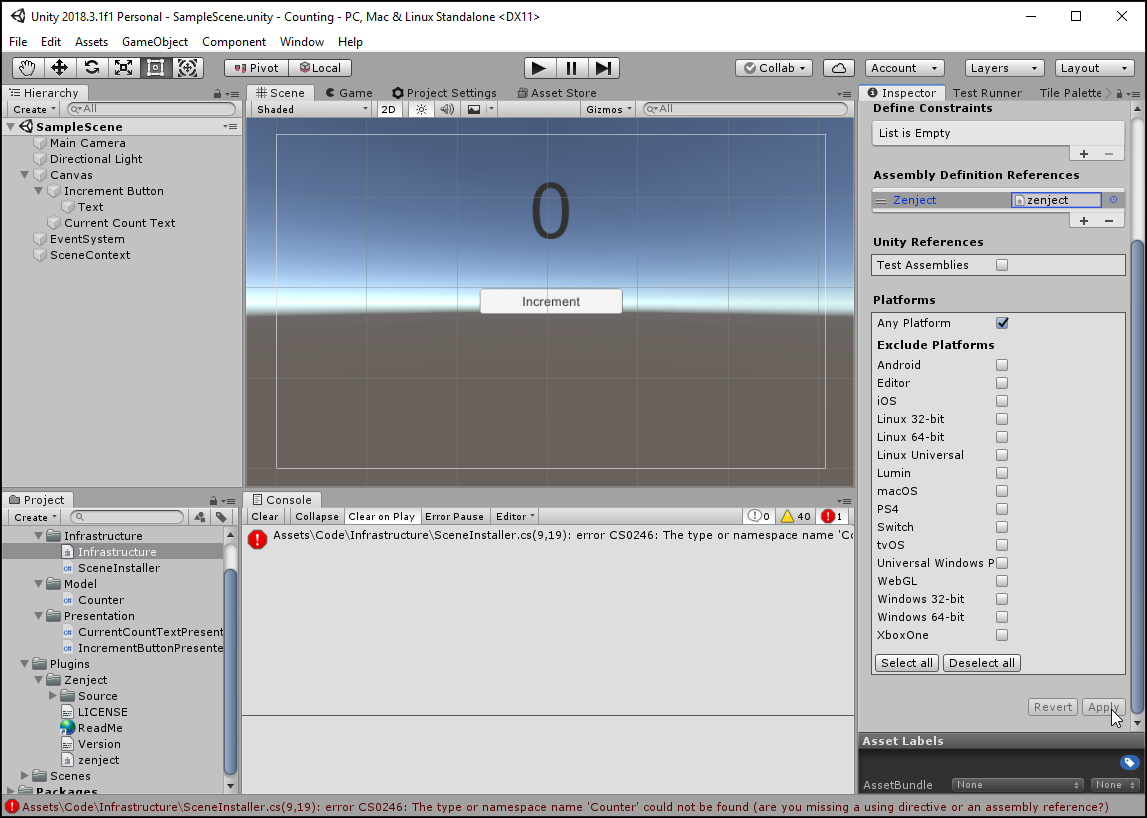
This assembly definition causes two errors to occur for the SceneInstaller class because the newly defined assembly does not reference the Zenject assembly. The Zenject plugin folder also contains an assembly definition, named zenject, so in the Infrastructure assembly definition add an Assembly Definition Reference to the zenject project in order to handle these errors, then hit the Apply button near the bottom of the Inspector.
The addition of the zenject reference will uncover a new error, namely that Infrastructure assembly does not have a reference to the Counter model. This is because the code in an assembly does not have access to code not belonging to an assembly, even though code not in an assembly has access to code placed in assemblies (such as when SceneInstaller had yet to be placed in an assembly, yet was able to access code from the zenject assembly).
To solve this error, create a new Assembly Definition named Model in the Model code folder and reference this new assembly from the Infrastructure assembly.
Finally, create a Presentation Assembly Definition under the Presentation folder, and add references to both the Model and zenject assemblies.
