This document is shortcut guide for starknet beginner using M1 Mac.
We have followed this guide provided by Starkathon Preparing to Work with the StarkNet Hackathon Env..
And found out it assumes that participants already have working python environments. In this guide, we describe a way to setup StarkNet environment for those who have no python envronment.
There are cases where python versions installed in M1 collide and a problem occurs. Remove Pythons installed by brew and reinstall them.
$ brew list
$ brew uninstall <python version> --ignore-dependencies
export LANG="en_US.UTF-8"
$ brew install python3
$ CFLAGS=-I`brew --prefix gmp`/include LDFLAGS=-L`brew --prefix gmp`/lib pip3 install ecdsa fastecdsa sympy
$ python3 -m venv ~/cairo_venv
$ source ~/cairo_venv/bin/activate
(cairo_venv) $ brew install gmp
You have to use 8.5.3 version of marshmallow-dataclass.
(cairo_venv) $ pip3 install marshmallow-dataclass==8.5.3 --force
You have to use 0.8.1 version of cairo-lang.
(cairo_venv) $ pip3 install cairo-lang==0.8.1
func main():
    [ap] = 1000; ap++
    [ap] = 2000; ap++
    [ap] = [ap - 2] + [ap - 1]; ap++
    ret
end
(cairo_venv) $ cairo-compile test.cairo --output test_compiled.json
(cairo_venv) $ cairo-run \
  --program=test_compiled.json --print_output \
  --print_info --relocate_prints
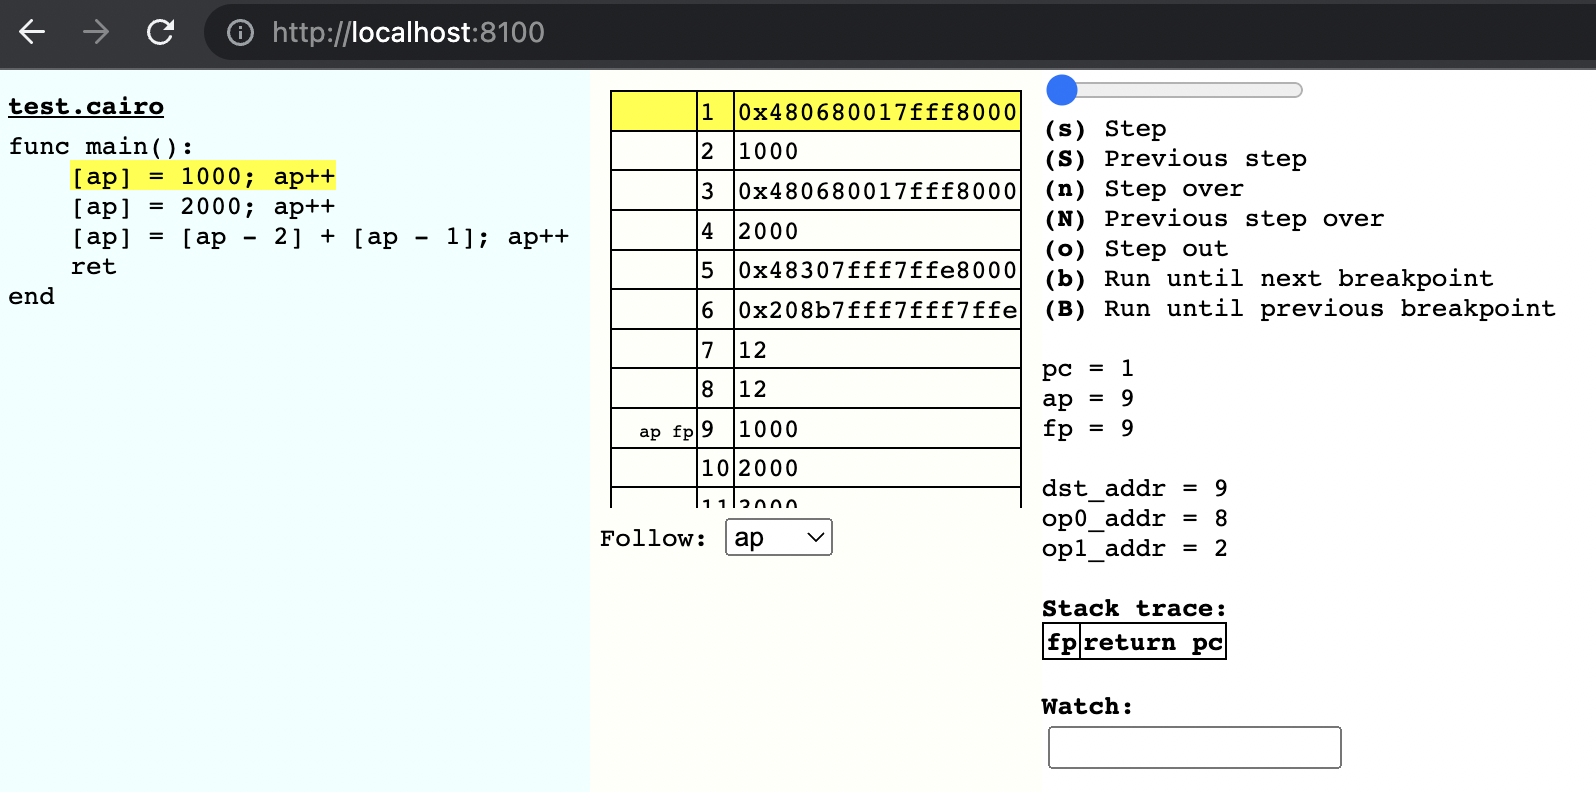
You can open the Cairo tracer by providing the --tracer flag to cairo-run. Then open it at http://localhost:8100/.
(cairo_venv) $ cairo-run \
   --program=test_compiled.json --print_output \
   --print_info --relocate_prints --tracer
Number of steps: 4 (originally, 4)
Used memory cells: 11
Register values after execution:
pc = 12
ap = 12
fp = 12

Running tracer on http://localhost:8100/
Now open browser and visit http://localhost:8100 to use tracer.
You can find tracer looks like below.

Now you have a working Cario environment.