Artela Blockchain is a layer 1 network that empowers developers to add user-defined native extensions and build feature-rich dApps. It offers extensibility that goes beyond EVM-equivalence, inter-domain interoperability, and boundless scalability with its Elastic Block Space design.
As the first layer 1 network equipped with Aspects, Artela network aims to maximize the value of Aspect and enable developers to build feature-rich dApps.
-
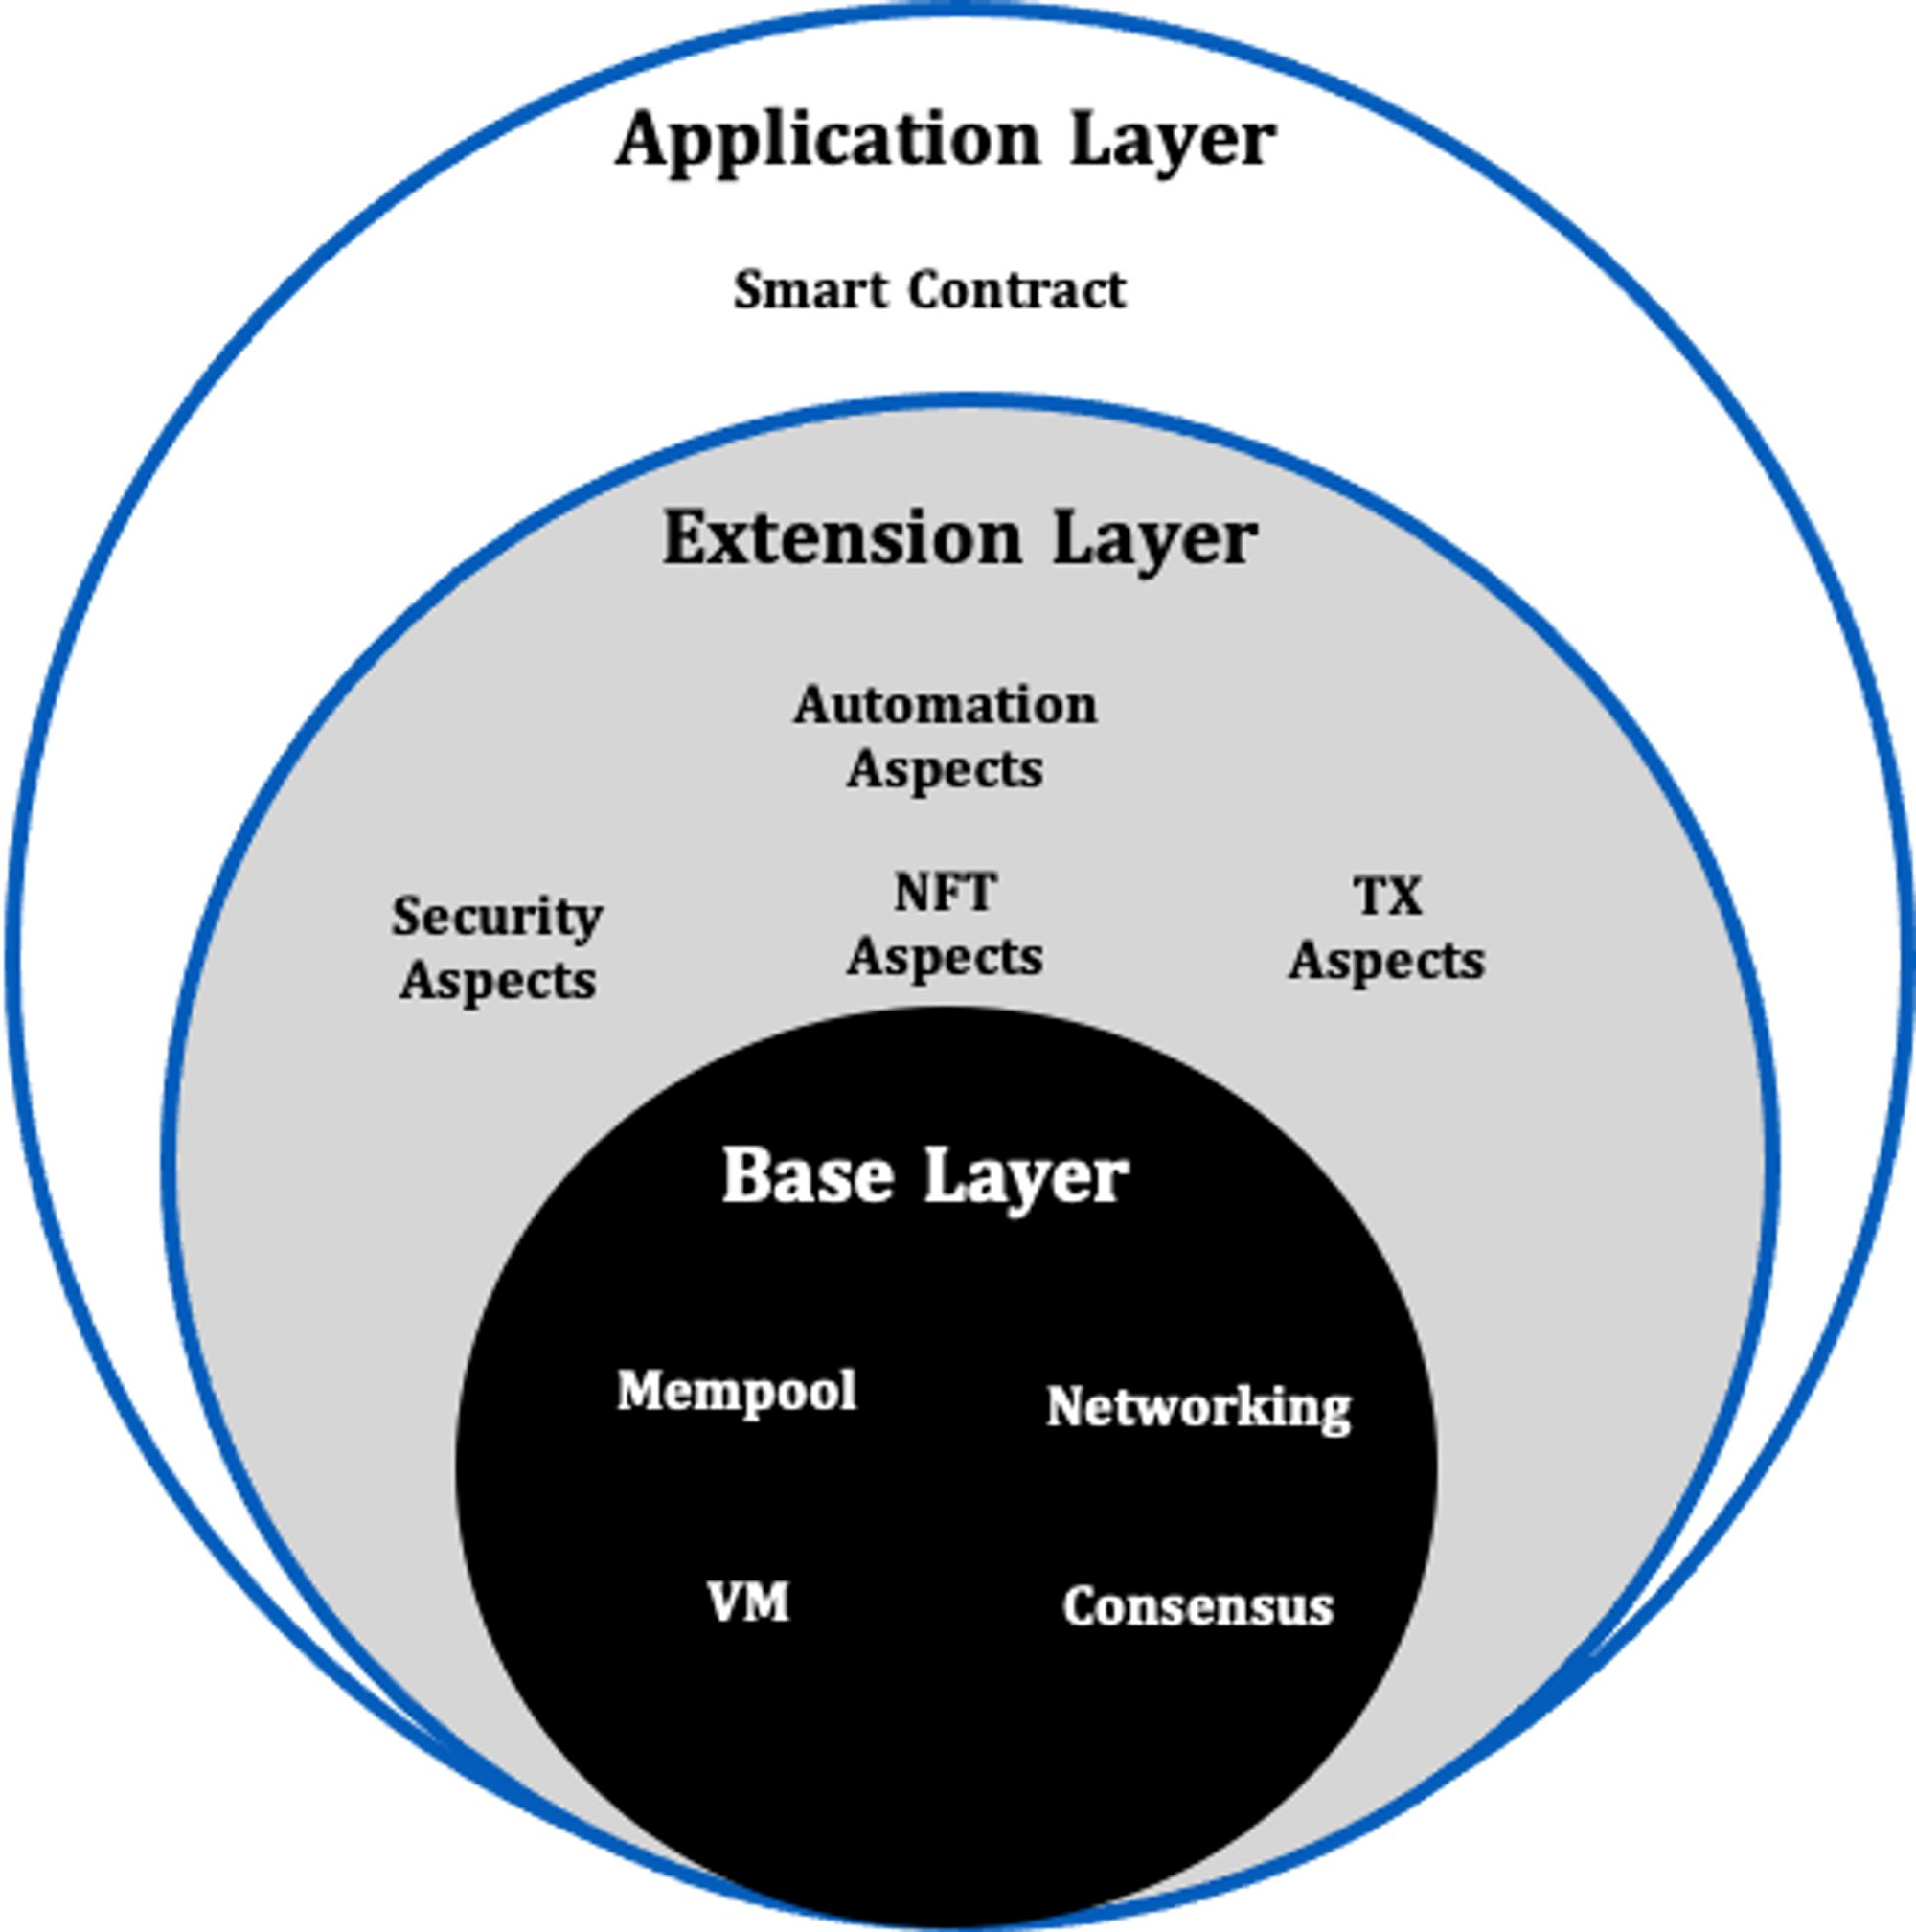
Base Layer: Provide basic functions, including consensus engine, networking, EVM environments for the smart contract execution, and WASM environments for the Aspects execution. This layer is launched by Artela.
-
Extension Layer: Provide the Aspect SDK. Developers are able to build Aspects. Aspects have access to all APIs within the base layer and can be freely combined with smart contracts and other Aspects. Aspect is securely isolated from Base Layer, ensuring that it has no impact on the security or availability of the core network.
-
Application Layer: Developers can build smart contracts as usual. Initially, EVM will be provided for the seamless landing of most dApps in crypto.
Artela is a blockchain built using Cosmos SDK and Cometbft and created with Ignite CLI.
1). Set Up Your Go Development Environment
Make sure you have set up your Go programming language development environment.
2). Download the Source Code
Obtain the project source code using the following method:
git clone https://github.com/artela-network/artela.git
3). Compile
Compile the source code and generate the executable using the Go compiler:
cd artela
make clean && make
The artela project comes with executable found in the build directory.
| Command | Description |
|---|---|
artelad |
artelad is the core node software of the Artela network, responsible for running and managing the Artela blockchain network. |
Initialize the testnet by running a simple script
sh init.sh
Running the node by
artelad start
Run the following command to initialize a 4-validator testnet:
make create-testnet
To view node logs, use tail -f _testnet/node2/artelad/node.log.
This command compiles the current repository code and generates Docker images. It launches Docker containers named artela0 to artela3, each running artelad as a node. Disk mapping is configured to map directories artea/_testnet/node0 to node3 to Docker containers artela0 to artela3.
More options about the testnet:
| Command | Description |
|---|---|
build-testnet |
Build Docker images for the testnet and create a configuration for 4-validator nodes. |
create-testnet |
Remove a previously built testnet, build it again using build-testnet, and start Docker containers. |
stop-testnet |
Stop the running Docker containers for the testnet. |
start-testnet |
Start the previously stopped Docker containers for the testnet. |
remove-testnet |
Stop the Docker containers and remove all components created by the build-testnet command. |
Minimum:
- CPU with 2+ cores
- 4GB RAM
- 1TB free storage space to sync the Tetnet
- 8 MBit/sec download Internet service
Recommended:
- Fast CPU with 4+ cores
- 16GB+ RAM
- High-performance SSD with at least 1TB of free space
- 25+ MBit/sec download Internet service
Presistent nodes of artela testnet:
https://testnet-rpc1.artela.networkhttps://testnet-rpc2.artela.networkhttps://testnet-rpc3.artela.networkhttps://testnet-rpc4.artela.network
Learn more about Artela in https://artela.network/
Copyright © Artela Network, Inc. All rights reserved.
Licensed under the Apache v2 License.


