So you're almost done with your modlist and all that remains is the NPC's. You've tried out many NPC's and got frustrated that none meet your style, or you're getting black faces here there and everywhere. Well, the Creation Kit has a solution for you.
NOTE: This is a BRUTEFORCE method of getting every face on every NPC in the game to be correct and rendered. You should ONLY do this once you have FULLY FINALISED your modlist. We are NOT RESPONSIBLE for any errors that occur if you remove the facegen and encounter errors.
The purpose of regenerating all the faces for NPC's in the game to provide a level of consistency across the entire game and ensure that newly added NPC's conform to your chosen styling. Paired with some nice textures, you can create a unique vanilla friendly look to your NPC's.
To effectively generate facegen, you will need the following items:
- The Creation Kit from Bethesda Net
- Creation Kit Platform Extended for Skyrim
- The main file from Tweaked Creation Kit Ini
- Synthesis
- Cathedral Asset Optimizer
- My Custom BSA Packer CAO Profile (optional but highly recommended. Extract the folder into
\Cathedral Asset Optimizer\Profiles)
It is recommended that you have some updated textures for NPC's such as Tempered Skins and Reverie Skin and upscaled/reworked warpaint.
It is recommended that you change the TintMaskResolution line in the CreationKitPlatformExtended.ini to 1024 instead of 512 as that will result in better quality facetints being created. The difference is very noticable.
To ensure that all the required resources are loaded by the creation kit for facegen, we need to run a Synthesis Patcher called NPCs Face Data. This patcher will check all of your plugins for NPC's and facedata and add the masters to the plugin along with the NPC's in question.
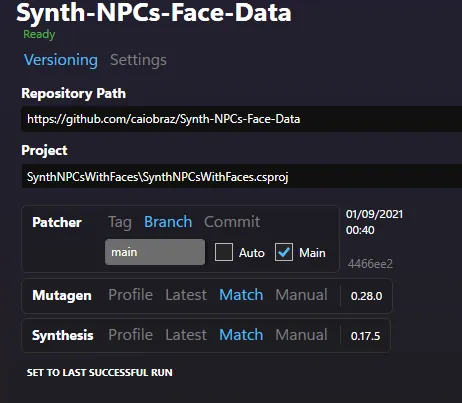
To run the patcher, firstly load Synthesis and then press the Git Repository button to add a new patcher. In the Repository Path field, paste in: "https://github.com/gabriel-andreescu/Synth-NPCs-Face-Data" (Remove the ""). Make sure the Project field is set to SynthNPCsWithFaces/SynthNPCsWithFaces.csproj. An example of how it should look is given below.
Run the patcher and allow it process. Once it is completed, close Synthesis and activate the new plugin called NPCsWithFaces. The plugin may be present in your overwrite folder or in a mod that catches generated files if you have one set up.
Before opening the creation kit, it is Strongly recommended that you create a mod called "CK Output" and set your creation kit to output files there. If you don't, bad things can happen. To do this, complete the following:
- Right click in MO2, press
Create New Modand name it something sensible (for the purposes of this tutorial, we are naming it "CK Output") - Activate the mod
- Go to the right hand drop down menu, press
editand select the Creation Kit. - Tick the button that says
Create files in mod instead of overwrite. (example given in the picture below) - Press the dropdown menu next to it and select the new mod you just made.
- Press the
Applybutton and then theOKbutton.
It's now time to get all the resources loaded into the creation kit. Activate any other loose files that you wish to use in the facegen process and then complete the following.
Note: Anything that you activate with an ESP plugin after this point will NOT be loaded in the CK. Go back and re-run the Synthesis patcher to add them to the loader.
- Select the creation kit as the executable and then press the
Runbutton. - Once it has finished loading, press the folder icon.
- Double click the
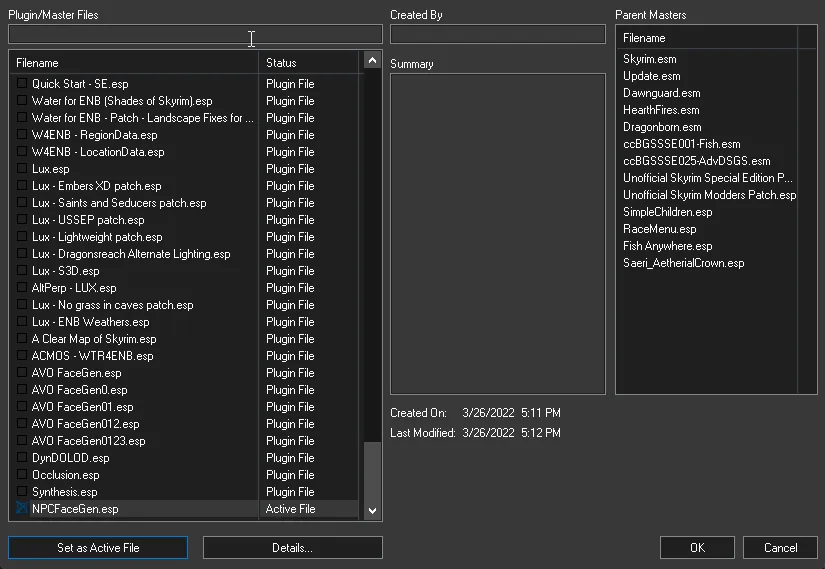
NPCsWithFaces.espplugin that we just made with Synthesis. - Press the
Set as Active Filebutton.
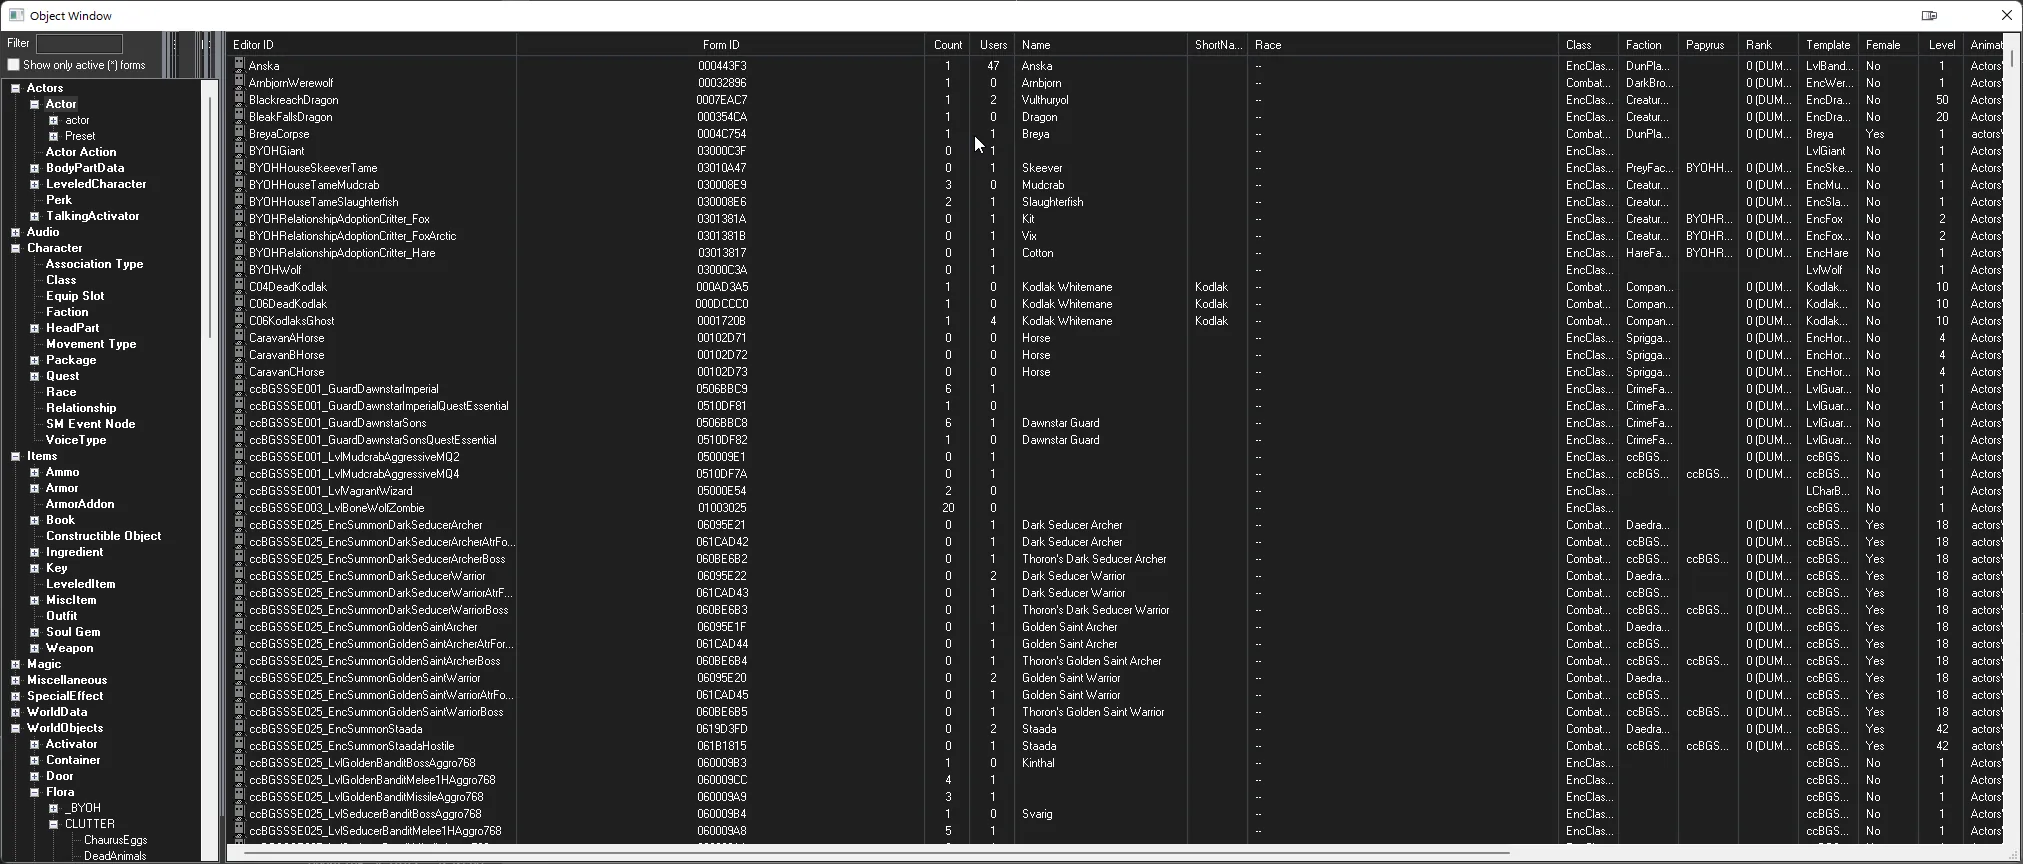
Once the plugin and all its dependencies have loaded, select the Objects window and click on the Actors which is in bold. To make life easier for, click on the header that says Race twice to filter by race.
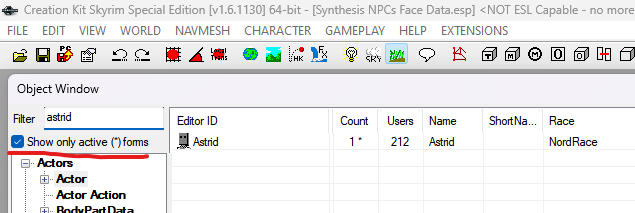
The Creation Kit now allows for you to filter by active forms. You can enable this by ticking the boox shown in the picture below.
Depending on whether you have a lot of new NPC's and your system RAM, you will need to do one of two methods. If you have less than 32GB of ram, the alternative method is recommended.
Complete the following steps to regenerate faces. WARNING This may take a while and require a lot of RAM & Virtual memory.
- Select All NPC's from the bottom up. If you spot any flagge "RaceChild" do not select them.
- Press Ctrl+F4 and confirm any dialogue box that comes up.
- Wait until the process is completed and then confirm any dialogue box that comes up.
- You can now exit the Creation Kit.
Complete the following steps to regenerate faces.
- Select all of the NPC's from the bottom up until you see RedguardRace.
- Press Ctrl+F4 and confirm any dialogue box that comes up.
- Wait until the process is completed and then confirm any dialogue box that comes up.
- Select all the NPC's from after RedguardRace until you see NordRaceVampire.
- Repeat steps 2&3.
- Select all the NPC's NordRaceVampire until you see ImperialRace
- Repeat steps 2&3.
- Select all the NPC's after ImperialRace until you see BretonRaceVampire.
- Repeat steps 2&3.
- Select all the NPC's after BretonRace up until the top of the list of NPC's.
- Repeat steps 2&3.
- You can now exit the Creation Kit.
Depending on how many mods you have, your generated FaceGen can be anything from around 8GB to well over 50GB. Naturally, we want to try and compact that to both save space and also minimize conflicts. Thankfully, when you pack facegen into a BSA, it can reduce the overall size down to a tenth of what it is. To compact into a BSA, complete the following.
- Create a new mod called
Facegenand move your regerenated facegen into it. - Open Cathedral Asset Optimizer and load the
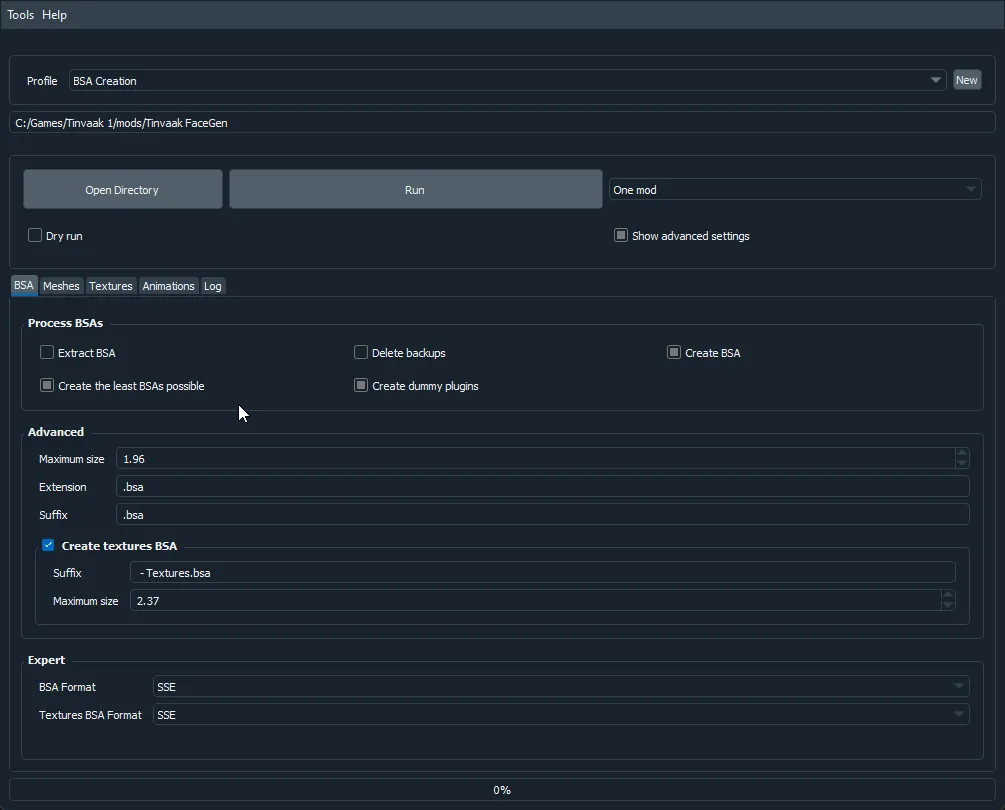
BSA Packerprofile or a similar one. Check theShow Advanced Settingsbox. - IMPORTANT: Ensure that the
Maximum Sizeis set to1.96. IF THIS IS LARGER THAN THAT VALUE, YOUR BSA'S WILL NOT LOAD. - Press
Open Directoryand navigate to where your Facegen folder is. Select it and pressSelect Folder. - Verify that the settings look the same as below (Note: Where it says
C:/Games/Tinvaak 1/Mods/Tinvaak Facegen, make sure it says the folder you just selected.
- Click on
Logto move to the logging tab. You will able to monitor CAO's progress in there. - Press
Runto begin the process. If you recieve a pop-up windows asking if you want to save, pressYes. This process can take a long time so grab a good book and a mug of coffee. - Once CAO has completed, you can safely close the application.
- Re-Open/navigate back to MO2 and activate the new plugins you see at the bottom of your load order.
- Jump for joy as you are now ready to play the game.
Why do I not generate the faces for the Children?
Due to the unique TRI structure of the child head, regenerating them results in them looking like shiny potatoes. If you want them to look better, I recommend Rustic Children or Simple Children.
What happens if I generate Astrid's face?
All your NPC's will have burnt faces.
Do I have to repeat the process every time I add a new mod with NPC's or remove it?
Technically speaking no, but it is recommended if you want to have consistency.
What mods do you use for this?
I have used a wide variety of mods for this. A good mixture is Reverie and Skysight Skins. BNP skins are good as well.
