-
Notifications
You must be signed in to change notification settings - Fork 3
Hardware: ProMicro
Difficulty Level: Hard
This section covers the required hardware for users who have chosen the Pro Micro board.
This board is significantly harder to use than the Teensys. But is cheap in bulk and is best suited for farms of multiple Switches running PABotBase where they rarely need to be reprogrammed.
There are 2 levels of hardware setups here. How far you get into this tutorial will depend on which level you wish to achieve.
- Basic Programs: No computer control. No feedback. (Basic Hardware only)
- Advanced Programs: Computer control. Feedback optional. (Basic Hardware + Advanced Hardware)
At a minimum, you will need to buy the following components:
- Pro Micro Board
- Micro-USB male to USB-A male cable or adapter. (example 1, example 2)
Adapters for Micro-USB male to USB-A male are notoriously difficult to find in quantity. Cables are easy to find, but less convenient if you just want to plug them into the standing Switch dock.
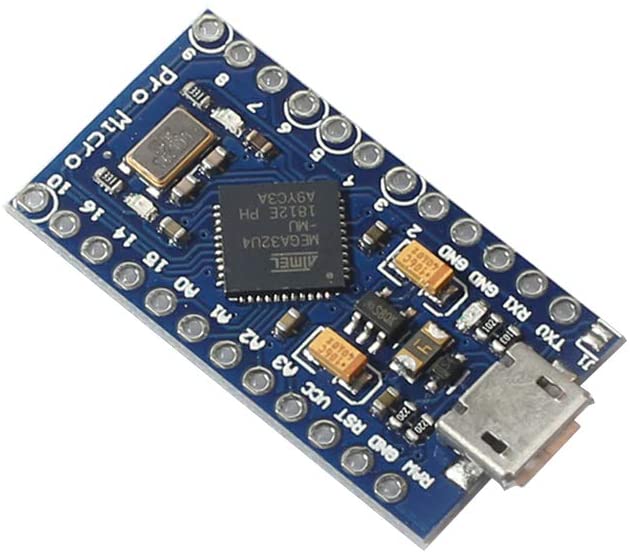
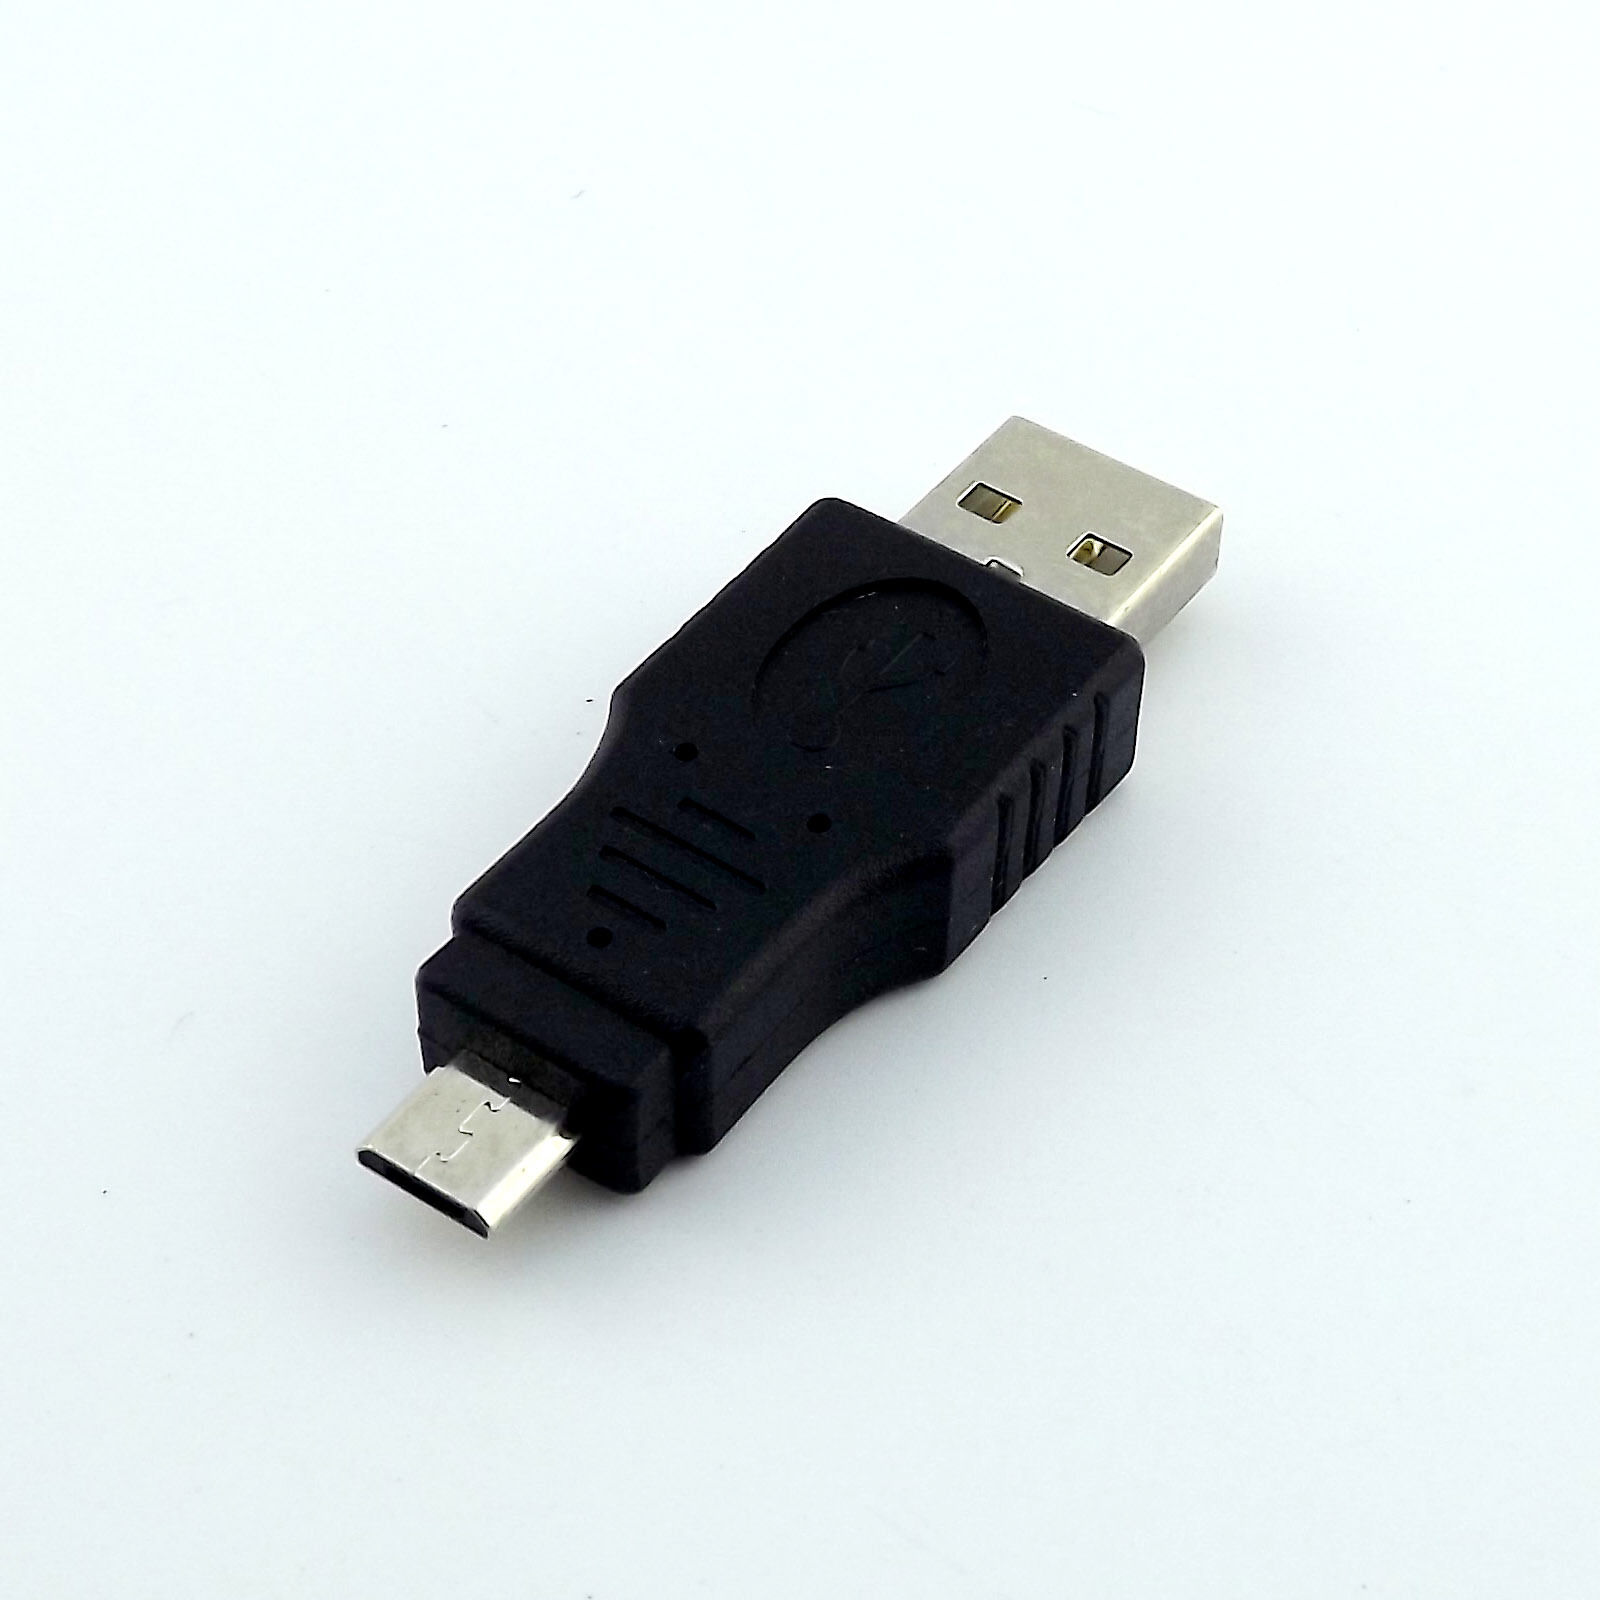
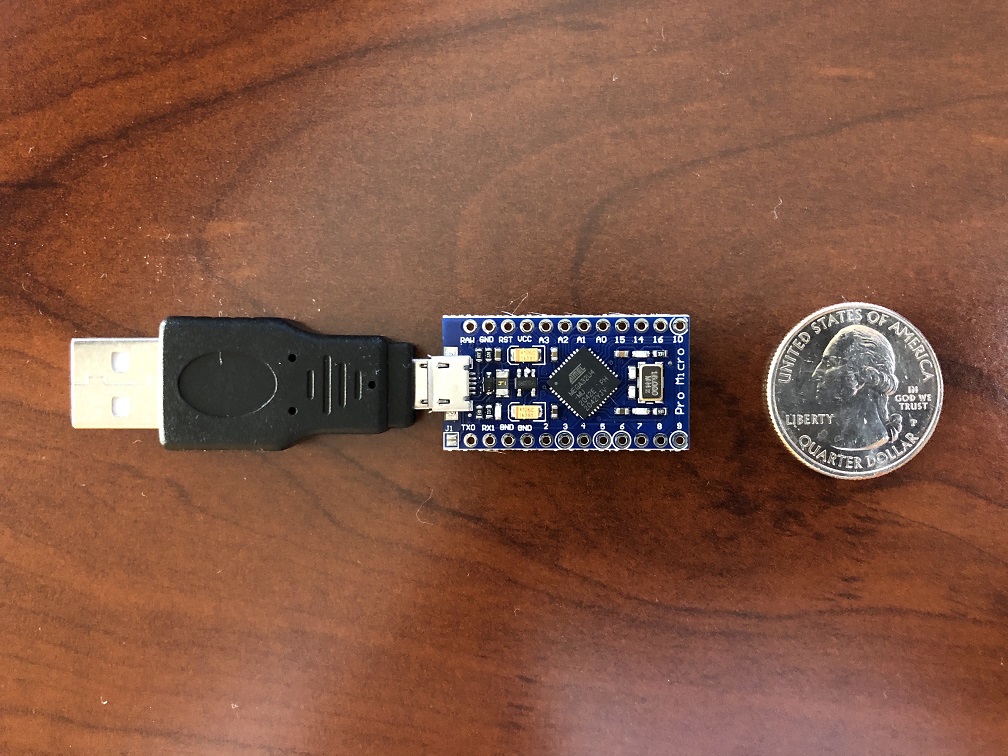
The basic Pro Micro hardware setup will look like this:
Switch Lite users will also need:
- A USB hub or portable dock. (example)
The Switch Lite does not have a USB-A port. Therefore you need either an adapter or a hub to connect the Teensy. A charging hub or dock is required to simultaneously charge and use the Teensy.
Portable docks will work for the Switch Lite. It will just not be able to output video over the HDMI.
Optional Hardware:
-
If you will be using the FastCodeEntry program or if you are a heavy user in general, then it is strongly recommended to get a USB-A male-to-female cable with a power switch on it. (example)
-
If you intend to change programs very often and will be running the Switch next to a computer, then you will want a USB switch. (example) These are like USB-only KVM switches. In fact a regular KVM switch will also work. With this, you no longer have to constantly plug/unplug USBs which will eventually wear them down.
To use any of the advanced programs, you will need additional hardware.
Buy the following additional components:
- Serial Board (Pick one)
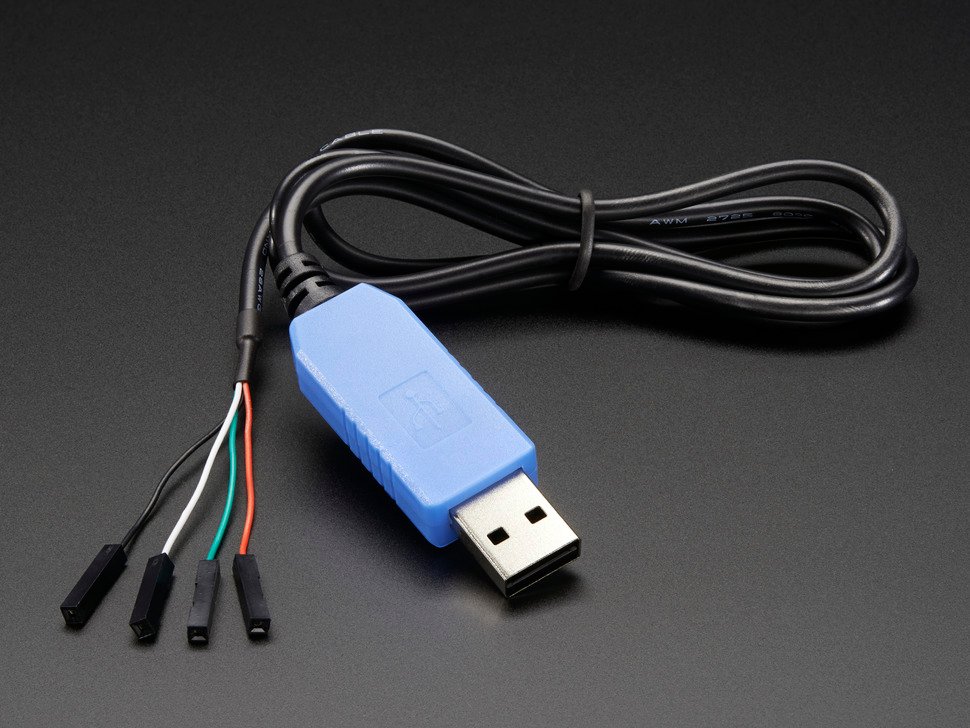
- UART Cable (CP210x controller)
- Avoid the Prolifice (PLxxxx) controllers. Many of them are knock-offs that do not work.
- The Adafruit UART cable is reliable and beginner-friendly, but it is also quite expensive.
- CP210x board (4 for $8) | (2 for $8) | (1 for $8)
- If you are experienced (or confident), these are some cheaper alternatives which also work. These may require a trivial amount of extra wiring.
- UART Cable (CP210x controller)
- Board Connection (Pick one)
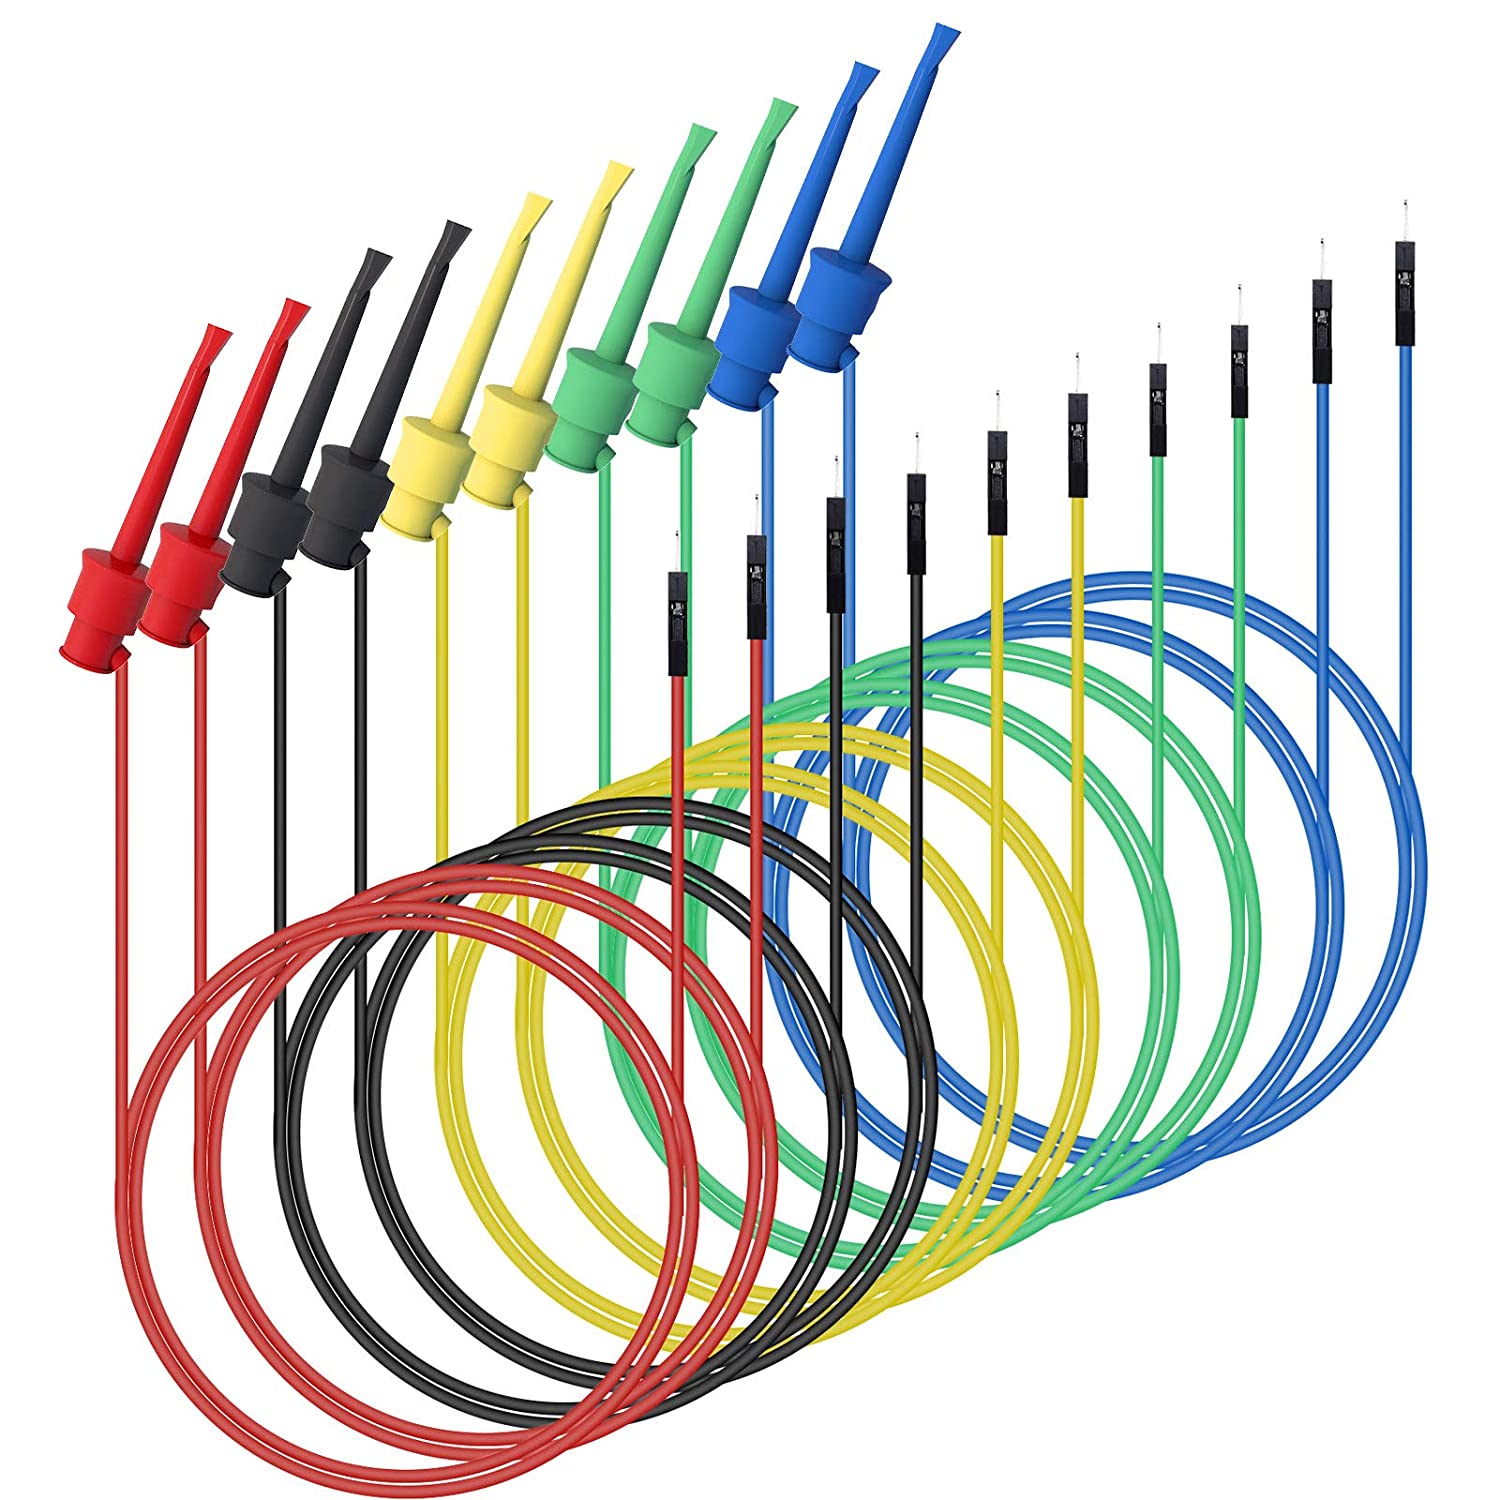
- Mini-Grabber to Male jumper wires (example)
Easiest option, but item is hard to find
- Solderless Hammer Headers (example)
Fairly easy to install. Ensure you are getting hammer headers, they will have a bulge on the short side to hold the pins in place
- Hammer Headers (example)
Most difficult option! You will need to solder with this option. Please only pick it if you are comfortable soldering.
- Mini-Grabber to Male jumper wires (example)
- Video capture card (example)
- HDMI cable(s)
Important: You will need a fairly powerful computer to handle serial programs with video feedback. For a single Switch with video feedback, we recommend a quad core computer no older than 2015. If you want to run 4 Switches all with feedback, we recommend a modern 8-core computer. The computer must also be running 64-bit Windows, though plan to extend support to other operating systems in the future.
There are many ways to set this up with varying cost and difficulty. Here we will present some simple options that do not require soldering. If you are experienced with electronics, feel free to do your own thing.
Here are the two options covered in this tutorial:
This option is the easiest to setup, however the mini grabber cables that are needed are rarely in stock.
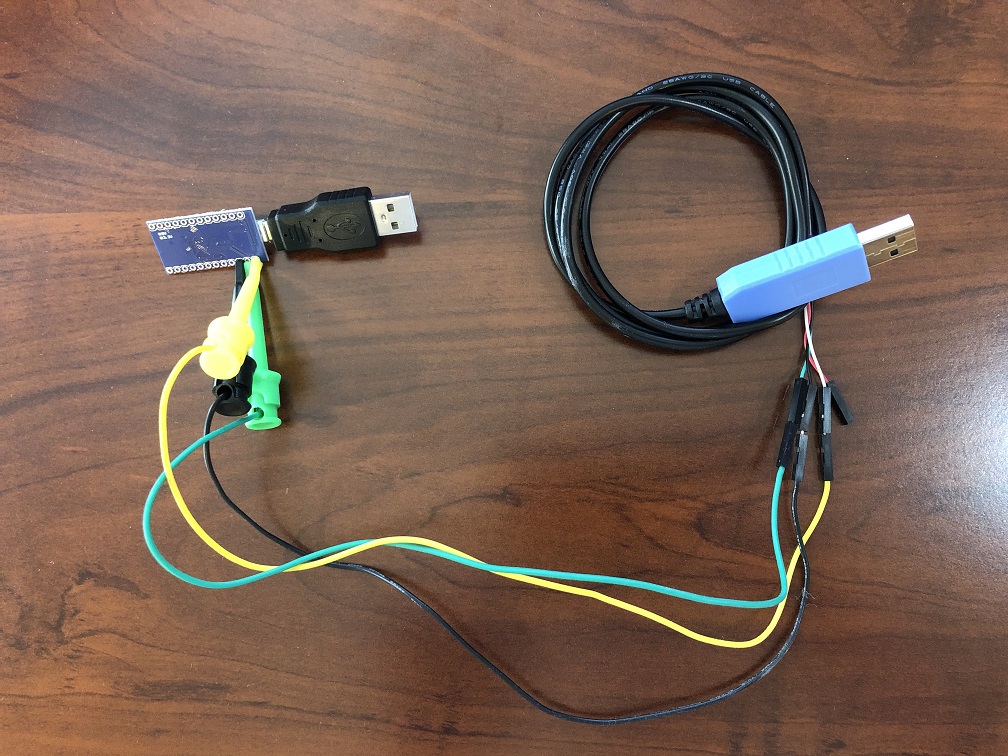
Required Hardware:
- Everything from the previous section.
- A USB-to-TTL UART cable or board. It is recommended to get one with the CP210x controller. Avoid the Prolific (PLxxxx) controllers. Many of them are knock-offs that do not work.
- Mini grabber to jumper wires (male). You want the one with male jumper wires.
Hardware Setup:
Once you have your hardware, you need to make some connections.
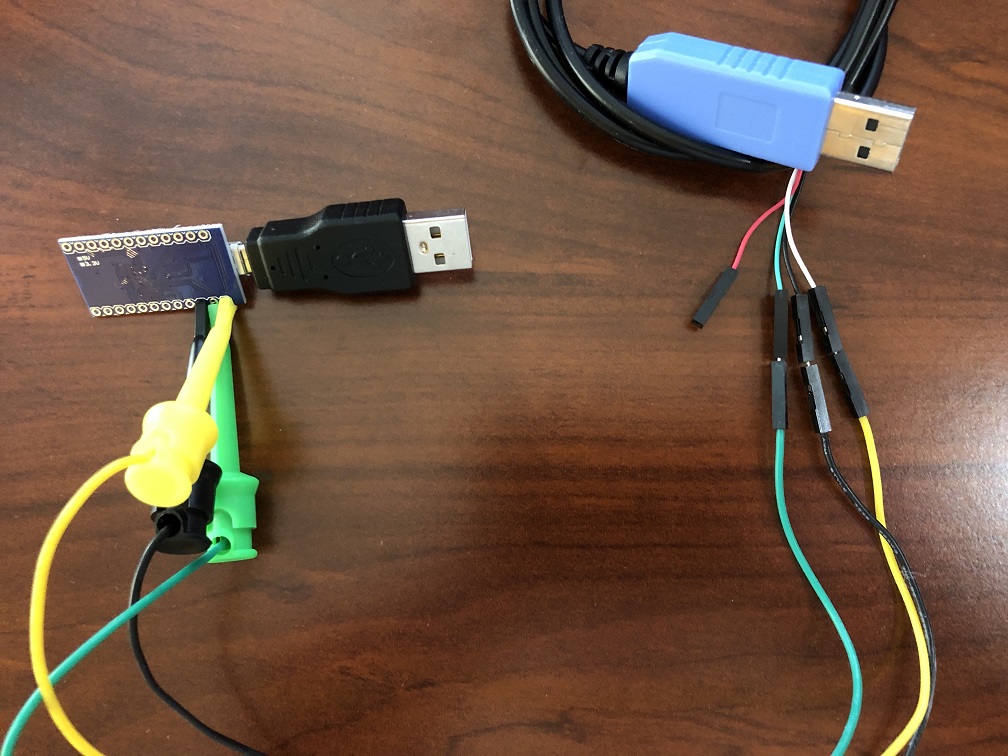
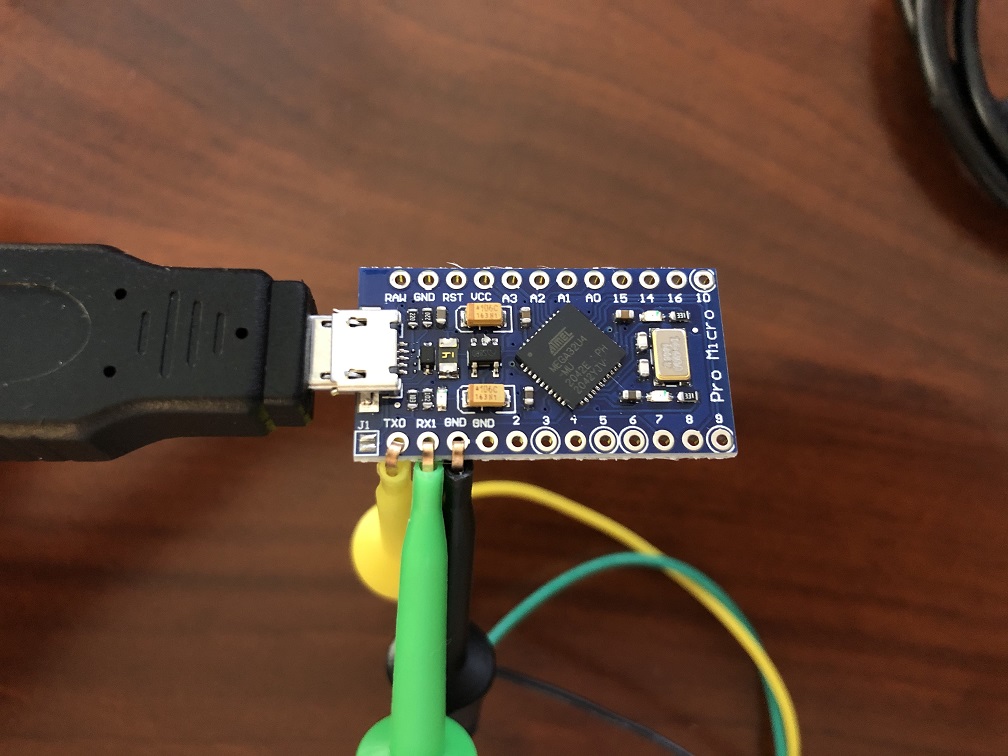
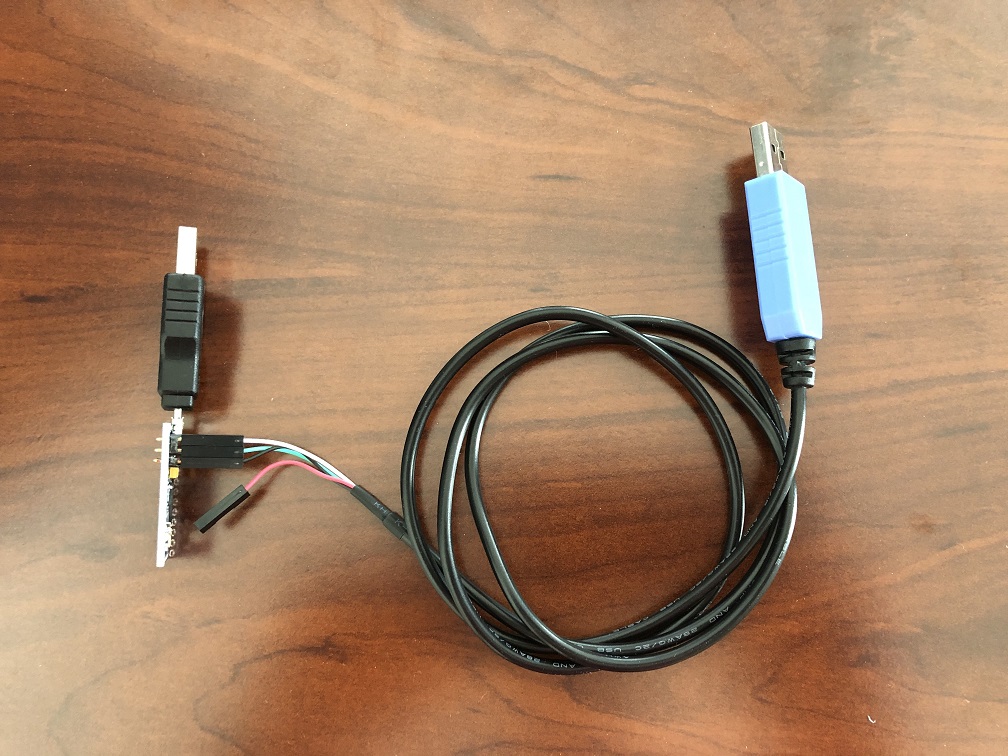
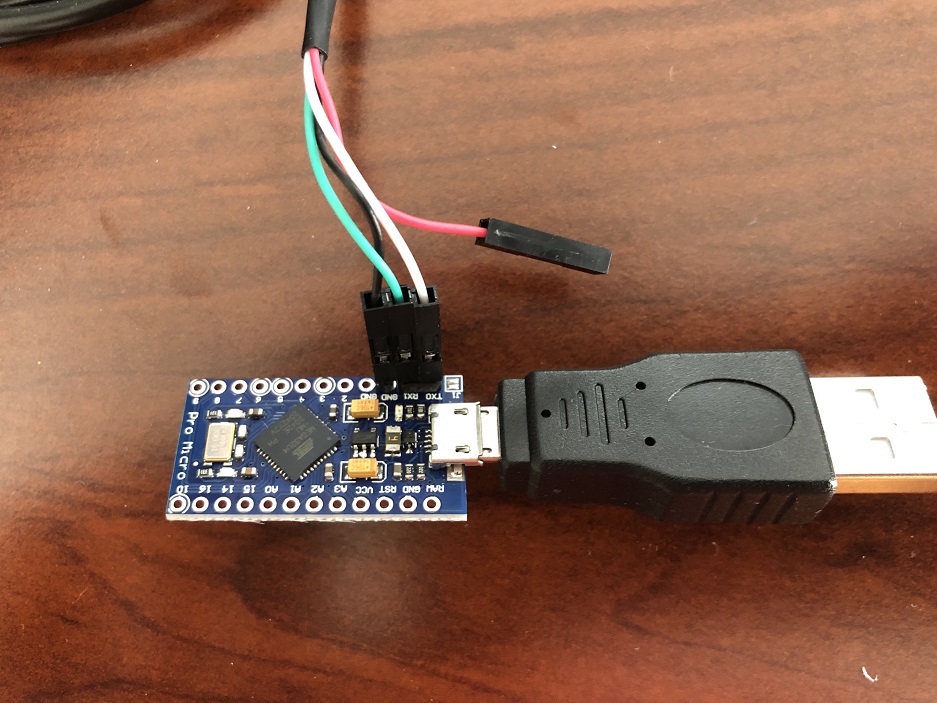
Make the following connections:
- UART cable green (TX) to Pro Micro RX1
- UART cable white (RX) to Pro Micro TX0
- UART cable black (GND) to Pro Micro GND (any one is fine)
- UART cable red (VCC) – leave unconnected
Note that the mini grabber clips may not fit through the holes on the Pro Micro. This is fine.
This option is cleaner, but is more involved.
Required Hardware:
- Everything from the previous section.
- A USB-to-TTL UART cable or board. It is recommended to get one with the CP210x controller. Avoid the Prolific (PLxxxx) controllers. Many of them are knock-offs that do not work.
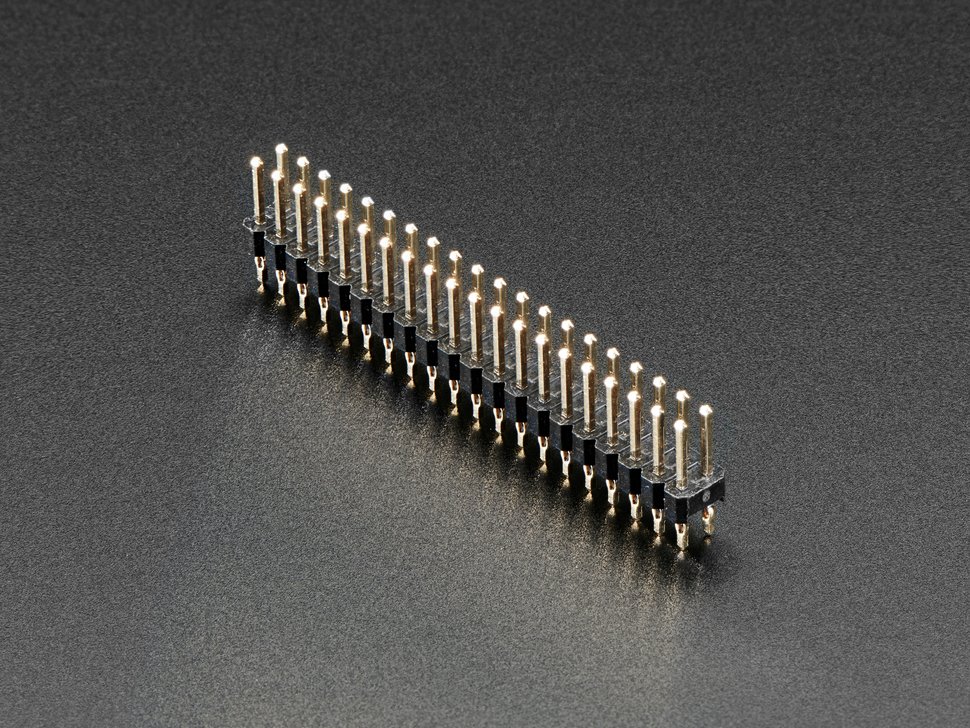
- Solderless Hammer Headers
- A box cutter or a wire cutter.
- Pliers. (you will likely need two of them)

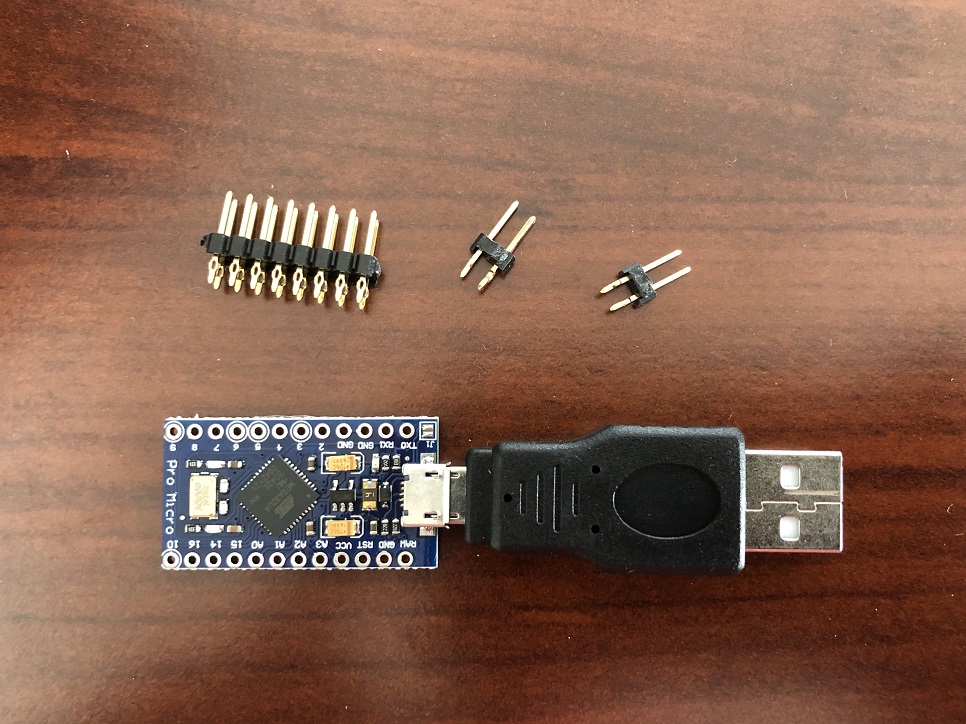
Hardware Setup:
- Use your box cutter or wire cutter to cut out 2 pairs of pins from the strip of solderless headers. Be very careful not to cut yourself.
- Insert a pair of hammer headers into the TX and RX holes on the Pro Micro.
- Insert a hammer header into the GND hole on the Pro Micro. (Since you can't easily split the pair of pins, you can do GND and the pin adjacent to it.)
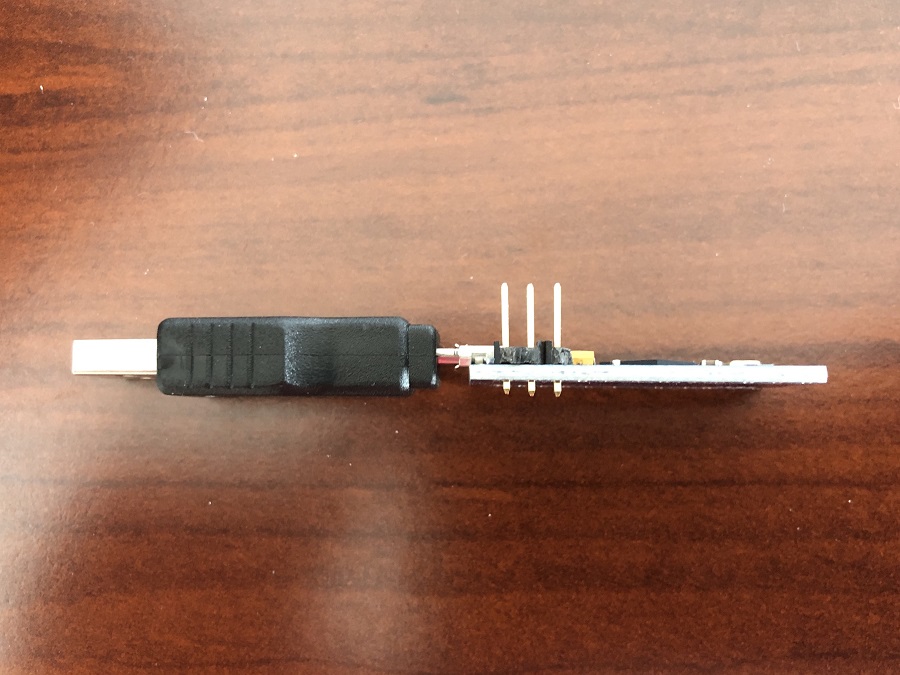
You will need a LOT of force to push the hammer headers into the holes. Recommend using pliers to pull the pins out of the plastic holds and inserting the long side into the Pro Micro. Then put the covers back on and use pliers to squeeze it in.
Now that the pins are setup, you can make the connections.
- UART cable green (TX) to Pro Micro RX1
- UART cable white (RX) to Pro Micro TX0
- UART cable black (GND) to Pro Micro GND (any one is fine)
- UART cable red (VCC) – leave unconnected
- Windows OS
- Mac OS
- Windows OS
- Mac OS
- Not supported currently
Hardware Requirements
Example Hardware Setups
Appendix
- Change Grip Order Menu
- Day Skippers
- Global Settings
- How to host your first Raid
- Maximizing Switch Stability
- Pokemon Walls
- Program Compatibility
- Raid Code
- Unattended Shiny Hunting
- User Slot Number
Troubleshooting
