기간: 2022.06.23 ~2022.06.24
-
모듈화 !!!!!!! -
객체 생성자 함수를 활용하여 컴포넌트를 구현함으로서, 코드의 가독성을 높인다.
├── css
│   ├── default.css
│   └── index.css
├── js
│   ├── components
│   │   ├── button.js
│   │   ├── card.js
│   │   ├── cardList.js
│   │   └── carousel.js
│   └── index.js
├── index.html
└── READEME.md
<!DOCTYPE html>
<html lang="en">
<head>
  <meta charset="UTF-8">
  <meta http-equiv="X-UA-Compatible" content="IE=edge">
  <meta name="viewport" content="width=device-width, initial-scale=1.0">

  <!-- css -->
  <link rel="stylesheet" href="./css/default.css">
  <link rel="stylesheet" href="./css/carousel.css">

  <title>Carousel</title>
</head>
<body>
  <div class="container">
  </div>
  <!-- axios 설치 -->
  <script src="https://cdn.jsdelivr.net/npm/axios/dist/axios.min.js"></script>

  <!-- js -->
   <script type="module" src="./js/index.js"></script>
</body>
</html>-
모듈은 특수한 키워드나 기능과 함께 사용되기에
<script type="module">같은 속성을 설정해야 한다. -
해당 스크립트가 모듈이란 걸 브라우저가 알 수 있게 해야 한다.
| Module의 장점 |
|---|
| Module은 자신만의 스코프가 있다. 그래서 전역 변수 관리를 쉽게할 수 있다. Module Scope를 사용하여 모듈의 함수간에 변수를 공유할 수 있다. |
| 어디서든 동일한 Module을 공유할 수 있기 때문에 재사용성이 좋다. |
| 코드를 작은 파일로 분할 할 수 있다. |
import { Carousel } from "./components/carousel.js";

const containerElem = document.querySelector(".container")

// CardList 관련 data
const cardData = {
  url: "https://picsum.photos/v2/list",  // api 요청 url
  width: "23vw",                         // 카드컴포넌트의 너비
  height: "23vw",                        // 카드컴포넌트의 높이
  images: [],                            // 이미지 정보
  parentNode: containerElem,             // 부모 노드 (계속 변경될 예정)
  id: "cl-1",                            // 카드 리스트를 구분하기 위한 id
};

// Carousel 생성 함수
const create = function (data) {
  axios({
    url: data.url,
    method: "get",
  }).then((response) => {
    data.images = response.data;
    new Carousel(data)
  });
};

create(cardData);
create(cardData1); - Carousel 컴포넌트 생성 과정
- Carousel생성 중 필요한 정보를 담은 data 객체를 생성한다.
- Carousel을 생성하는 함수를 호출 할 때, 인자로 위에 만든 data 객체를 넣는다.
- Carousel 생성자 함수를 통해 해당 데이터를 반영하는 캐러셀이 구현된다.
- LoremPicsum이라는 api를 활용하여 이미지를 받아온다.
- 받아온 이미지 리스트를 저장하고 Carousel 생성자 함수 호출!
- 이미지 리스트: 여러개의 이미지 정보를 담은 객체의 리스트
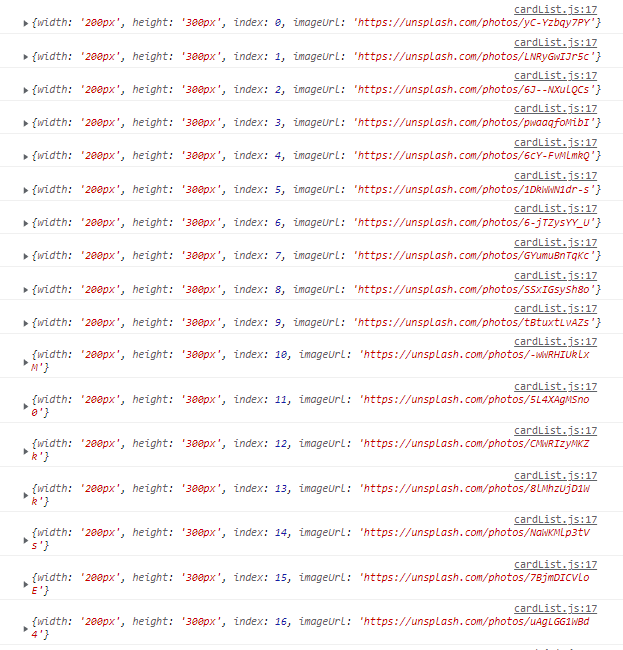
[이미지 리스트] |
[이미지 정보 객체] |
|---|
DOM구조는 다음과 같이 생성될 것이다.
├── div .container
│   ├── div .carousel
│   │   ├── div .card-list
│   │   │    ├── div .card-item
│   │   │    ├── div .card-item
│   │   │    ├── div .card-itme
│   │   │    ├── div .card-item
│   │   │    ├── div .card-item
...
│   │   │    └─ div .card-item
│   │   ├── div .left
│   │   └──  div .right
│   ├── div .carousel
...
-
따라서 carousel 생성하는 생성자 함수에서 CardList와 Button은 생성하는 생성자 함수를 호출한다.
-
인자로 받는 data객체에서 parentNode속성을 carousel 태그로 수정한 뒤, CardList와 Button 생성자 함수를 호출 할 때 인자로 전달한다.
 // 부모 노드 속성 바꿔주기
  data.parentNode = this.carouselElem
  // CardList 컴포넌트 생성
  new CardList(data);

  // 부모 노드 속성 바꿔주기
  data.parentNode = this.carouselElem
  // Button 컴포넌트 생성
  new Button(data);
import { Card } from "./card.js";

function CardList(data) {
  // ...생략
  // parentNode 속성 변경
  data.parentNode = this.cardListElem;

  // Card 컴포넌트 생성
  this.cardCreate(data);
}

CardList.prototype = {
  prototype: CardList,
  cardCreate: function ({ images, width, height, parentNode }) {
    images.forEach(({ download_url }, index) => {
      const data = {
        width,
        height,
        parentNode,
        index: index,
        imageUrl: download_url,
      };
      // console.log(data)
      new Card(data);
    });
  },
};

export { CardList };cardCreate메서드를 생성하고 호출을 함으로서, 여러개의 카드 컴포넌트를 생성한다.- 파라미터로 넘어온 데이터 중 image 배열은 이미지에 대한 데이터가 담겨져 있는 객체의 배열이다.
- image 배열에
forEach메서드를 활용하여 배열 요소 각각 (각각 이미지)를 순회한다. - 순회할 때마다, Card 생성자 함수를 호출한다.( 카드 컴포넌트 구성에 필요한 데이터를 재가공하여 인자로 넘겨준다. )
function Card({ width, height, index, imageUrl }) {
  this.divElem = document.createElement("div");
  this.divElem.style.width = width;
  this.divElem.style.height = height;
  this.divElem.style.backgroundImage = `url(${imageUrl})`;
  this.divElem.style.backgroundPosition = "center";
  this.divElem.style.backgroundSize = "cover";
  this.divElem.style.borderRadius = "0.5rem";

  this.divElem.classList.add(index);
  this.divElem.classList.add("card-item");

  // DOM에 반영: document.querySelector(".card-list:last-child").appendChild(this.divElem);
  parentNode.appendChild(this.divElem);
}

export { Card };-
넘겨받은 데이터를 활용하여 카드의 css 속성을 변경한다.
-
document.querySelector(".card-list:last-child").appendChild(this.divElem)를 사용하지 않는 이유-
querySelector를 card의 개수만큼 반복해야 한다.
-
querySelector가 성능이 좋지 않다고 들어서 성능에 좋을 것 같지 않다.
-
그래서 CardList에서 Card생성자 함수를 호출 할 때, parentNode를 인자로 전달하는 방식으로 수정했다.
(모든 코드를 이와 같은 형식으로 수정) => index.js, carousel.js, cardList.js, card.js, button.js
-
고려 사항
| 기능 | 세부 정보 |
|---|---|
| 버튼을 클릭시 CardList를 translate한다. (X축) | - 버튼을 클릭 시, 어떤 CardList를 이동시키는지 알아야 한다. - translate 되는 범위를 계산해야 한다. - 현재 얼마나 translated되었는지 알아야 한다. |
| Button은 캐러셀 기준 수직 가운데에 위치해야 한다. | |
| resize이벤트 발생 시, CardList와 Button을 재조정해야 한다. | - CardList이동이 초기화 된다. - CardList의 사이즈를 반영하여 Button의 크기와 위치가 변경되어야 한다. - CardList가 translate되는 범위도 재조정해야 한다. |
📌 버튼 클릭 시 CardList를 tranlate 한다.
    let cardListWidth = this.cardListElem.getBoundingClientRect().width;
    let totalCount = (cardListWidth - document.querySelector("body").offsetWidth) / 10;
    let count = this.cardListElem.getAttribute("data-count");

    this.leftButtonElem.addEventListener("click", () => {
        if (count == "0") return;
        count = +count - 1;
        this.cardListElem.setAttribute("data-count", `${count}`);
        this.cardListElem.style.transform = `translate3d(-${count * totalCount}px, 0, 0)`;
    });

    this.rightButtonElem.addEventListener("click", () => {
        if (count == "10") return;
        count = +count + 1;
        this.cardListElem.setAttribute("data-count", `${count}`);
        this.cardListElem.style.transform = `translate3d(-${count * totalCount}px, 0, 0)`;
});-
하나의 카드리스트를 10번으로 나누어 이동시키는 것으로 구현
변수 설명 비고 cardListWidth카드 리스트의 길이 totalCount한번 움직일때 마다 이동시켜야 길이 ( 카드 리스트 - 현재 브라우저에 보이는 화면 너비 ) / 10 countCardList의 data-count 속성 값 현재 얼마나 슬라이드 되었는지 보여준다.
- 버튼을 누를때 마다 CardList를 x축으로 translate하고 data-count속성 값을 수정한다.
- 오른쪽으로 버튼을 누르면 CardList의 data-count 속성은 1이 증가하고 X 축으로 translate 된다.
- 왼쪽 버튼을 누르면 CardList의 data-count 속성은 1이 감소하고 X 축으로 translate 된다.
- data-count가 0이면 더이상 왼쪽으로 슬라이드 할 수 없기 때문에 조건문으로 분기를 처리했다.
- data-count가 10이되면 더이상 오른쪽으로 슬라이드 할 수 없기 때문에 조건문으로 분기를 처리 했다.
📌 Button은 캐러셀 기준 수직 가운데에 위치해야 한다.
    setButtonSize: function () {
        const height = this.height;

        // 왼쪽 버튼
        this.leftButtonElem.style.fontSize = `calc(${height}/3)`;
        this.leftButtonElem.style.top = `calc(${height}/2 - ${height}/4.5)`;

        // 오른쪽 버튼
        this.rightButtonElem.style.fontSize = `calc(${height}/3)`;
        this.rightButtonElem.style.top = `calc(${height}/2 - ${height}/4.5)`;
    },
📌 resize이벤트 발생 시, CardList와 Button을 재조정해야 한다.
    window.addEventListener("resize", () => {
        clearTimeout(this.resizeState);

        // 캐러셀 이동 초기화
        this.cardListElem.setAttribute("data-count", 0);
        this.cardListElem.style.transform = "translate3d(0, 0, 0)";
        count = 0

        this.resizeState = setTimeout(()=> {
            // Button 조정
            this.setButtonSize();

            // Carousel 이동 범위조정
            cardListWidth = this.cardListElem.offsetWidth;
            totalCount = (cardListWidth - document.querySelector("body").offsetWidth) / 10;
        }, 2000)
});- resize할 시, 캐러셀 이동을 초기화한다.
- CardList의 translate 속성 초기화
- CardList의 data-count 속성을 0으로 변경
- 변수 count를 0으로 초기화
- Button 위치와 캐러셀 이동 범위를 현재 너비 기준으로 변경한다.
setTimeout을 사용한 이유는 3-1)에서 확인할 수 있다.
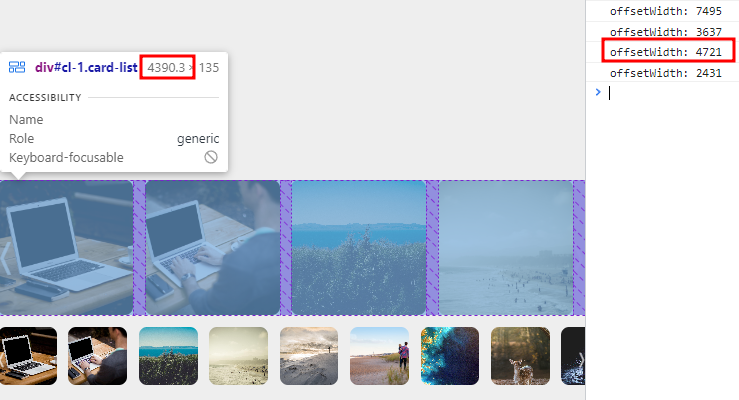
[해결전] |
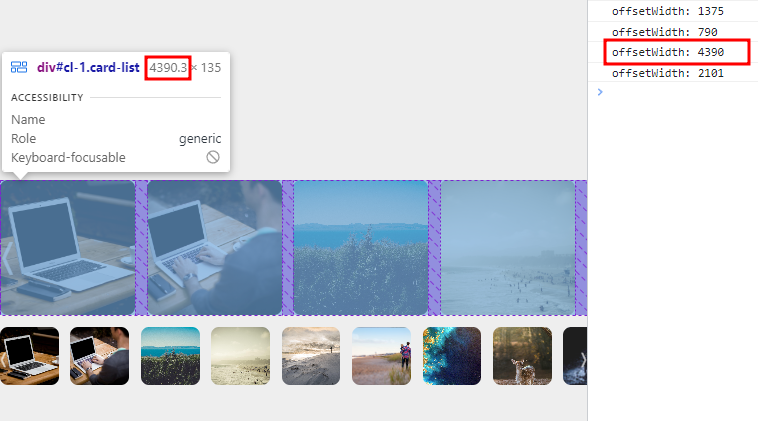
[해결후] |
|---|
이러 오류가 발생하는 이유는 다음과 같다. (나의 추측 🤔)
- resize이벤트가 발생하면 offsetWidth를 잡게 되는데, 실제로 carousel 사이즈가 변경되는 시간에 비해 이벤트를 catch하는 시간이 더 빠르다.
- 즉, 변경 도중에 offsetWidth의 값을 가져오는 것이다.
해결 방안 : setTimeout()을 활용하여 resize 이벤트가 끝나고 Crousel 사이즈가 조정이 된 후에 offsetWidth의 값을 조회하는 방식으로 수정
    window.addEventListener("resize", () => {
      clearTimeout(this.resizeState);

      // 캐러셀 이동 초기화
      this.cardListElem.setAttribute("data-count", 0);
      this.cardListElem.style.transform = "translate3d(0, 0, 0)";
      count = 0

      this.resizeState = setTimeout(()=> {
      // 버튼 사이즈 조정
      this.setButtonSize();

      // 캐러셀 이동 조정
      cardListWidth = this.cardListElem.offsetWidth;
      totalCount = (cardListWidth - document.querySelector("body").offsetWidth) / 10;
      }, 2000)
});- resize 이벤트가 발생한 후, 2초동안 resize이벤트가 발생하지 않으면 resize이벤트가 종료되었다고 생각한다.
- 종료되었을 때, Button 사이즈와, Carousel 이동 범위를 조정한다.
Button에 position: absolute를 주어 화면에 맞게 위치하도록 조정했다. 이렇게 구현하니 발생한 문제점은 다음과 같다.
-
CardList의 width는 브라우저 화면을 넘어서 길게 존재하다보니 오른쪽 버튼을 화면에 딱맞게 위치하도록 계산을 해야 한다.
this.rightButtonElem.style.left = `calc(${document.querySelector("body").offsetWidth}px - ${width} / 9.255)`;
- CardList가 x축으로 이동하다보니, translate로 이동시키면 버튼도 같이 이동한다.
- 버튼은 무조건 브라우저 화면에서 고정된 위치에 있어야 한다.
fixed는 ViewPort 기준이기때문에 CardList의 y좌표를 구한 뒤, 이에 맞게 위치를 조정을 했다.
  setButtonSize: function () {
    const height = this.height;
    const top = this.cardListElem.getBoundingClientRect().top + "px"

    this.leftButtonElem.style.fontSize = `calc(${height}/3)`;
    this.leftButtonElem.style.top = top;

    this.rightButtonElem.style.fontSize = `calc(${height}/3)`;
    this.rightButtonElem.style.top = top;
},- 아.뿔.사.
position: fixed는 y축으로 스크롤해도 vp 기준이기 때문에 그대로 따라온다. - 해당 버튼은 캐러셀이 있는 범위에만 있어야한다. 그래서
position: fixed로 구현하는 것은 잘못된 방식이였다.
이전에 했던 방식과 달리 CardList의 자식으로 Button을 추가하는 것이 아닌 그 상위의 요소에 추가하면 된다.
그래서 CardList에 Carousel이라는 부모를 추가하여 Carousel의 자식으로 Button을 추가했다. (현재방식)
.carousel {
  position: relative;
  width: 100%;
  overflow-x: hidden;
}

.left, .right {
  position: absolute;
  cursor: pointer;
  color: rgba(255, 255, 255, 0.7);
  transition: 1s;
  z-index: 2;
}

.right {
  right: 0;
} setButtonSize: function () {
const height = this.height;
// 왼쪽 버튼
this.leftButtonElem.style.fontSize = `calc(${height}/3)`;
this.leftButtonElem.style.top = `calc(${height}/2 - ${height}/4.5)`;
// 오른쪽 버튼
this.rightButtonElem.style.fontSize = `calc(${height}/3)`;
this.rightButtonElem.style.top = `calc(${height}/2 - ${height}/4.5)`;
},- 간단하게 구현이 가능하다. Button의 top만 수직 가운데에 위치하도록 js로 계산하여 추가했다.
