第一步: 拷贝本项目到本地
第二步:
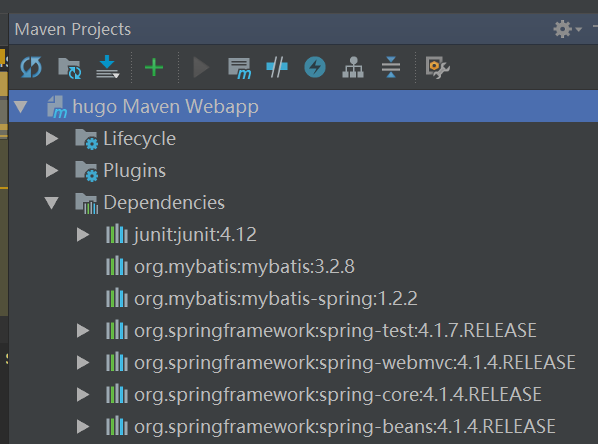
用intellij idea打开本项目,待加载项目完毕后,检查maven所添加的依赖是否成功。

第三步:准备数据库 我使用的是phpmyadmin来管理mysql的,其实本库的数据库表非常简单,就是一个admin表,username和password两个字段,确保数据库搭建好。
第四步:修改jdbc
主要是用户名和密码,还有数据库的名称修改成自己的。
第五步:设置tomcat 启动项目
非常抱歉,在编写这个项目时有一些地方疏忽了,非常感谢一些同学的提出!!
有同学反映maven安装失败,当导入这个项目时,需要对自己本地的maven进行设置
同时修改maven的配置文件,主要就是配置阿里的镜像服务器,下载的时候会更快。
  <mirrors>
    <!-- mirror
     | Specifies a repository mirror site to use instead of a given repository. The repository that
     | this mirror serves has an ID that matches the mirrorOf element of this mirror. IDs are used
     | for inheritance and direct lookup purposes, and must be unique across the set of mirrors.
     |
    <mirror>
      <id>mirrorId</id>
      <mirrorOf>repositoryId</mirrorOf>
      <name>Human Readable Name for this Mirror.</name>
      <url>http://my.repository.com/repo/path</url>
    </mirror>
     -->


     <mirror>
      <id>alimaven</id>
      <name>aliyun maven</name>
      <url>http://maven.aliyun.com/nexus/content/groups/public/</url>
      <mirrorOf>central</mirrorOf>
    </mirror>

     <mirror>
<id>alimaven</id>
<name>aliyun maven</name>
<url>http://maven.aliyun.com/nexus/content/groups/public/</url>
<!--<mirrorOf>central</mirrorOf> -->
<mirrorOf>*</mirrorOf>
</mirror>
  </mirrors>
然后就可以完成创建了,点击tomcat图标运行


